Attaching of Arm Cuff and
Posture During Measurement
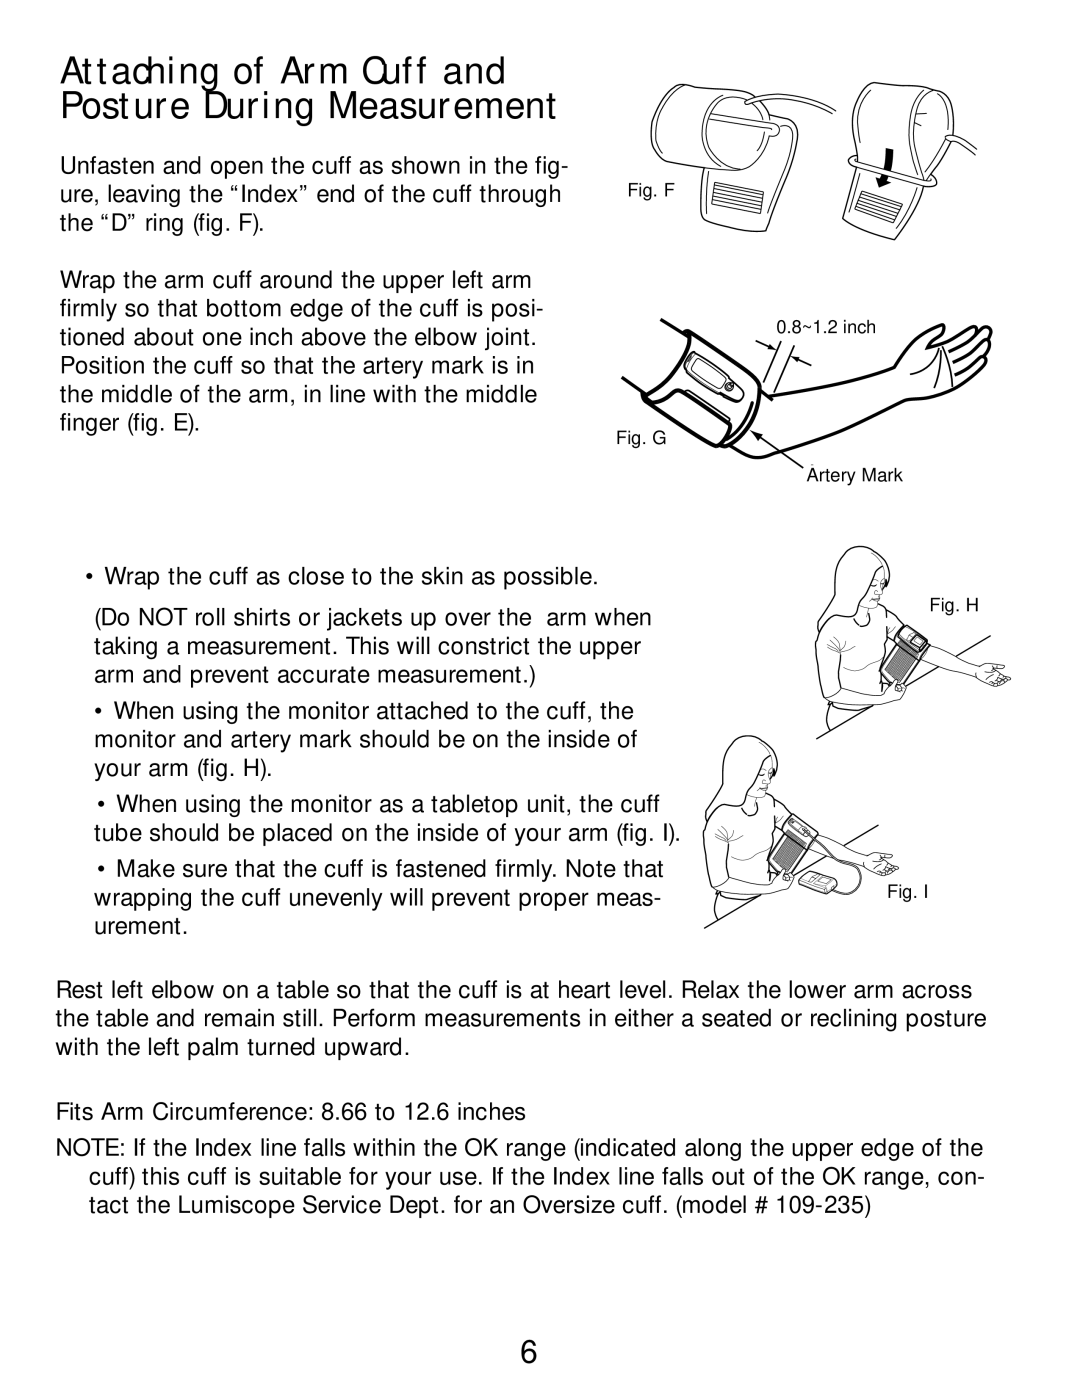
Unfasten and open the cuff as shown in the fig-
ure, leaving the “Index” end of the cuff through Fig. F the “D” ring (fig. F).
Wrap the arm cuff around the upper left arm firmly so that bottom edge of the cuff is posi- tioned about one inch above the elbow joint. Position the cuff so that the artery mark is in the middle of the arm, in line with the middle finger (fig. E).
Fig. G
• Wrap the cuff as close to the skin as possible.
(Do NOT roll shirts or jackets up over the arm when taking a measurement. This will constrict the upper arm and prevent accurate measurement.)
•When using the monitor attached to the cuff, the monitor and artery mark should be on the inside of
your arm (fig. H).
• When using the monitor as a tabletop unit, the cuff tube should be placed on the inside of your arm (fig. I).
• Make sure that the cuff is fastened firmly. Note that wrapping the cuff unevenly will prevent proper meas- urement.
2~3 cm 0.8~1.2 inch
Arteryry Mark region
Fig. H
Fig. I
Rest left elbow on a table so that the cuff is at heart level. Relax the lower arm across the table and remain still. Perform measurements in either a seated or reclining posture with the left palm turned upward.
Fits Arm Circumference: 8.66 to 12.6 inches
NOTE: If the Index line falls within the OK range (indicated along the upper edge of the cuff) this cuff is suitable for your use. If the Index line falls out of the OK range, con- tact the Lumiscope Service Dept. for an Oversize cuff. (model #
6