24/96 specifications
M-Audio 24/96 is a high-performance audio interface known for its impressive sound quality and versatility, making it a popular choice among musicians, producers, and sound engineers. With a focus on delivering 24-bit/96kHz audio resolution, this interface ensures that recordings capture the full range of audio frequencies, resulting in clearer and more detailed sound.One of the standout features of the M-Audio 24/96 is its dual analog inputs, allowing users to connect microphones, instruments, or line-level sources. The unit features XLR and 1/4-inch combo jacks, providing flexibility for a variety of audio equipment. Additionally, it comes equipped with high-quality preamps that help to enhance the signal strength while maintaining low noise, critical for professional audio applications.
The M-Audio 24/96 also incorporates a 24-bit digital signal processing (DSP) engine, ensuring that the audio conversion process is smooth and optimal. Users can expect a transparent audio path with minimal latency, making it ideal for real-time monitoring during recordings. The interface supports both USB 1.1 and USB 2.0 connections, making it compatible with a wide range of computers and reducing the need for additional drivers or software, enhancing the overall user experience.
For those working on digital audio workstations (DAWs), the M-Audio 24/96 is compatible with popular platforms such as Pro Tools, Logic Pro, and Cubase. Its plug-and-play capabilities mean that users can start recording and producing music almost immediately upon connecting the interface to their computer.
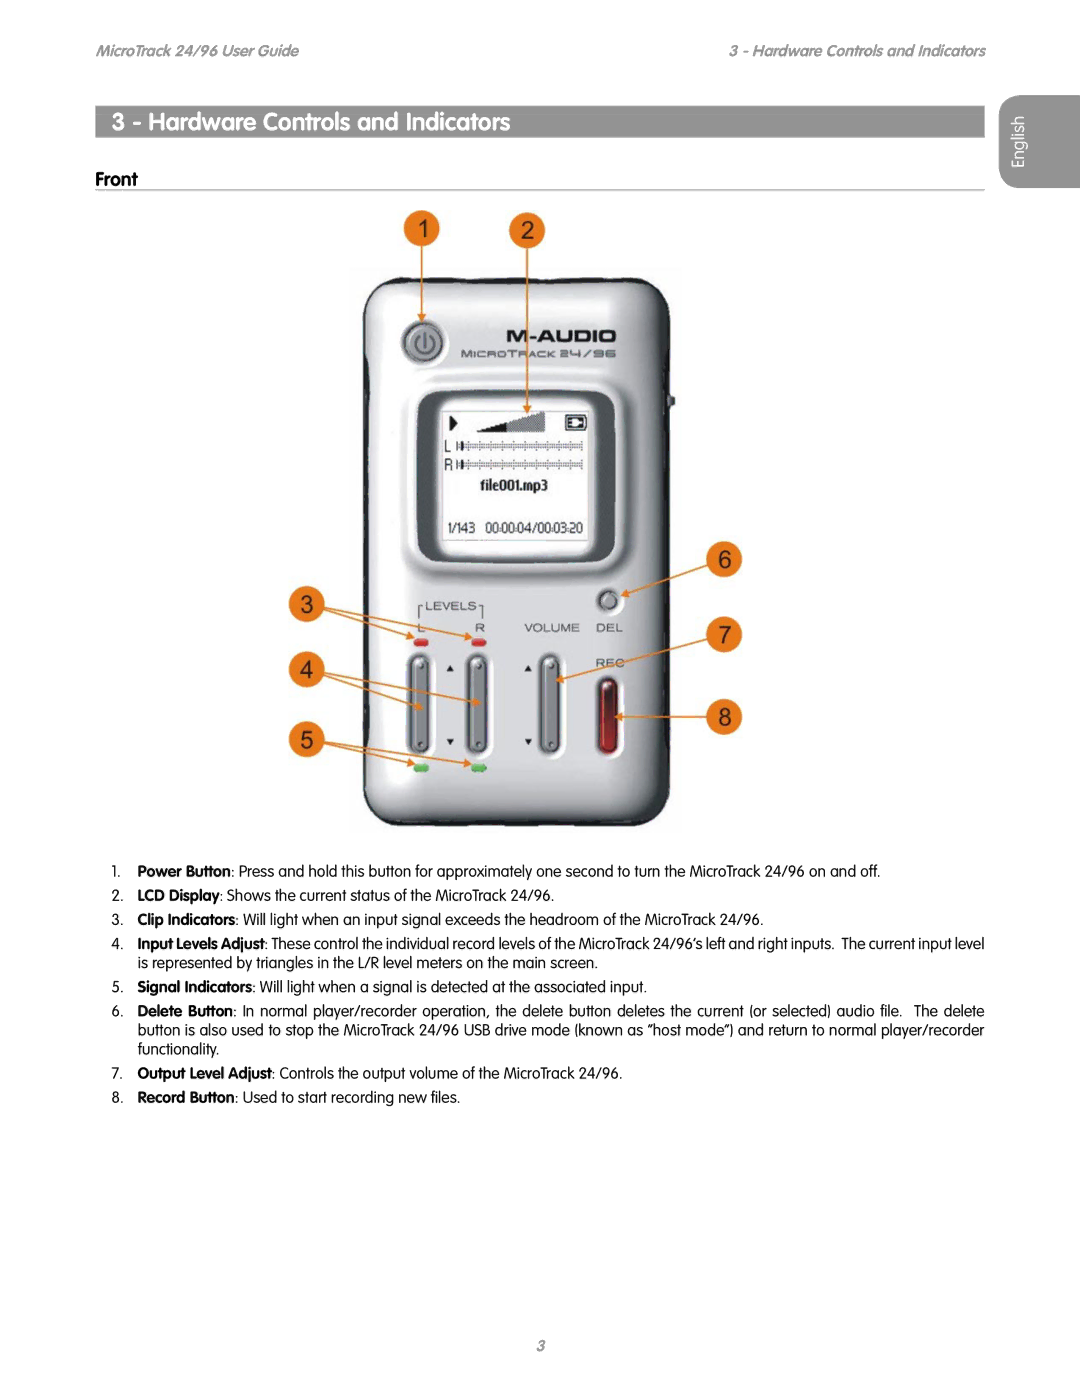
Moreover, the product features a stereo output as well as headphone outputs, offering options for monitoring and playback. The level meters on the front panel provide crucial feedback during recordings, ensuring signal integrity and preventing clipping.
In conclusion, the M-Audio 24/96 is a reliable and feature-rich audio interface designed to meet the demands of modern musicians and producers. Its high-resolution audio capture, versatile connectivity options, and seamless integration with DAWs make it a valuable tool for anyone looking to achieve professional-quality recordings without breaking the bank. Whether you're a beginner or a seasoned pro, the M-Audio 24/96 offers the performance and reliability needed to elevate your audio projects.

