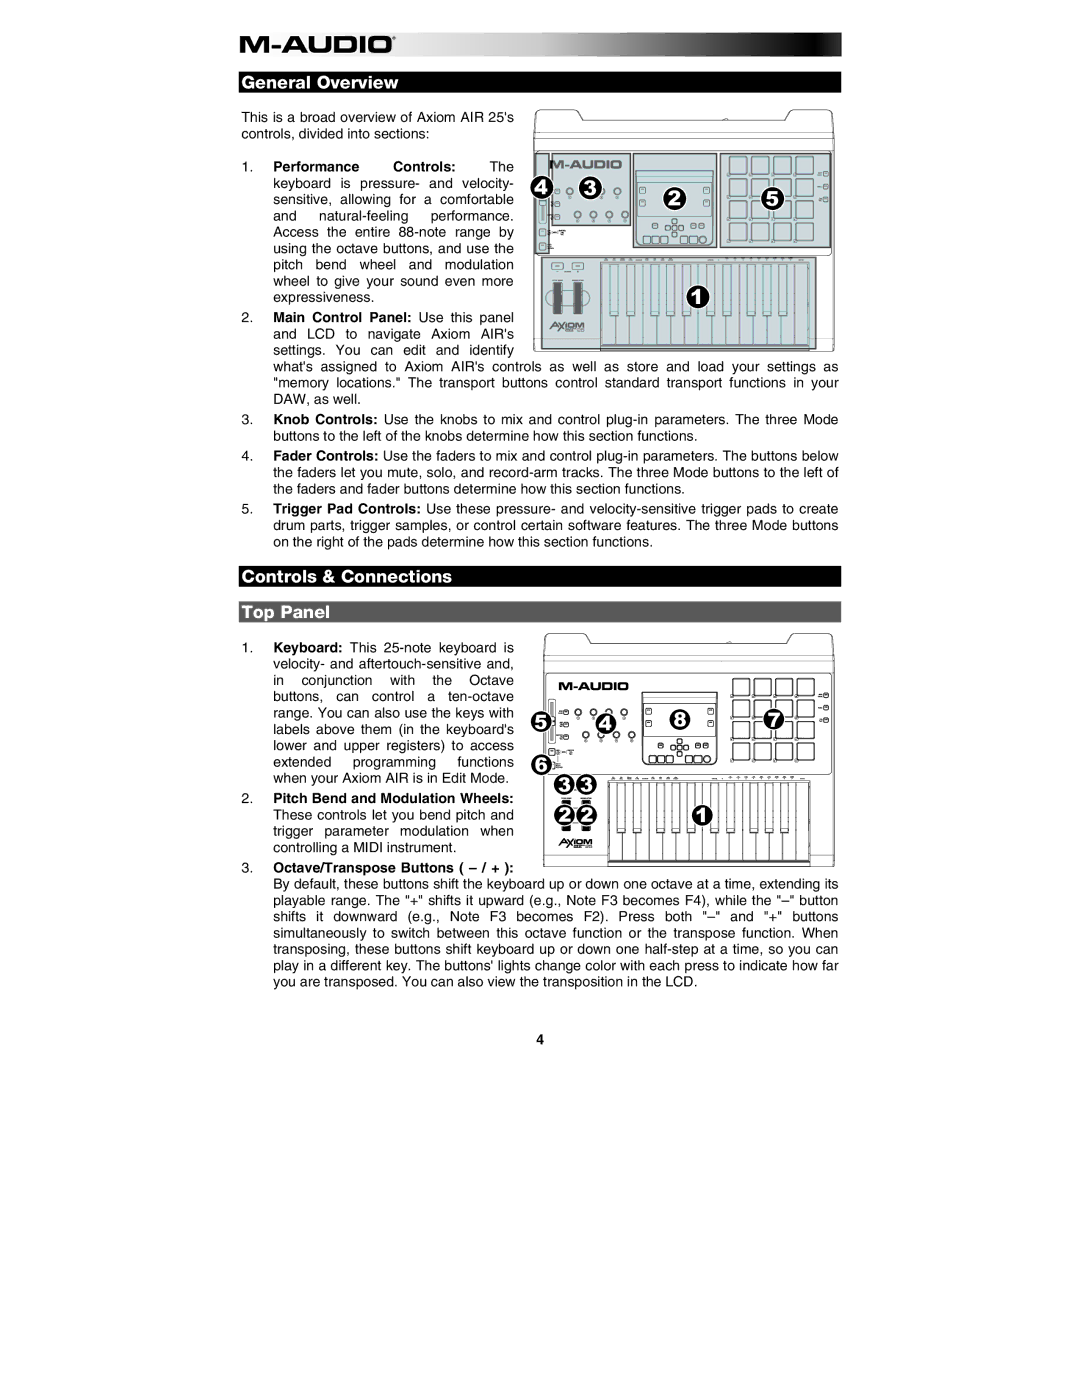
General Overview
This is a broad overview of Axiom AIR 25's controls, divided into sections:
1. Performance | Controls: | The |
|
|
|
|
|
|
|
| |||
keyboard is pressure- and | velocity- | 4 | 3 | 2 | 5 | |
sensitive, allowing for a comfortable |
|
| ||||
and |
|
|
|
| ||
Access the entire |
|
|
|
| ||
using the octave buttons, and use the |
|
|
|
| ||
pitch bend wheel and modulation |
|
|
|
| ||
wheel to give your sound even more |
|
|
|
| ||
expressiveness. |
|
|
|
|
| 1 |
2. Main Control Panel: Use this panel![]()
![]()
![]()
![]()
![]()
![]()
![]()
![]()
![]()
![]()
![]()
![]()
![]()
![]()
![]() and LCD to navigate Axiom AIR's
and LCD to navigate Axiom AIR's ![]()
![]()
![]()
![]()
![]() settings. You can edit and identify
settings. You can edit and identify ![]()
![]()
![]()
![]() what's assigned to Axiom AIR's controls as well as store and load your settings as "memory locations." The transport buttons control standard transport functions in your DAW, as well.
what's assigned to Axiom AIR's controls as well as store and load your settings as "memory locations." The transport buttons control standard transport functions in your DAW, as well.
3.Knob Controls: Use the knobs to mix and control
4.Fader Controls: Use the faders to mix and control
5.Trigger Pad Controls: Use these pressure- and
Controls & Connections
Top Panel
1. Keyboard: This |
|
|
|
| |
| velocity- and |
|
|
|
|
| in conjunction with the Octave |
|
|
|
|
| buttons, can control a |
|
|
|
|
| range. You can also use the keys with | 5 | 4 | 8 | 7 |
| labels above them (in the keyboard's | ||||
|
|
| |||
| lower and upper registers) to access |
|
|
|
|
| extended programming functions | 6 |
|
|
|
| when your Axiom AIR is in Edit Mode. |
| 3 3 |
|
|
2. | Pitch Bend and Modulation Wheels: |
|
|
| |
|
|
|
| ||
| These controls let you bend pitch and |
| 2 2 |
| 1 |
| trigger parameter modulation when |
|
|
|
|
| controlling a MIDI instrument. |
|
|
|
|
3. | Octave/Transpose Buttons ( |
|
|
|
|
By default, these buttons shift the keyboard up or down one octave at a time, extending its playable range. The "+" shifts it upward (e.g., Note F3 becomes F4), while the
4