Taking Your Blood Pressure Reading
Proceed only after reading the previous sections of this manual.
Remember! Remain still; do not talk during the measurement.
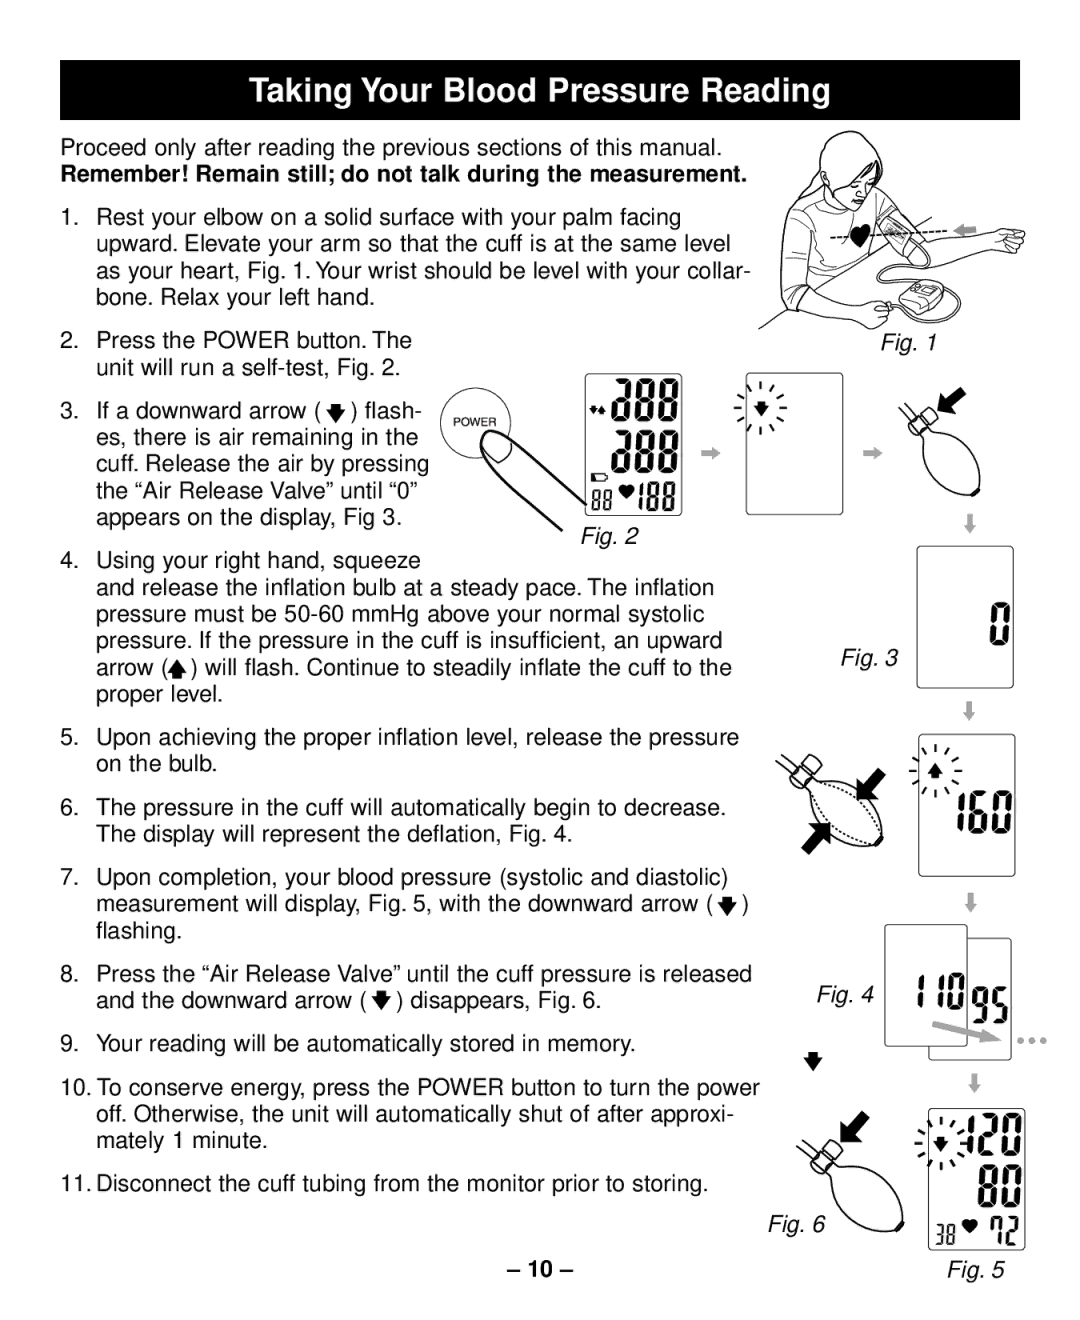
1. | Rest your elbow on a solid surface with your palm facing |
|
| upward. Elevate your arm so that the cuff is at the same level |
|
| as your heart, Fig. 1. Your wrist should be level with your collar- |
|
| bone. Relax your left hand. |
|
2. | Press the POWER button. The | Fig. 1 |
| unit will run a |
|
3. | If a downward arrow ( ) flash- |
|
| es, there is air remaining in the |
|
| cuff. Release the air by pressing |
|
the “Air Release Valve” until “0”
appears on the display, Fig 3.
Fig. 2
4.Using your right hand, squeeze
and release the inflation bulb at a steady pace. The inflation pressure must be
arrow (![]() ) will flash. Continue to steadily inflate the cuff to the proper level.
) will flash. Continue to steadily inflate the cuff to the proper level.
5.Upon achieving the proper inflation level, release the pressure
on the bulb.
6.The pressure in the cuff will automatically begin to decrease. The display will represent the deflation, Fig. 4.
7.Upon completion, your blood pressure (systolic and diastolic)
measurement will display, Fig. 5, with the downward arrow ( ![]() ) flashing.
) flashing.
8.Press the “Air Release Valve” until the cuff pressure is released and the downward arrow ( ![]() ) disappears, Fig. 6.
) disappears, Fig. 6.
9.Your reading will be automatically stored in memory.
10.To conserve energy, press the POWER button to turn the power off. Otherwise, the unit will automatically shut of after approxi- mately 1 minute.
11.Disconnect the cuff tubing from the monitor prior to storing.
Fig. 3
Fig. 4
Fig. 6
– 10 – | Fig. 5 |
