DTV Digital to Analog Converter Set Top Box
INSTRUCCIONES EN ESPAÑOL INCLUIDAS
THAT MAKE USING YOUR MAGNAVOX PRODUCT MORE ENJOYABLE
TB110MW9
Before Using
Important Safeguards
RISK OF ELECTRIC SHOCK DO NOT OPEN
Model No
Before Using
INSERT
Dealer Phone No
Avoid the Hazards of Electrical Shock and Fire
Precautions
Install the product in a horizontal position
Location
Advanced Operation
Before Using
Initial Setup Setup Wizard
T a b l e o f C o n t e n t s
Conexión a una caja de cable
Overview
Conexión a un TV sin tomas de A/V
Conexión a un TV con tomas de A/V
1 Unsnap the battery cover from the
Accessories
Installing Batteries
Check the following accessories when unpacking the STB
2 Number buttons 3 OK button
Remote Control
Location of Controls
Ubicación del control
Rear Panel
1 Remote control sensor 2 POWER indicator
1 AC power cord
Front Panel
white red yellow
A Connecting to a TV without A/V Jacks
B Connecting to a TV with A/V Jacks
Connections
y ellow
C Connecting to a Cable Box Optional
Note to the Cable TV System Installer
white
on the STB to the audio input jack on the DVD
D Connecting to Other Devices
Conexión a otros dispositivos
red yellow
”SETUP WIZARD” screen automatically appears
Initial Setup Setup Wizard
Initial Setup
1 Press STANDBY-ON on the remote control to activate the STB
9 Select “AUTOSCAN” using K / L, then press OK
3 Select “CONTINUE” using s / B, then press OK
4 Select the language using K / L, then press OK
6 Select your time zone using K / L, then press OK
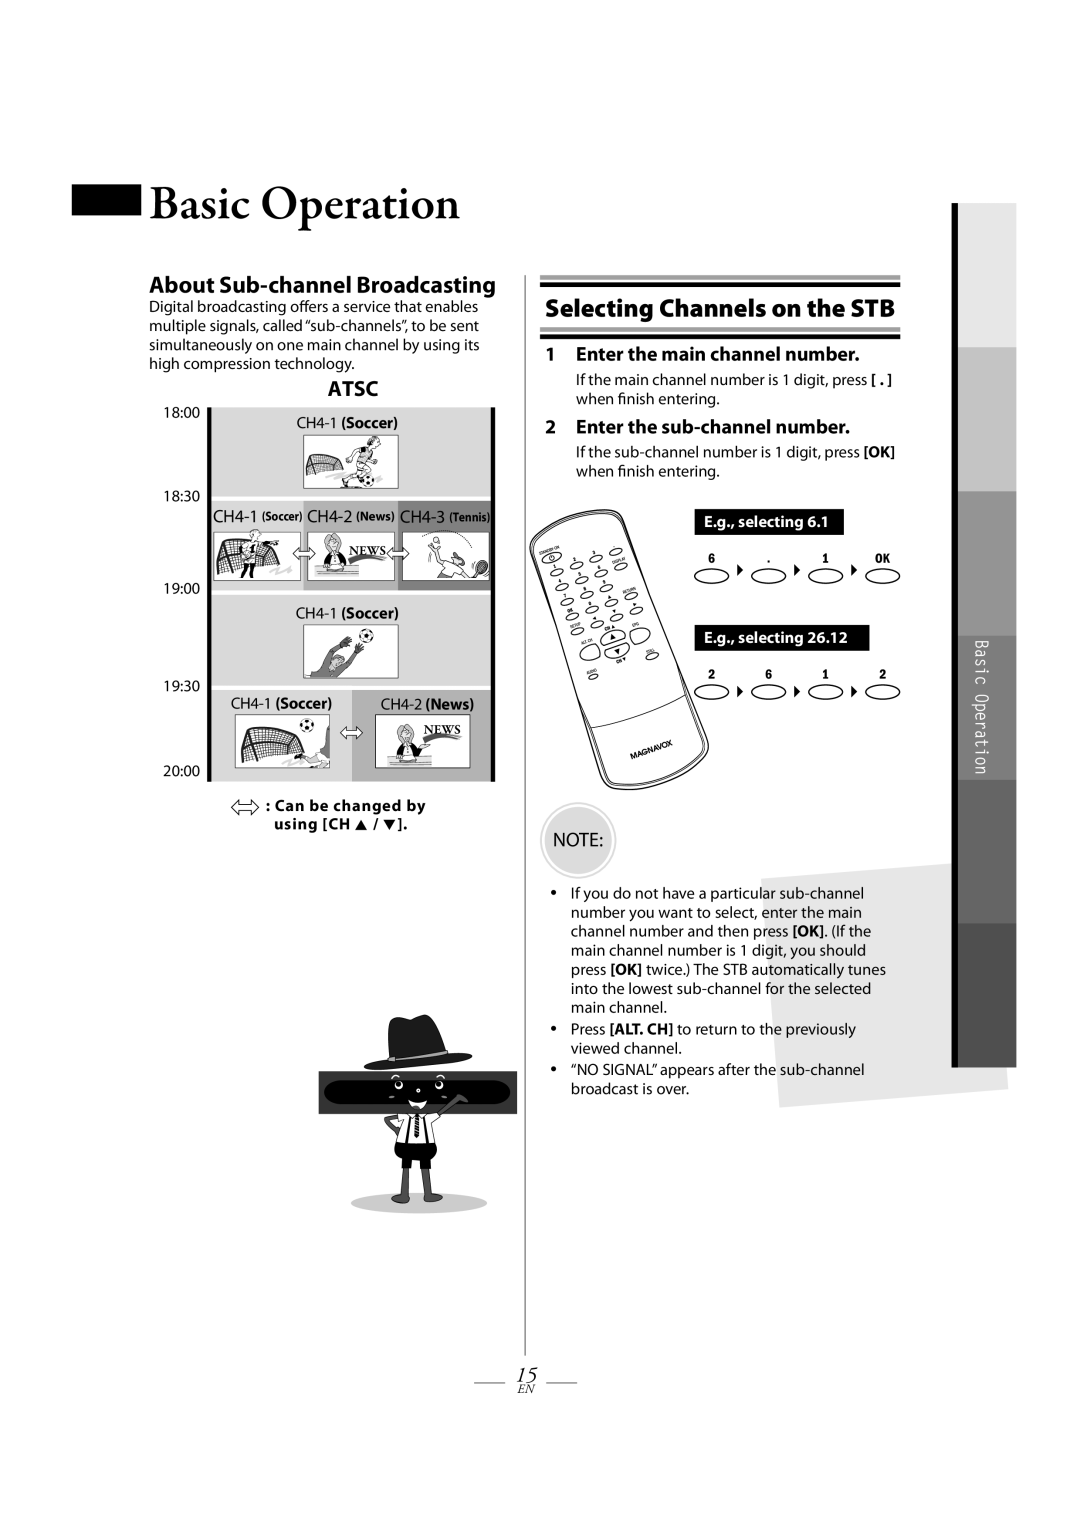
“NO SIGNAL” appears after the sub-channel broadcast is over
using CH K / L
If the main channel number is 1 digit, press . when finish entering
If the sub-channel number is 1 digit, press OK when finish entering
Choosing Audio Language
To cancel still mode
Press AUDIO repeatedly
Press STILL
1 Press EPG while watching TV
2 Select the desired program using s / B
provide signals for “EPG”
Press DISPLAY
1 Press SETUP
1 Press SETUP 2 Select “CHANNEL” using K / L, then press OK
3 Select “AUTOSCAN” using K / L, then press OK
4 Select “AUTOSCAN” using K / L, then press OK
Operation
6 Press SETUP to exit
4 Select “DELETE” using K / L, then press OK
5 Press OK again to add the channel to the channel map
1 Press SETUP 2 Select “DETAIL” using K / L, then press OK
Adjusting Antenna
2 Press SETUP 3 Select “CHANNEL” using K / L, then press OK
4 Select “ANTENNA” using K / L, then press OK
4 Select your time zone using K / L , then press OK
Setting the Time Zone and D.S.T Daylight Saving Time
1 Press SETUP 2 Select “TIME” using K / L , then press OK
3 Select “TIME ZONE” using K / L , then press OK
3 Select “V-CHIP” using K / L , then press OK
3 Select “D.S.T” using K / L , then press OK
4 Select “ON” or “OFF” using s / B , then press OK
1 Press SETUP 2 Select “DETAIL” using K / L , then press OK
MPAA Rating
5 Select the desired rating type using K / L , then press OK
6 Select the desired rating using
K / L , then press OK repeatedly to switch between view and block
6 Enter the new 4-digit password using the Number buttons
7 Press SETUP to exit
4 Enter 4737 in the password entry field
5 Select “NEW PASSWORD” using K / L , then press OK
5 Select the desired DTV closed caption using K / L , then press OK
5 Select “MANUAL” using K / L , then press OK
3 Select “CLOSED CAPTION” using K / L , then press OK
4 Select the desired closed caption item using K / L , then press OK
Auto Power Down
3 Select “AUTO POWER DOWN” using K / L , then press OK
4 Select desired amount of time using K / L , then press OK
Viewing Analog TV
You can view analog TV by switching “RF OUT” setting
You cannot view Digital TV with this setting
You cannot view Analog TV with this setting
3 Select the desired channel on your TV
You can view analog TV without switching “RF OUT” setting
Method 2 Método
2 Select “RF THROUGH” in “RF OUT”
3 Select “RF OUT” using K / L, then press OK
Setting RF OUT
Using SETUP to Switch “RF OUT” Setting
2 Select “CHANNEL” using K / L, then press OK
Low volume
Troubleshooting
No power
to the remote control
Power Consumption
Specifications
Connecting Jacks ANT. IN/OUT
Power Source
Customer Service
LIMITED WARRANTY
WARRANTY STATEMENT REGARDING NON AUTHORIZED REPAIRS
FUNAI SERVICE CORPORATION
