Manuals
/
Makita
/
Power Tools
/
Drill
Makita
DP4010, DP4011
specifications
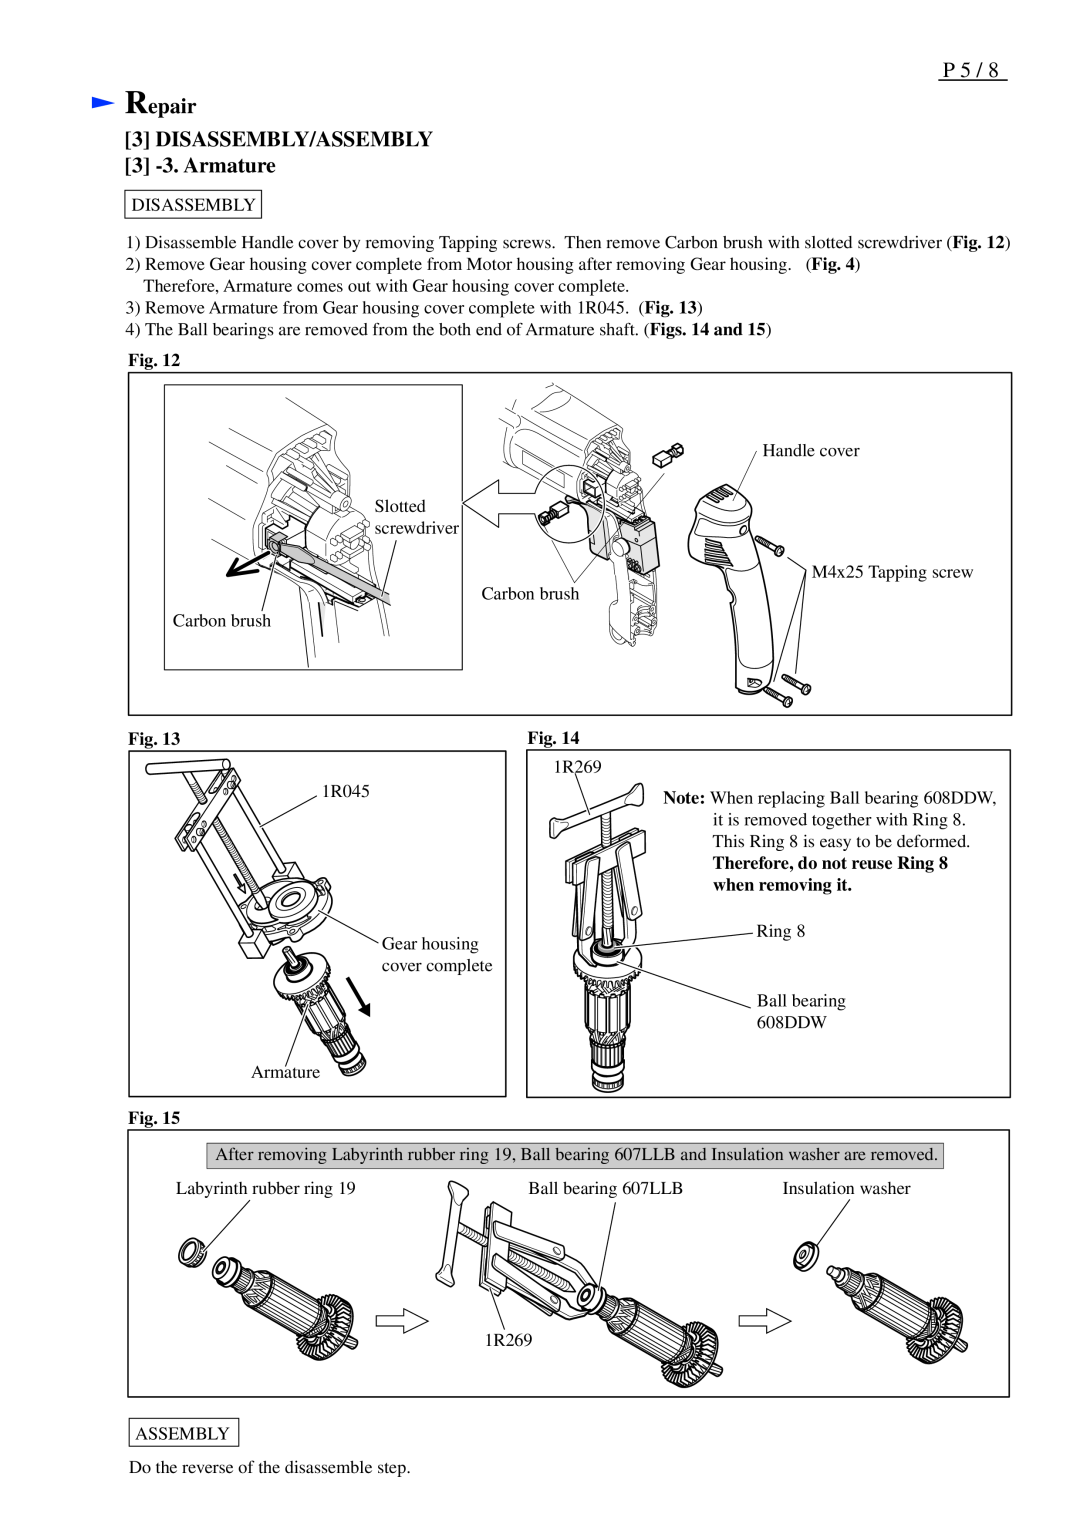
Repair 3 DISASSEMBLY/ASSEMBLY 3 -3. Armature
Models:
DP4010
1
5
8
8
Download
8 pages
46.22 Kb
1
2
3
4
5
6
7
8
Specifications
Circuit diagram
Necessary Repairing Tools
Switch
Page 5
Image 5
Page 4
Page 6
Page 5
Image 5
Page 4
Page 6
Contents
Optional accessories
Specification
PRODUCT
Standard equipment
2 LUBRICATION
1 NECESSARY REPAIRING TOOLS
Repair
3 -2. Gear Section
Repair 3 DISASSEMBLY/ASSEMBLY 3 -1. Drill Chuck
1R139
17.0mm 11/16
Repair 3 DISASSEMBLY/ASSEMBLY 3 -2. Gear Section Cont
Therefore, do not reuse Ring 8 when removing it
Repair 3 DISASSEMBLY/ASSEMBLY 3 -3. Armature
Repair 3 DISASSEMBLY/ASSEMBLY 3 -4. Bearing Retainer
Switch Noise suppressor
Circuit diagram
Power supply cord
Fig. D-1
Switch
Wiring diagram
Fig. D-2
Noise suppressor
Top
Page
Image
Contents