Assembly & Aausting
INSTALLING PLAIN END BLADES
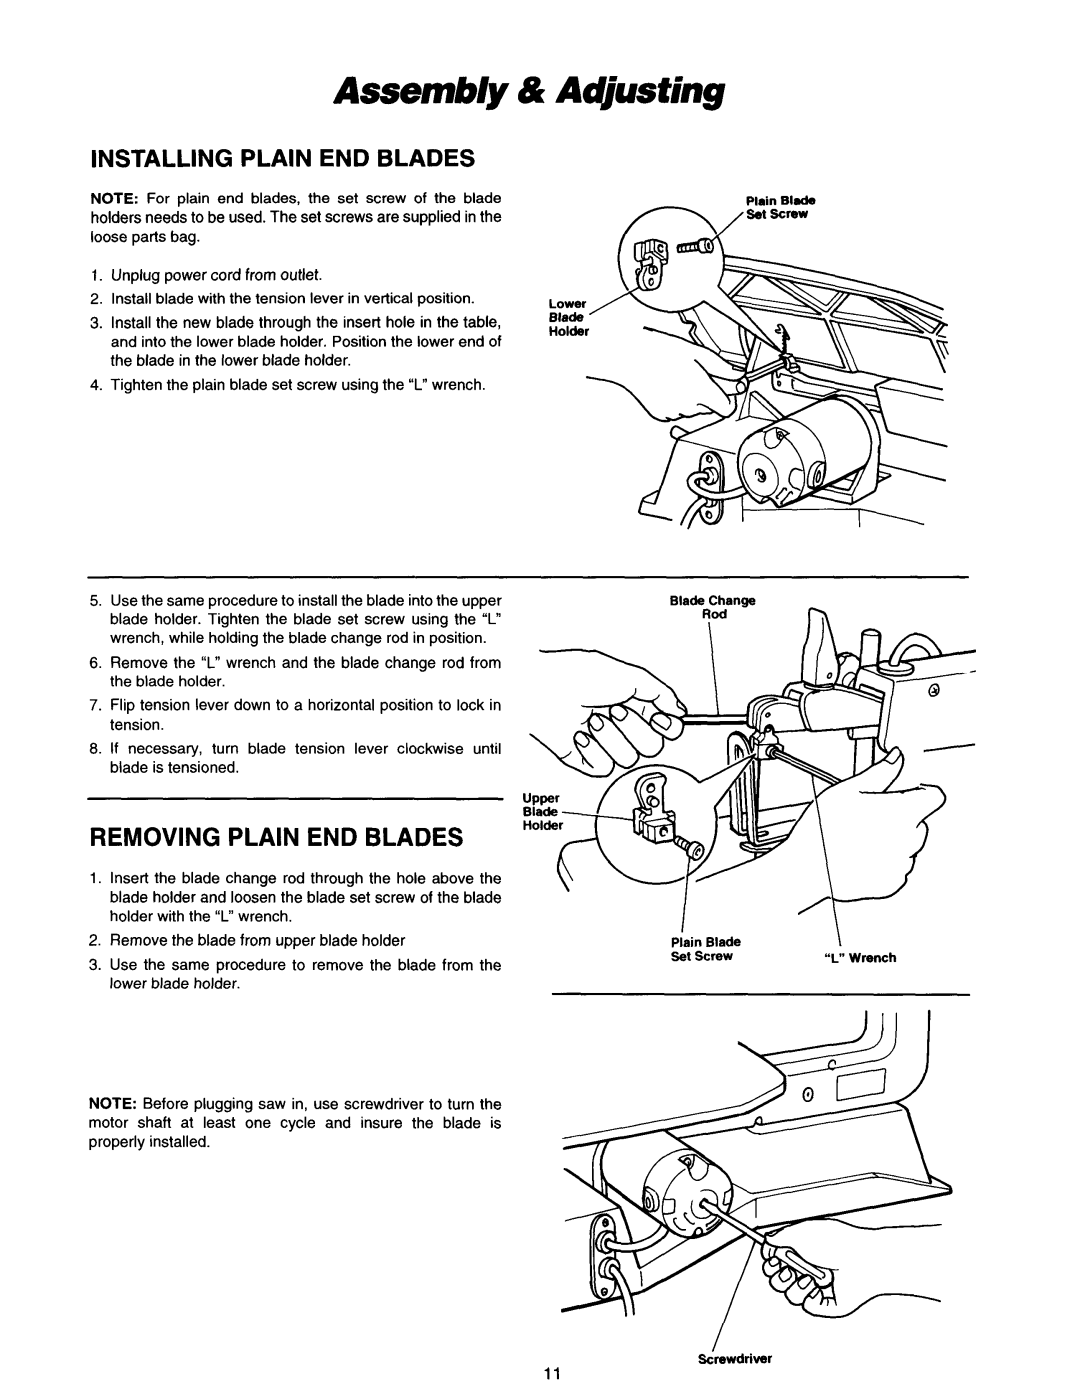
NOTE: For plain end blades, the set screw of the blade holders needs to be used. The set screws are supplied in the loose parts bag.
1.Unplug power cord from outlet.
2.Install blade with the tension lever in vertical position.
3.Install the new blade through the insert hole in the table, and into the lower blade holder. Position the lower end of the blade in the lower blade holder.
4.Tighten the plain blade set screw using the “L” wrench.
5.Use the same procedure to installthe blade into the upper blade holder. Tighten the blade set screw using the “L” wrench, while holdingthe blade change rod in position.
6.Remove the ‘I“wrench and the blade change rod from the blade holder.
7.Flip tension lever down to a horizontal position to lock in tension.
8.If necessary, turn blade tension lever clockwise until blade is tensioned.
REMOVING PLAIN END BLADES
1.Insert the blade change rod through the hole above the blade holder and loosen the blade set screw of the blade holder with the “L” wrench.
2.Remove the blade from upper blade holder
3.Use the same procedure to remove the blade from the lower blade holder.
NOTE: Before plugging saw in, use screwdriver to turn the motor shaft at least one cycle and insure the blade is properly installed.
Plain Blade |
|
Set Screw | “L” Wrench |
Screwdriver
11