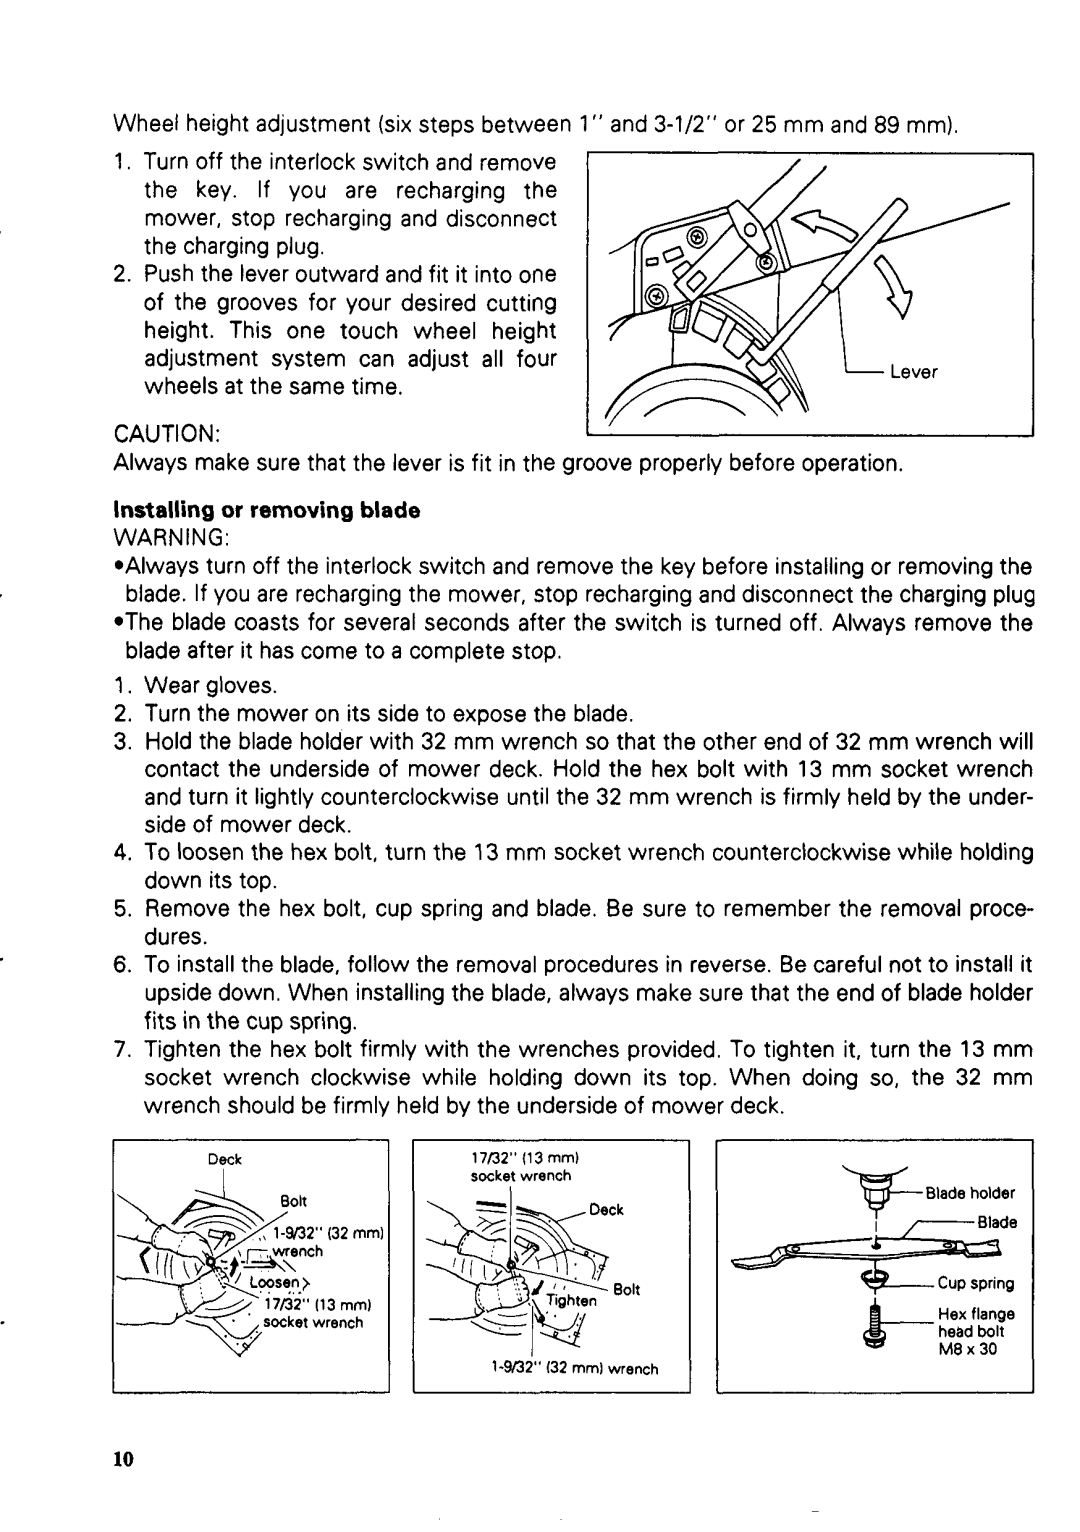
Wheel height adjustment (six steps between 1" and
1.Turn off the interlock switch and remove the key. If you are recharging the mower, stop recharging and disconnect the charging plug.
2.Push the lever outward and fit it into one of the grooves for your desired cutting height. This one touch wheel height adjustment system can adjust all four wheels at the same time.
CAUTION:
Always make sure that the lever is fit in the groove properly before operation.
Installing or removing blade
WARNING:
*Always turn off the interlock switch and remove the key before installing or removing the blade. If you are rechargingthe mower, stop rechargingand disconnect the charging plug *The blade coasts for several seconds after the switch is turned off. Always remove the
blade after it has come to a complete stop.
1.Wear gloves.
2.Turn the mower on its side to expose the blade.
3.Hold the blade holder with 32 mm wrench so that the other end of 32 mm wrench will contact the underside of mower deck. Hold the hex bolt with 13 mm socket wrench and turn it lightly counterclockwise until the 32 m m wrench is firmly held by the under- side of mower deck.
4.To loosen the hex bolt, turn the 13 mm socket wrench counterclockwise while holding down its top.
5.Remove the hex bolt, cup spring and blade. Be sure to remember the removal proce- dures.
6.To install the blade, follow the removal procedures in reverse. Be careful not to install it upside down. When installing the blade, always make sure that the end of blade holder fits in the cup spring.
7.Tighten the hex bolt firmly with the wrenches provided. To tighten it, turn the 13 mm socket wrench clockwise while holding down its top. When doing so, the 32 mm wrench should be firmly held by the underside of mower deck.
I | Deck | 17/32" (13 mml |
|
|
I | socket wrench | =Blade | holder | |
|
| I | ||
|
|
|
|
Cup spring
k- Hex flange head bolt
ME x 30
10
