MOUNT10 PROJECTOR MOUNT | INSTALLATION INSTRUCTIONS continued | |
Step 2 B |
|
|
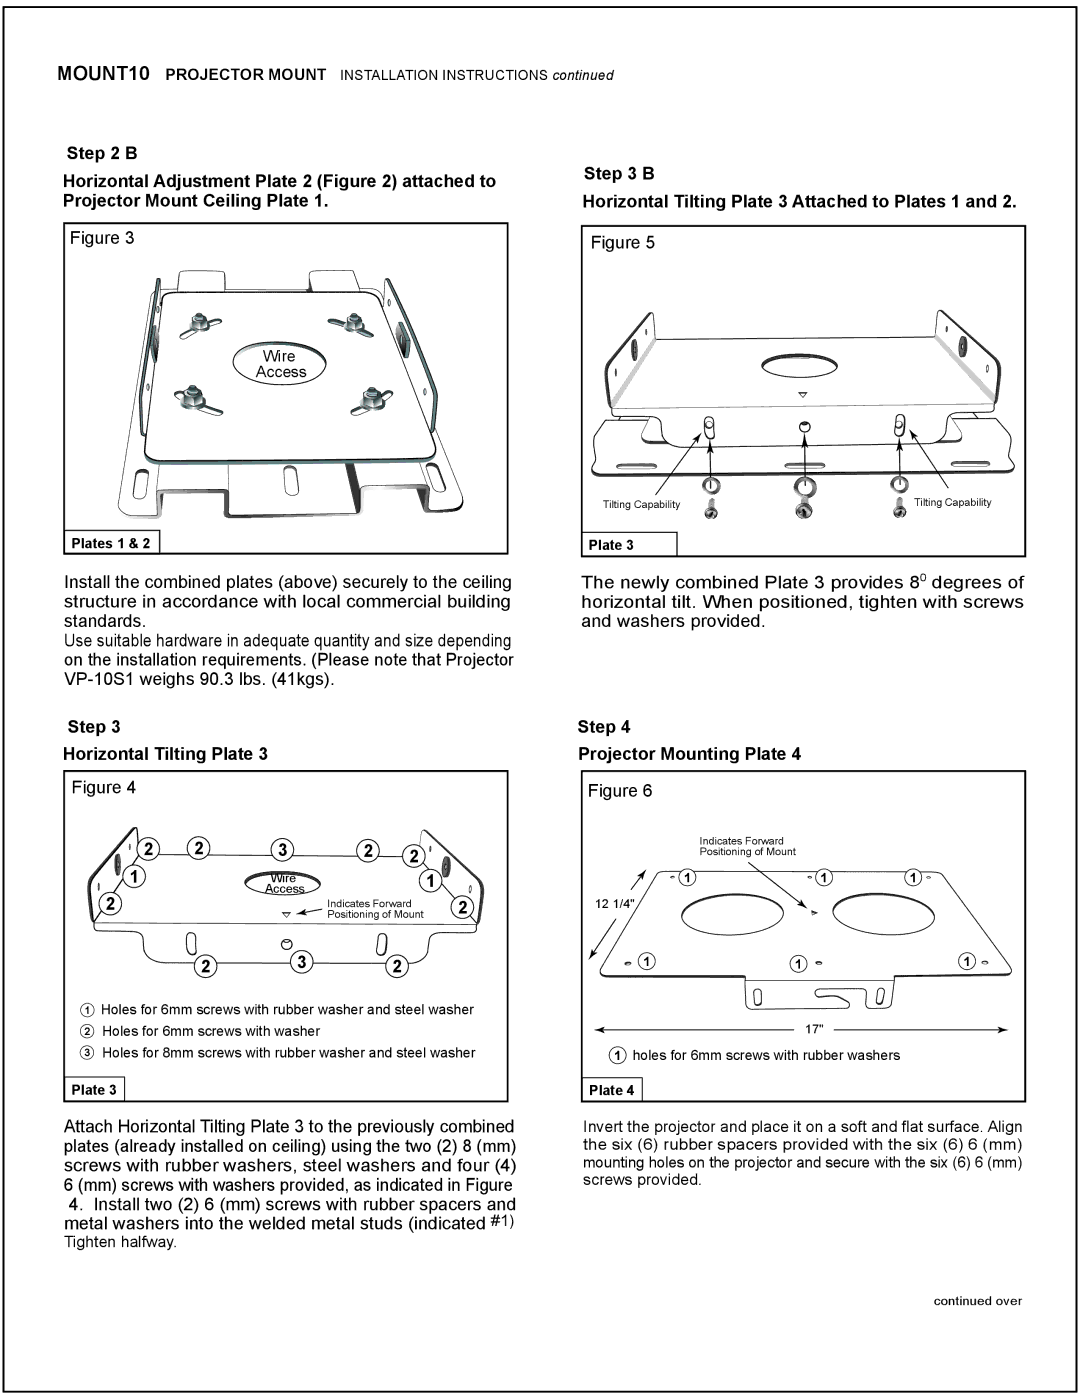
Horizontal Adjustment Plate 2 (Figure 2) attached to | Step 3 B | |
| ||
Projector Mount Ceiling Plate 1. |
| Horizontal Tilting Plate 3 Attached to Plates 1 and 2. |
Figure 3
Figure 5
Wire
Access
Plates 1 & 2
Tilting Capability | Tilting Capability |
Plate 3
Install the combined plates (above) securely to the ceiling structure in accordance with local commercial building standards.
Use suitable hardware in adequate quantity and size depending on the installation requirements. (Please note that Projector
The newly combined Plate 3 provides 80 degrees of horizontal tilt. When positioned, tighten with screws and washers provided.
Step 3
Horizontal Tilting Plate 3
Figure 4
2 | 2 | 3 | 2 | 2 |
|
|
|
|
|
| |
1 |
| Wire |
|
| 1 |
2 |
| Access |
|
|
|
|
| Indicates Forward | 2 | ||
|
| Positioning of Mount | |||
2 3 2
1Holes for 6mm screws with rubber washer and steel washer
2Holes for 6mm screws with washer
3Holes for 8mm screws with rubber washer and steel washer
Plate 3
Attach Horizontal Tilting Plate 3 to the previously combined plates (already installed on ceiling) using the two (2) 8 (mm) screws with rubber washers, steel washers and four (4) 6 (mm) screws with washers provided, as indicated in Figure
4.Install two (2) 6 (mm) screws with rubber spacers and metal washers into the welded metal studs (indicated #1) Tighten halfway.
Step 4
Projector Mounting Plate 4
Figure 6
Indicates Forward
Positioning of Mount
1 | 1 | 1 |
12 1/4"
1 | 1 | 1 |
17"
1holes for 6mm screws with rubber washers
Plate 4
Invert the projector and place it on a soft and flat surface. Align the six (6) rubber spacers provided with the six (6) 6 (mm) mounting holes on the projector and secure with the six (6) 6 (mm) screws provided.
continued over