MOUNT10 PROJECTOR MOUNT INSTALLATION INSTRUCTIONS continued
Step 4 B
Projector Mounting Plate 4 (continued)
Figure 7
Projector Side
80 Tilt | 80 Tilt |
Mount Side
Plate 4
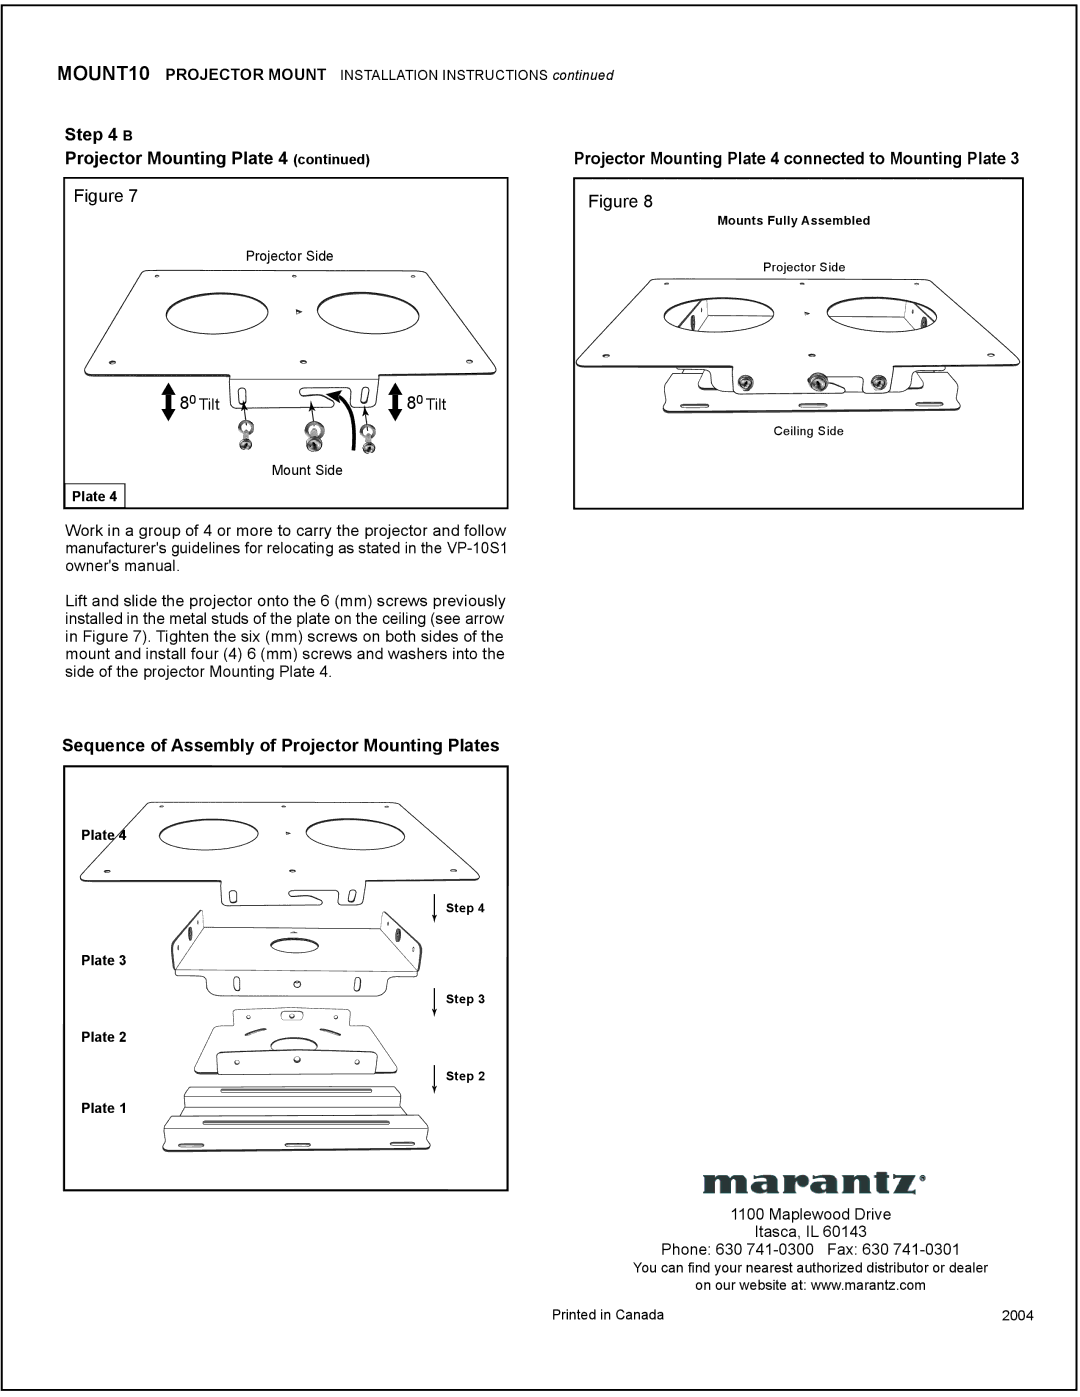
Work in a group of 4 or more to carry the projector and follow manufacturer's guidelines for relocating as stated in the
Lift and slide the projector onto the 6 (mm) screws previously installed in the metal studs of the plate on the ceiling (see arrow in Figure 7). Tighten the six (mm) screws on both sides of the mount and install four (4) 6 (mm) screws and washers into the side of the projector Mounting Plate 4.
Sequence of Assembly of Projector Mounting Plates
Plate 4
Step 4
Plate 3
Step 3
Plate 2
Step 2
Plate 1
Projector Mounting Plate 4 connected to Mounting Plate 3
Figure 8
Mounts Fully Assembled
Projector Side
Ceiling Side
1100 Maplewood Drive
Itasca, IL 60143
Phone: 630
You can find your nearest authorized distributor or dealer
on our website at: www.marantz.com
Printed in Canada | 2004 |
