
9406M, TCS5139-X, MC-0201-4, V-CRM2, V-CB1 specifications
Marshall Electronics is renowned for its innovative solutions in the field of professional video and audio equipment. Among its diverse product lineup, the TCS5139-X, V-CB1, 9406M, V-CRM2, and MC-0201-4 models stand out for their exceptional features and cutting-edge technologies.The TCS5139-X is a versatile touch screen controller designed for seamless operation in various broadcast applications. Its main features include a high-resolution display, intuitive user interface, and customizable settings that allow users to tailor the functions to their specific needs. The TCS5139-X supports multiple protocols, ensuring compatibility with a wide range of devices, making it an essential tool for any broadcast environment.
The V-CB1 is a compact, high-quality video converter known for its robust build and reliable performance. This device supports various resolutions and frame rates, ensuring optimal video quality in all settings. Its built-in scaling capabilities and low latency make it ideal for live production, where every millisecond counts. The V-CB1 also features comprehensive connectivity options, including HDMI, SDI, and analog inputs, enhancing its versatility in different applications.
The 9406M is a professional monitor that brings high-definition visuals to any production setup. It boasts a full HD display and advanced color calibration features, ensuring accurate color representation. This monitor is equipped with multiple input options, including SDI and HDMI, allowing for easy integration into existing workflows. The lightweight and slim design of the 9406M makes it a convenient choice for mobile production setups.
The V-CRM2 is a highly advanced camera control system designed to simplify the operation of pan-tilt-zoom (PTZ) cameras. It features an intuitive control interface and supports various camera models, allowing users to switch between different devices effortlessly. The V-CRM2 supports remote operation, enabling operators to adjust camera settings and angles from a distance, which is particularly beneficial in multi-camera shoots.
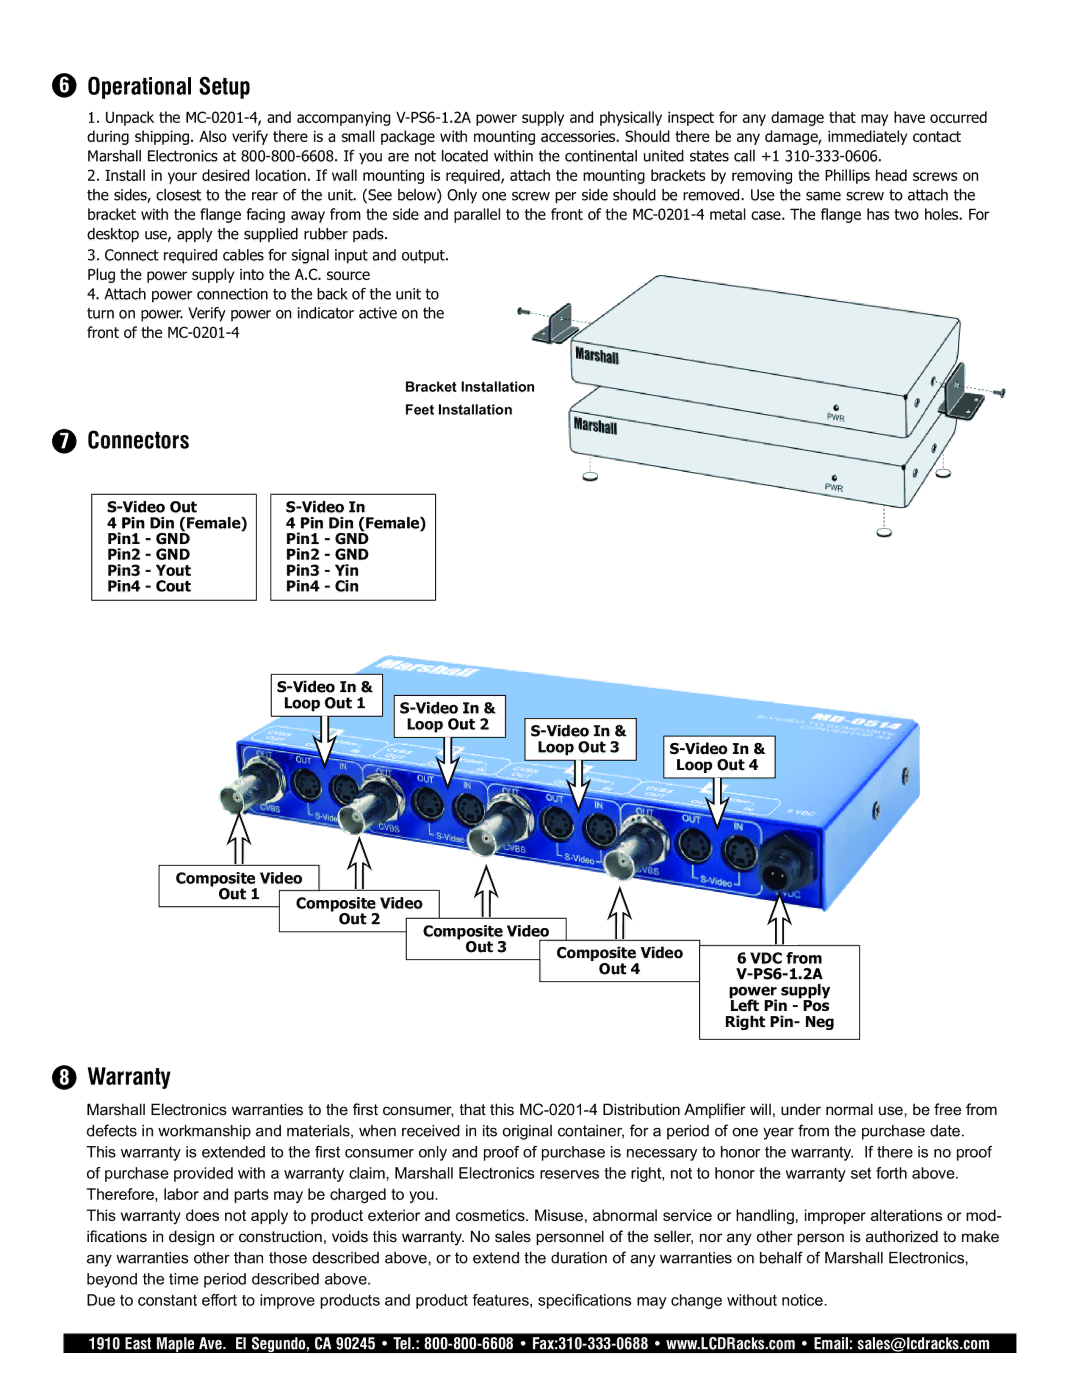
Lastly, the MC-0201-4 is a multi-channel audio mixer that offers professional-grade audio performance. It features multiple input options, built-in effects, and an intuitive layout for easy operation. The MC-0201-4 is ideal for live events, studio recordings, and broadcasting, ensuring top-notch audio quality in every application.
In summary, Marshall Electronics’ TCS5139-X, V-CB1, 9406M, V-CRM2, and MC-0201-4 models each bring unique features and technologies that cater to the demanding needs of video and audio professionals. With a focus on reliability, performance, and user-friendliness, these products are integral to achieving high-quality results in various media production environments.