
B36RA, B36LA specifications
The Martin Fireplaces B36LA and B36RA are sleek and stylish gas fireplaces designed to bring warmth and elegance to any living space. With their impressive features and advanced technologies, these models stand out as exceptional options for homeowners seeking both functionality and aesthetics in their heating solutions.One of the main characteristics of both the B36LA (lean attrape) and B36RA (room attrape) is their versatile design. These fireplaces are engineered to seamlessly fit into various environments, whether in a traditional home or a contemporary dwelling. The clean, linear design allows for easy integration into different styles of decor, while the large viewing area offers an unobstructed view of the mesmerizing flames, enhancing the ambiance of any room.
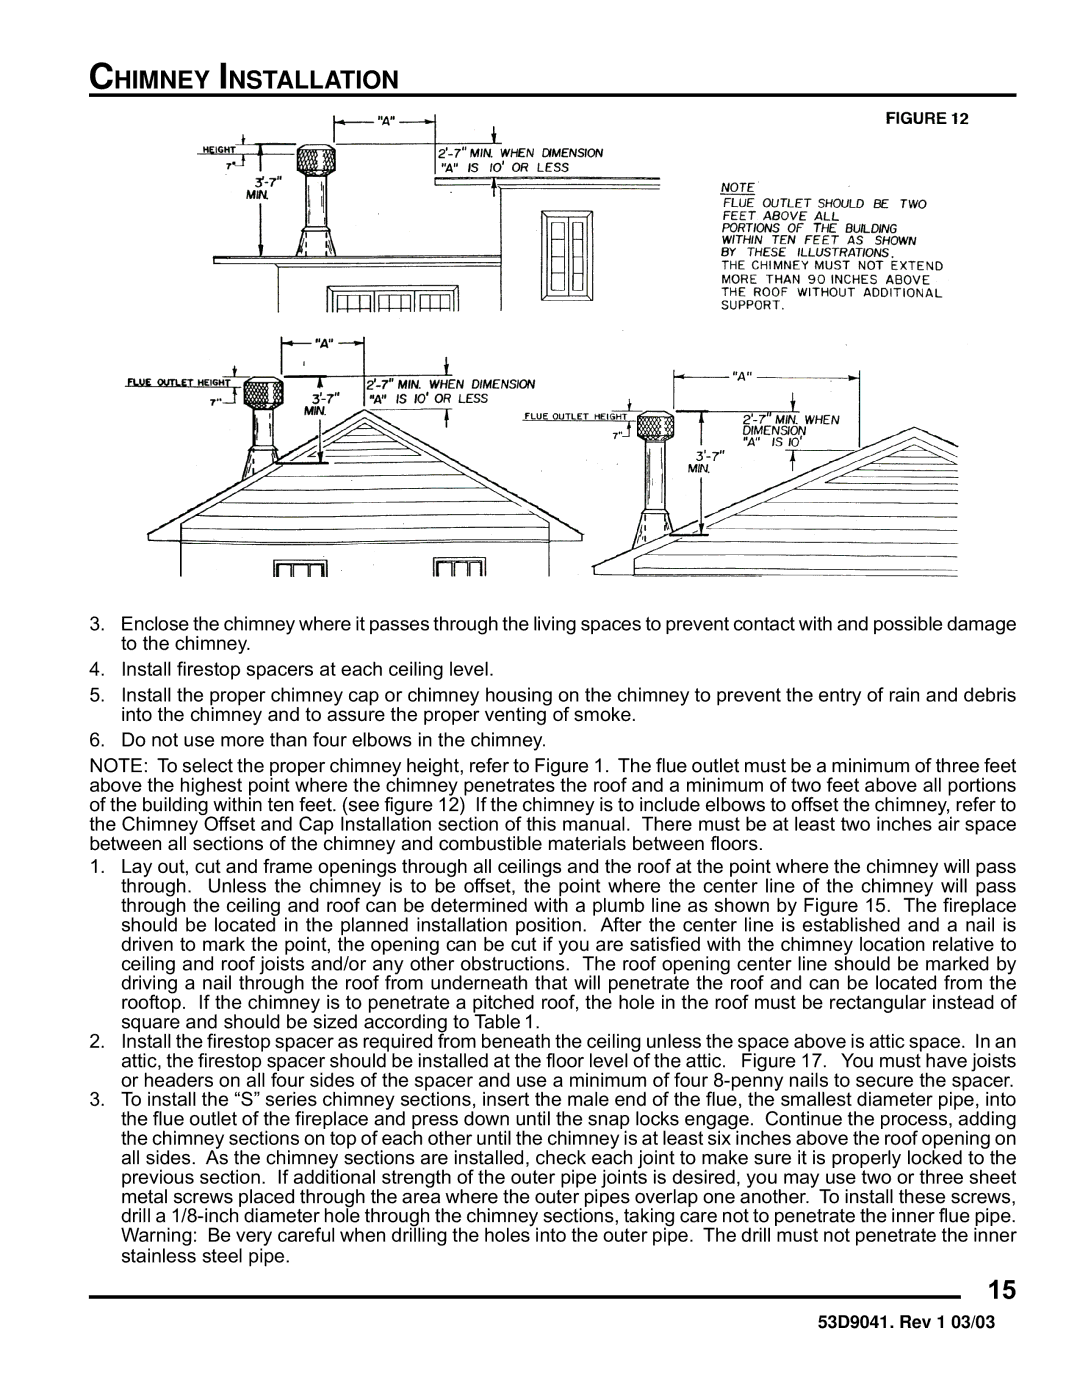
The B36LA and B36RA utilize state-of-the-art venting technology, ensuring safety and efficiency. They are compatible with both direct vent and vent-free systems, providing flexibility in installation. The direct vent option allows for efficient removal of combustion gases while drawing fresh air from outside, making it a smart choice for energy-conscious homeowners. Both models also prioritize safety, featuring built-in safety mechanisms to prevent any gas leaks or hazards, ensuring peace of mind for users.
In terms of performance, the B36LA and B36RA boast impressive heating capabilities. With adjustable flame heights and a powerful heating capacity, they can efficiently warm spaces of varying sizes. The innovative burner design also creates a realistic flame appearance, mimicking the natural flicker of a wood fire, while producing minimal emissions, making them an environmentally friendly option.
Moreover, these fireplaces come equipped with advanced control options, allowing users to easily adjust settings from the comfort of their seating area. Remote control functionality and wall-mounted thermostat options make it effortless to maintain the desired temperature, ensuring a cozy atmosphere at all times.
With their combination of modern aesthetics, safety features, and advanced heating technologies, the Martin Fireplaces B36LA and B36RA present an ideal solution for those seeking both style and warmth. Whether creating a focal point in a living room or offering supplemental heat in a bedroom, these fireplaces deliver on all fronts, making them a worthwhile investment for any home.