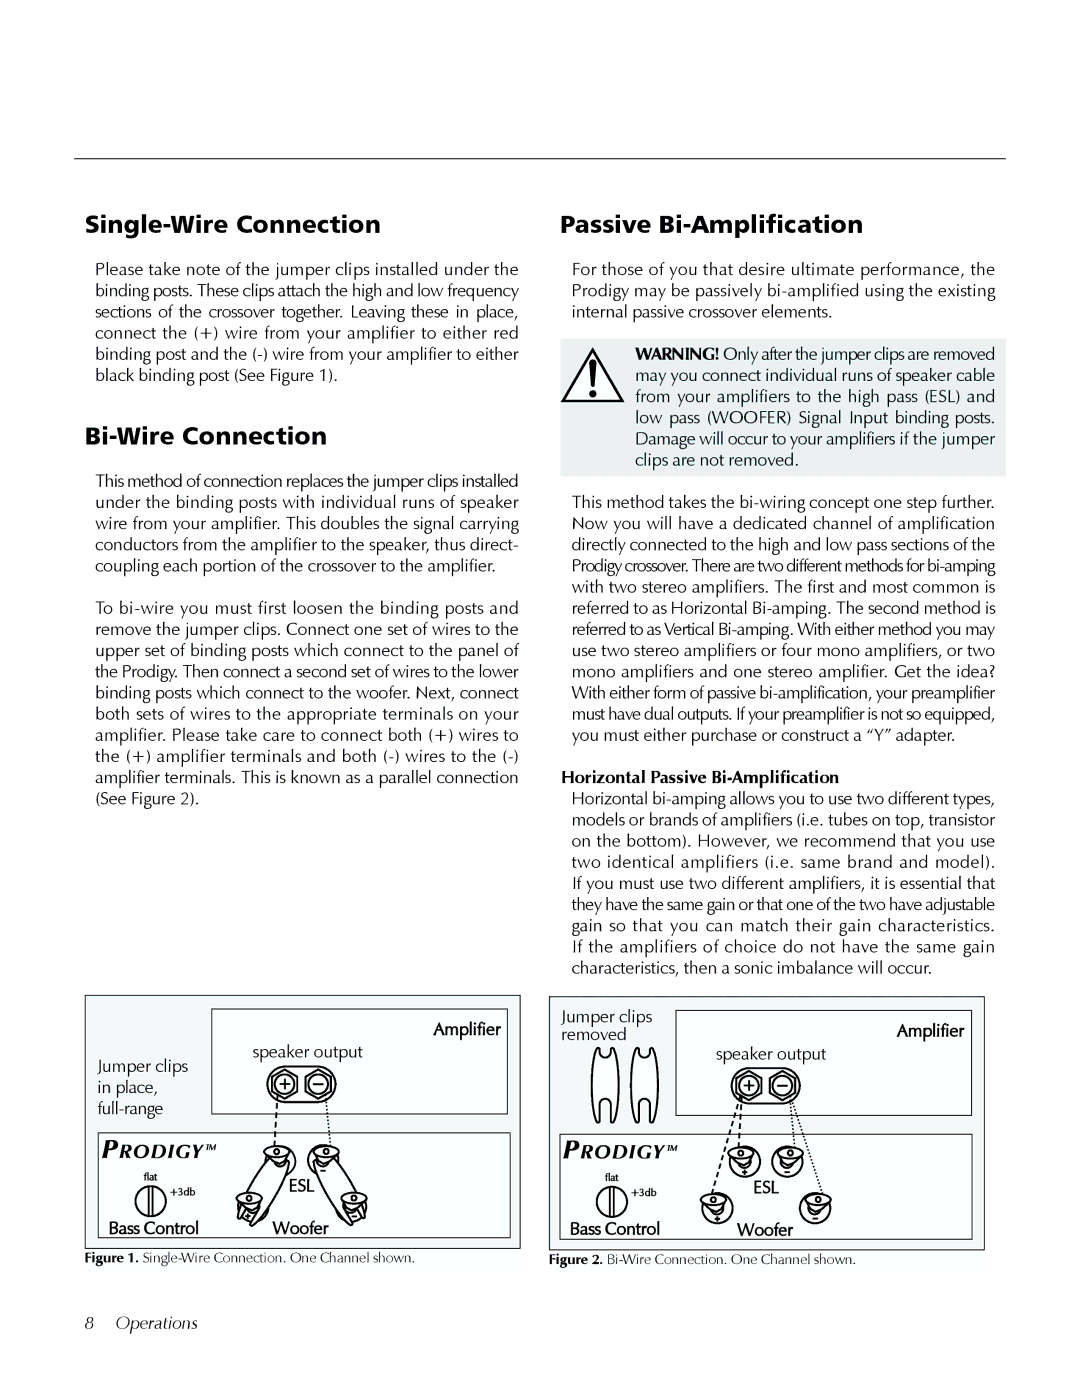
Please take note of the jumper clips installed under the binding posts. These clips attach the high and low frequency sections of the crossover together. Leaving these in place, connect the (+) wire from your amplifier to either red binding post and the (-) wire from your amplifier to either black binding post (See Figure 1).
Bi-Wire Connection
This method of connection replaces the jumper clips installed under the binding posts with individual runs of speaker wire from your amplifier. This doubles the signal carrying conductors from the amplifier to the speaker, thus direct- coupling each portion of the crossover to the amplifier.
To bi-wire you must first loosen the binding posts and remove the jumper clips. Connect one set of wires to the upper set of binding posts which connect to the panel of the Prodigy. Then connect a second set of wires to the lower binding posts which connect to the woofer. Next, connect both sets of wires to the appropriate terminals on your amplifier. Please take care to connect both (+) wires to the (+) amplifier terminals and both (-) wires to the (-) amplifier terminals. This is known as a parallel connection (See Figure 2).
For those of you that desire ultimate performance, the Prodigy may be passively bi-amplified using the existing internal passive crossover elements.
WARNING! Only after the jumper clips are removed may you connect individual runs of speaker cable from your amplifiers to the high pass (ESL) and low pass (WOOFER) Signal Input binding posts. Damage will occur to your amplifiers if the jumper clips are not removed.
This method takes the bi-wiring concept one step further. Now you will have a dedicated channel of amplification directly connected to the high and low pass sections of the Prodigy crossover. There are two different methods for bi-amping with two stereo amplifiers. The first and most common is referred to as Horizontal Bi-amping. The second method is referred to as Vertical Bi-amping. With either method you may use two stereo amplifiers or four mono amplifiers, or two mono amplifiers and one stereo amplifier. Get the idea? With either form of passive bi-amplification, your preamplifier must have dual outputs. If your preamplifier is not so equipped, you must either purchase or construct a “Y” adapter.
Horizontal Passive Bi-Amplification
Horizontal bi-amping allows you to use two different types, models or brands of amplifiers (i.e. tubes on top, transistor on the bottom). However, we recommend that you use two identical amplifiers (i.e. same brand and model). If you must use two different amplifiers, it is essential that they have the same gain or that one of the two have adjustable gain so that you can match their gain characteristics. If the amplifiers of choice do not have the same gain characteristics, then a sonic imbalance will occur.