Experimentation
Toe-in—Now you can begin to experiment. First begin by toeing your speakers in towards the listening area and then facing them straight into the room. You will notice the tonal balance and imaging changing. You will notice that as the speakers are toed-in, the system becomes slightly brighter than when toed-out. This design gives you the flexibility to compensate for a soft or bright room.
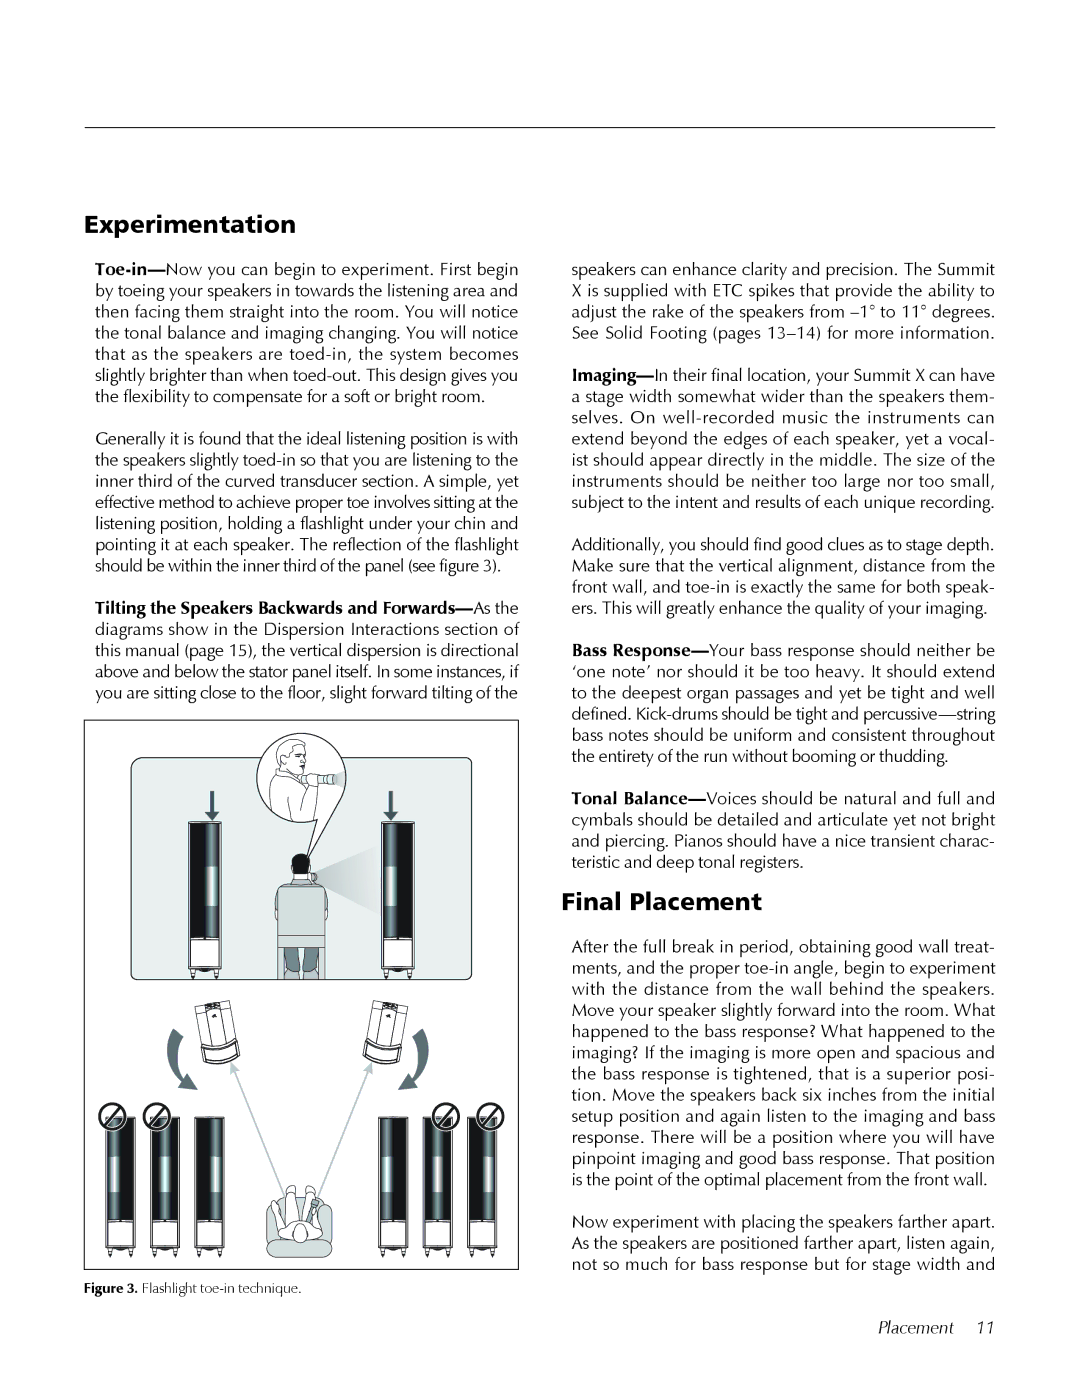
Generally it is found that the ideal listening position is with the speakers slightly toed-in so that you are listening to the inner third of the curved transducer section. A simple, yet effective method to achieve proper toe involves sitting at the listening position, holding a flashlight under your chin and pointing it at each speaker. The reflection of the flashlight should be within the inner third of the panel (see figure 3).
Tilting the Speakers Backwards and Forwards—As the diagrams show in the Dispersion Interactions section of this manual (page 15), the vertical dispersion is directional above and below the stator panel itself. In some instances, if you are sitting close to the floor, slight forward tilting of the
Figure 3.. Flashlight toe-in technique.
speakers can enhance clarity and precision. The Summit X is supplied with ETC spikes that provide the ability to adjust the rake of the speakers from –1° to 11° degrees. See Solid Footing (pages 13–14) for more information.
Imaging—In their final location, your Summit X can have a stage width somewhat wider than the speakers them- selves. On well-recorded music the instruments can extend beyond the edges of each speaker, yet a vocal- ist should appear directly in the middle. The size of the instruments should be neither too large nor too small, subject to the intent and results of each unique recording.
Additionally, you should find good clues as to stage depth. Make sure that the vertical alignment, distance from the front wall, and toe-in is exactly the same for both speak- ers. This will greatly enhance the quality of your imaging.
Bass Response—Your bass response should neither be ‘one note’ nor should it be too heavy. It should extend to the deepest organ passages and yet be tight and well defined. Kick-drums should be tight and percussive—string bass notes should be uniform and consistent throughout the entirety of the run without booming or thudding.
Tonal Balance—Voices should be natural and full and cymbals should be detailed and articulate yet not bright and piercing. Pianos should have a nice transient charac- teristic and deep tonal registers.
Final Placement
After the full break in period, obtaining good wall treat- ments, and the proper toe-in angle, begin to experiment with the distance from the wall behind the speakers. Move your speaker slightly forward into the room. What happened to the bass response? What happened to the imaging? If the imaging is more open and spacious and the bass response is tightened, that is a superior posi- tion. Move the speakers back six inches from the initial setup position and again listen to the imaging and bass response. There will be a position where you will have pinpoint imaging and good bass response. That position is the point of the optimal placement from the front wall.
Now experiment with placing the speakers farther apart. As the speakers are positioned farther apart, listen again, not so much for bass response but for stage width and