Installation
Your new refrigerator was packed carefully for shipment. Remove and discard shelf packing clips (if used) located just abov, each shelf where they hook onto the frame. To remove plastic clips wiggle the clips sideways and pull straight out.
Location
•Allow for a free flow of air through the front base grille,
•Install the refrigerator where the room temperature will not go below 55 ° E With temperatures below 55 °,
the refrigerator will not run frequently enough to maintain proper temperature in the freezer.
•Allow a minimum 1/2" clearance on the sides, top and back for ease of installation. If refrigerator is placed with the door hinge side against a wall, you
may want to allow additional space so the door can be opened wider,
•Use caution when installing the unit on vinyl or
hardwood floors so as not to mark or otherwise damage the flooring. A piece of plywood, a rug or
other material should be used to protect the floor while positioning the unit.
Leveling
Your refrigerator is equipped with front and back rolle so it can be moved away from the wall for cleaning. " enhance its appearance and to maintain performan( your refrigerator should be level.
For refrigerator models with adjustable wheels:
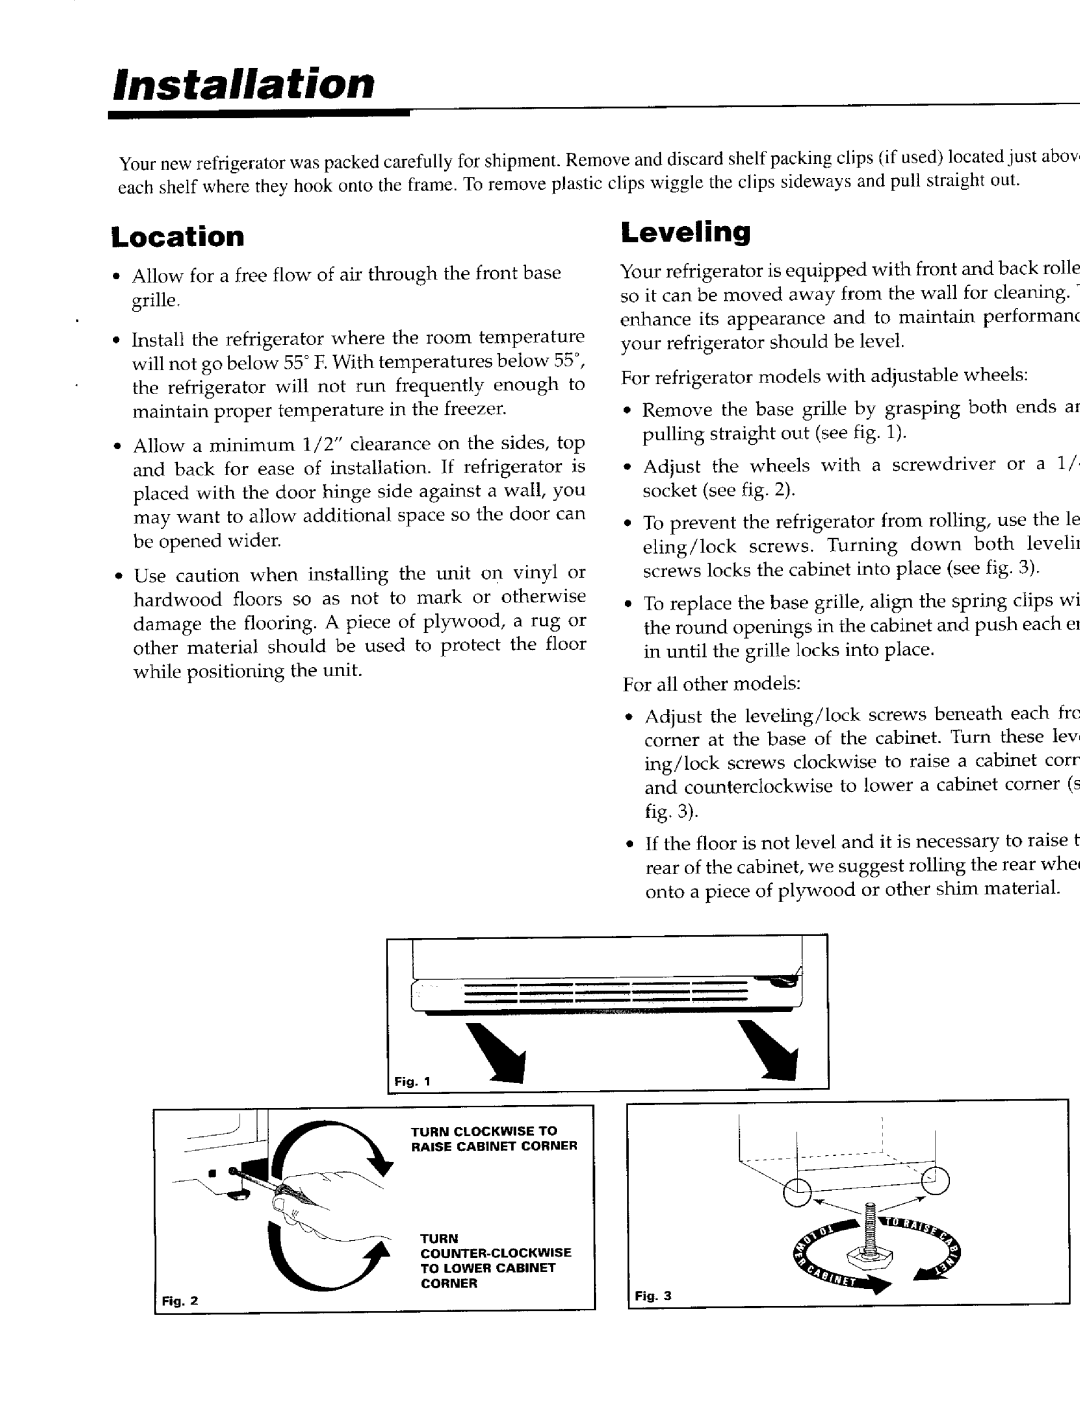
•Remove the base grille by grasping both ends ar pulling straight out (seefig. 1).
•Adjust the wheels with a screwdriver or a 1/_ socket (see fig. 2).
•To prevent the refrigerator from rolling, use the le
eling/lock screws. Turning down both levelil screws locks the cabinet into place (see fig. 3).
•To replace the base grille, align the spring clips wi the round openings in the cabinet and push each el in until the grille locks into place.
For all other models:
•Adjust the leveling/lock screws beneath each frc corner at the base of the cabinet. Turn these lev,
ing/lock screws clockwise to raise a cabinet corr
and counterclockwise to lower a cabinet corner (s fig. 3).
•If the floor is not level and it is necessary to raise t rear of the cabinet, we suggest rolling the rear wheq onto a piece of plywood or other shim material.
Fig, 1
I
TURN CLOCKWISE TO
RAISE CABINET CORNER | _ |
| |
TO LOWER CABINET |
|
CORNER |
|
Fig. 2 | Fig. 3 |