•Secure joints with duct tape. Do not use screws.
•DO NOT EXHAUST DRYER INTO ANY WALL, CEILING, CRAWL SPACE OR A CONCEALED SPACE OF A BUILDING, GAS VENT, ANY OTHER COMMON DUCT OR CHIMNEY. THIS COULD CREATE A FIRE HAZARD FROM LINT EXPELLED BY THE DRYER.
•Plastic flexible duct can kink, sag, be punctured, reduce airflow, extend drying times and affect dryer operation.
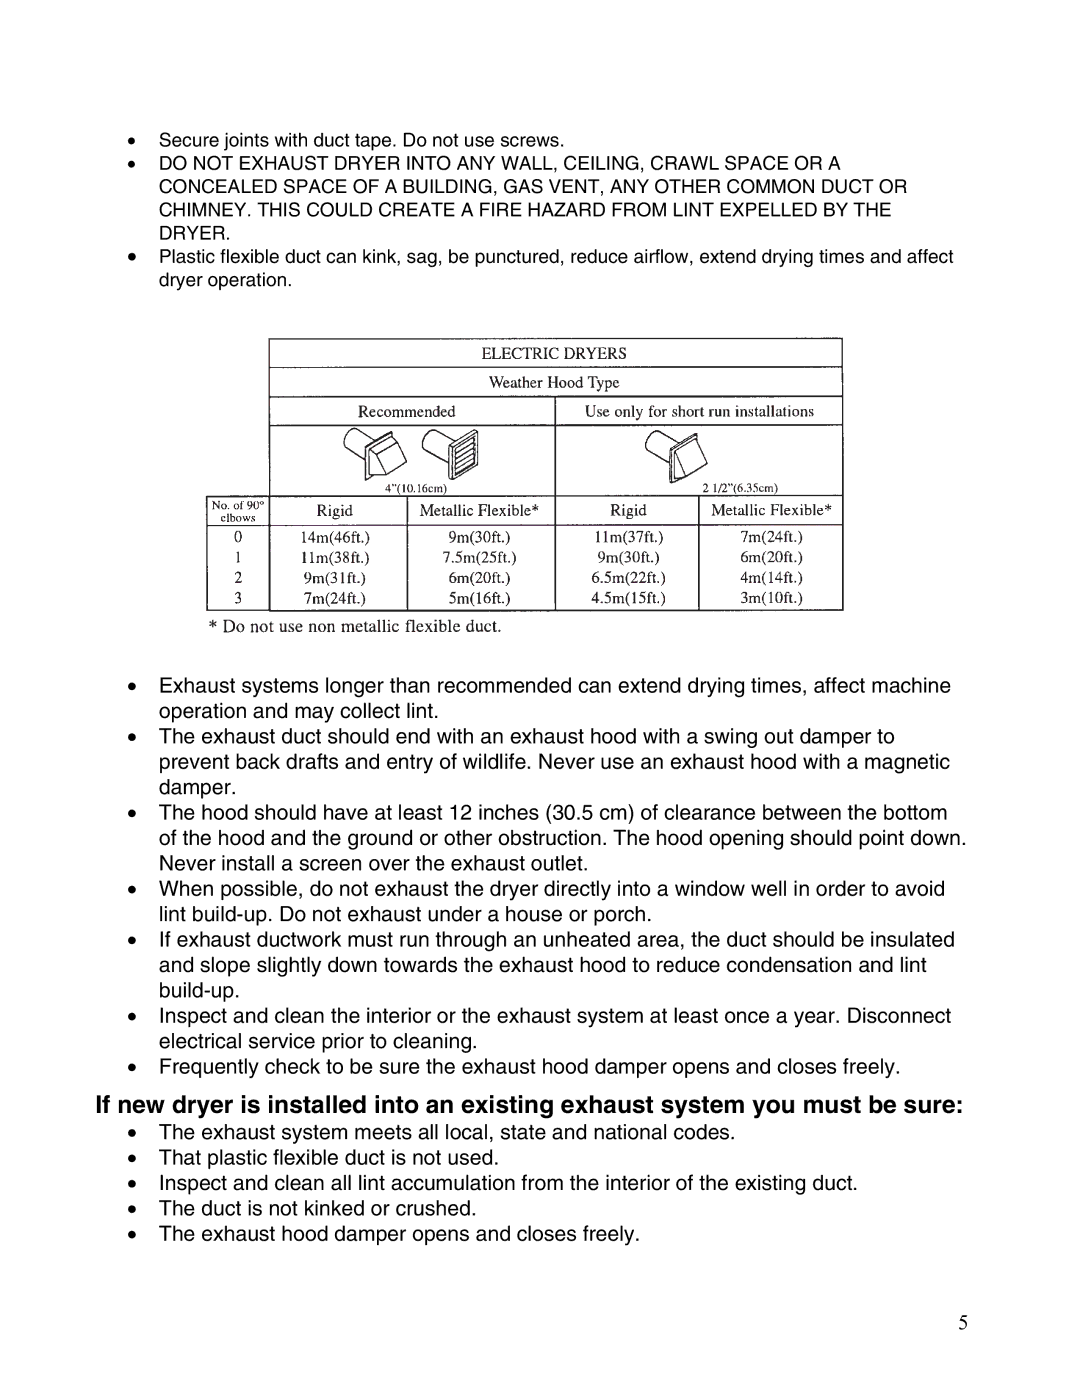
•Exhaust systems longer than recommended can extend drying times, affect machine operation and may collect lint.
•The exhaust duct should end with an exhaust hood with a swing out damper to prevent back drafts and entry of wildlife. Never use an exhaust hood with a magnetic damper.
•The hood should have at least 12 inches (30.5 cm) of clearance between the bottom of the hood and the ground or other obstruction. The hood opening should point down. Never install a screen over the exhaust outlet.
•When possible, do not exhaust the dryer directly into a window well in order to avoid lint
•If exhaust ductwork must run through an unheated area, the duct should be insulated and slope slightly down towards the exhaust hood to reduce condensation and lint
•Inspect and clean the interior or the exhaust system at least once a year. Disconnect electrical service prior to cleaning.
•Frequently check to be sure the exhaust hood damper opens and closes freely.
If new dryer is installed into an existing exhaust system you must be sure:
•The exhaust system meets all local, state and national codes.
•That plastic flexible duct is not used.
•Inspect and clean all lint accumulation from the interior of the existing duct.
•The duct is not kinked or crushed.
•The exhaust hood damper opens and closes freely.
5