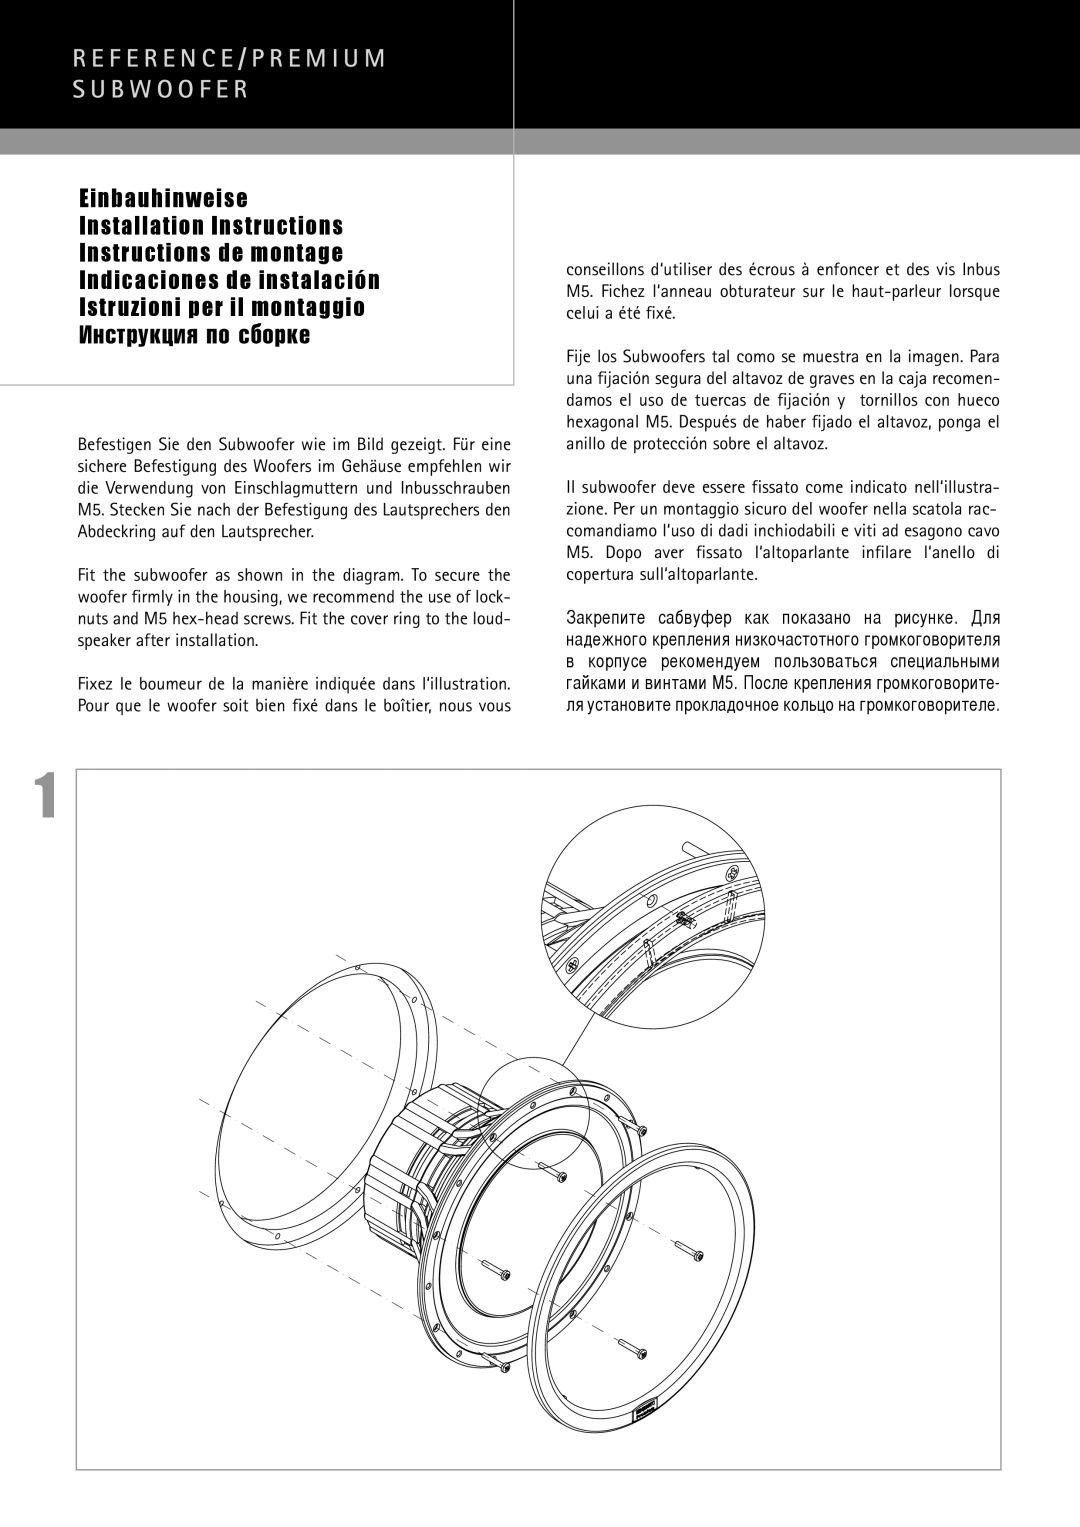
RWE254, RWE304, RWE204, RWE354, RWE 352 specifications
MB Quart is renowned for its commitment to delivering high-quality audio solutions, and their latest line of speakers, including the RWE254, PWE304, RWE354, RWE304, and RWE204, exemplifies this commitment with innovative technologies and outstanding performance.The RWE254 is a powerful 2-way coaxial speaker that brings an impressive sound experience to your vehicle. It features a 25mm aluminum dome tweeter that reproduces high frequencies with clarity and precision, while the 5.25-inch polypropylene injection molded woofer delivers deep, rich bass. The design incorporates a weather-resistant cone, ensuring durability against the elements, making it ideal for outdoor use.
The PWE304 is an advanced powered subwoofer that elevates the audio performance of any system. With a built-in amplifier, it streamlines installation while providing a robust low-frequency response. Its compact design makes it easy to integrate into various spaces without compromising sound quality. The adjustable crossover and phase control allow custom tuning to accommodate different music styles and preferences.
The RWE354 stands at the forefront of automotive audio technology. It features a 3-way coaxial design, offering a more comprehensive frequency response. The 6.5-inch woofer, 1-inch tweeter, and 1-inch midrange driver work together to create an immersive soundstage. The speaker is built with a high-temperature voice coil for improved performance, and the flexible mounting options allow for easy installation.
The RWE304 follows a similar design philosophy as the RWE354 but in a slightly smaller package. This 6.5-inch coaxial speaker still packs a punch with its high-efficiency design, ensuring that it can deliver clear and dynamic sound even at higher volume levels. The UV-resistant materials used in construction provide added longevity.
Lastly, the RWE204 is a great option for those who want quality sound in a compact form factor. This 4-inch coaxial speaker is perfect for smaller vehicles or for use as a secondary speaker system. Its lightweight design does not compromise on sound quality; it still features a durable cone and a neodymium magnet that enhances efficiency.
In summary, MB Quart's RWE and PWE series speakers blend advanced engineering with exceptional audio quality, ensuring an exhilarating listening experience. Each model is designed with specific features and technologies aimed at meeting the diverse needs of audio enthusiasts, making them an excellent choice for anyone looking to upgrade their vehicle's sound system. Whether you seek powerful bass or crystal-clear highs, these speakers promise to deliver unmatched performance and reliability.

