DESIGN FEATURES
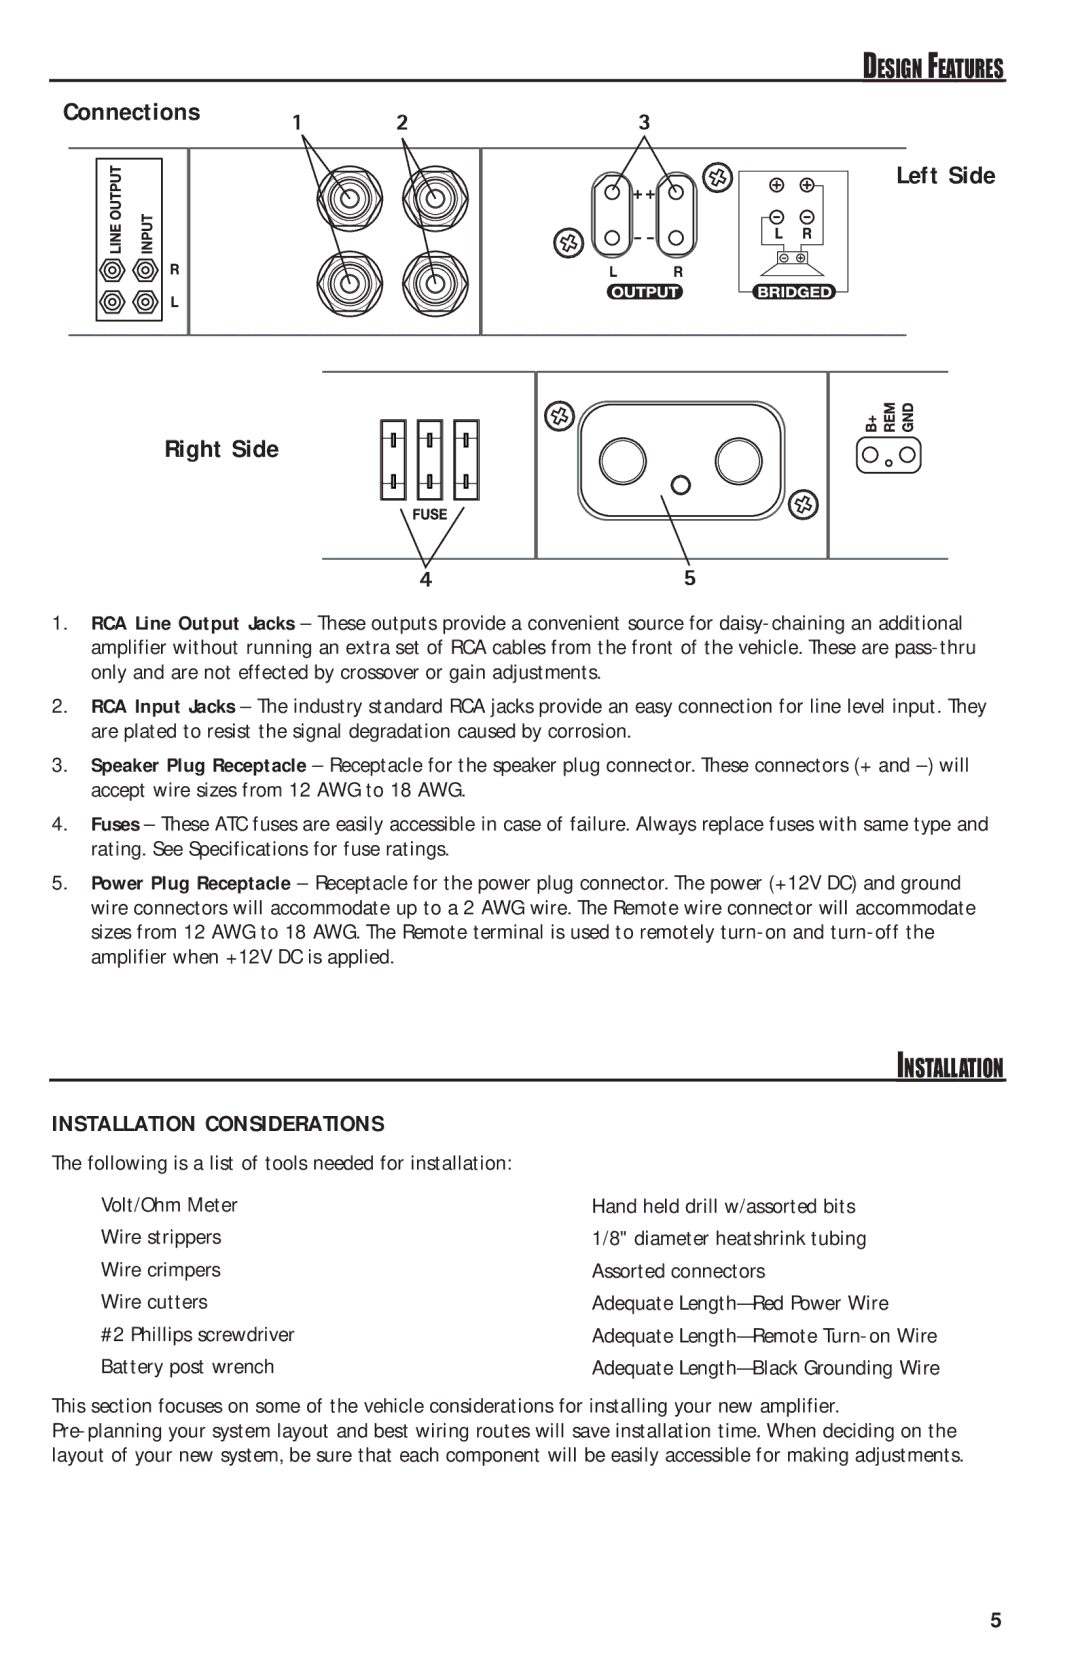
Connections
Left Side
Right Side
1.RCA Line Output Jacks – These outputs provide a convenient source for
2.RCA Input Jacks – The industry standard RCA jacks provide an easy connection for line level input. They are plated to resist the signal degradation caused by corrosion.
3.Speaker Plug Receptacle – Receptacle for the speaker plug connector. These connectors (+ and
4.Fuses – These ATC fuses are easily accessible in case of failure. Always replace fuses with same type and rating. See Specifications for fuse ratings.
5.Power Plug Receptacle – Receptacle for the power plug connector. The power (+12V DC) and ground wire connectors will accommodate up to a 2 AWG wire. The Remote wire connector will accommodate sizes from 12 AWG to 18 AWG. The Remote terminal is used to remotely
INSTALLATION
INSTALLATION CONSIDERATIONS
The following is a list of tools needed for installation:
Volt/Ohm Meter
Wire strippers
Wire crimpers
Wire cutters
#2 Phillips screwdriver
Battery post wrench
Hand held drill w/assorted bits
1/8" diameter heatshrink tubing
Assorted connectors
Adequate
Adequate
Adequate
This section focuses on some of the vehicle considerations for installing your new amplifier.
5