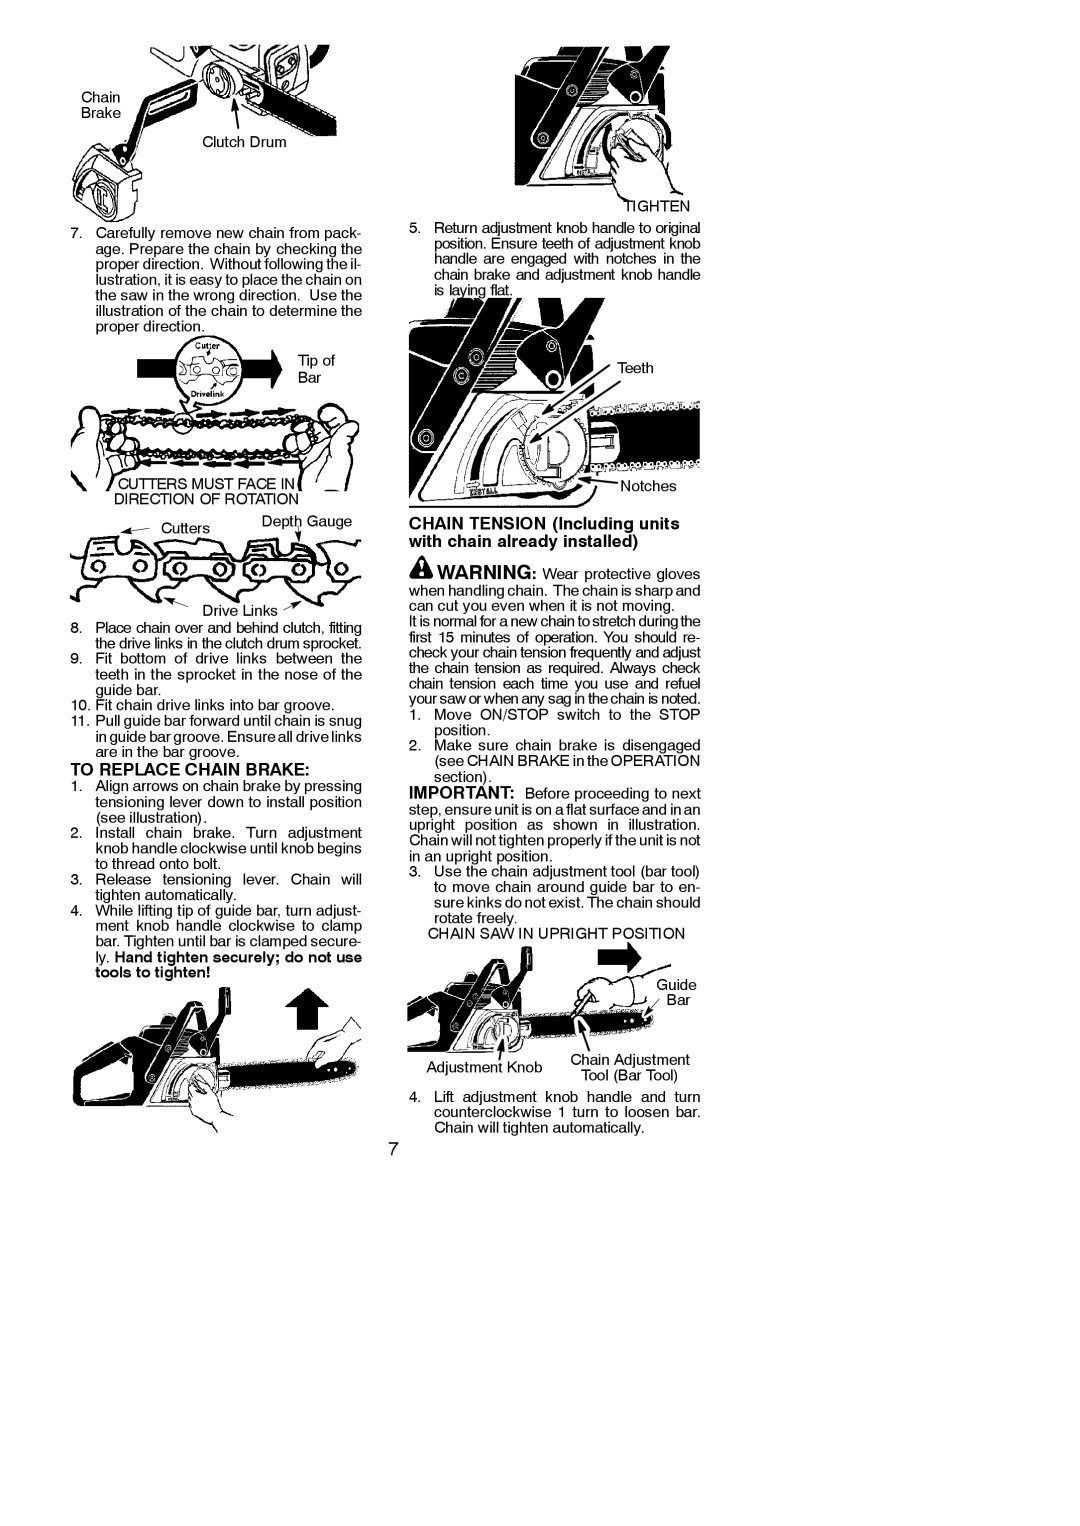
Chain
Brake
Clutch Drum
7.Carefully remove new chain from pack- age. Prepare the chain by checking the proper direction. Without following the il- lustration, it is easy to place the chain on the saw in the wrong direction. Use the illustration of the chain to determine the proper direction.
Tip of
Bar
CUTTERS MUST FACE IN
DIRECTION OF ROTATION
Cutters | Depth Gauge |
|
Drive Links
8.Place chain over and behind clutch, fitting the drive links in the clutch drum sprocket.
9.Fit bottom of drive links between the teeth in the sprocket in the nose of the guide bar.
10.Fit chain drive links into bar groove.
11.Pull guide bar forward until chain is snug in guide bar groove. Ensure all drive links are in the bar groove.
TO REPLACE CHAIN BRAKE:
1.Align arrows on chain brake by pressing tensioning lever down to install position (see illustration).
2.Install chain brake. Turn adjustment knob handle clockwise until knob begins to thread onto bolt.
3.Release tensioning lever. Chain will tighten automatically.
4.While lifting tip of guide bar, turn adjust- ment knob handle clockwise to clamp bar. Tighten until bar is clamped secure- ly. Hand tighten securely; do not use tools to tighten!
TIGHTEN
5.Return adjustment knob handle to original position. Ensure teeth of adjustment knob handle are engaged with notches in the chain brake and adjustment knob handle is laying flat.
Teeth
![]() Notches
Notches
CHAIN TENSION (Including units with chain already installed)
![]() WARNING: Wear protective gloves when handling chain. The chain is sharp and can cut you even when it is not moving.
WARNING: Wear protective gloves when handling chain. The chain is sharp and can cut you even when it is not moving.
It is normal for a new chain to stretch during the first 15 minutes of operation. You should re- check your chain tension frequently and adjust the chain tension as required. Always check chain tension each time you use and refuel your saw or when any sag in the chain is noted.
1.Move ON/STOP switch to the STOP position.
2.Make sure chain brake is disengaged (see CHAIN BRAKE in the OPERATION section).
IMPORTANT: Before proceeding to next step, ensure unit is on a flat surface and in an upright position as shown in illustration. Chain will not tighten properly if the unit is not in an upright position.
3.Use the chain adjustment tool (bar tool) to move chain around guide bar to en- sure kinks do not exist. The chain should
rotate freely.
CHAIN SAW IN UPRIGHT POSITION
Guide
Bar
Adjustment Knob | Chain Adjustment | |
Tool (Bar Tool) | ||
|
4.Lift adjustment knob handle and turn counterclockwise 1 turn to loosen bar. Chain will tighten automatically.
7