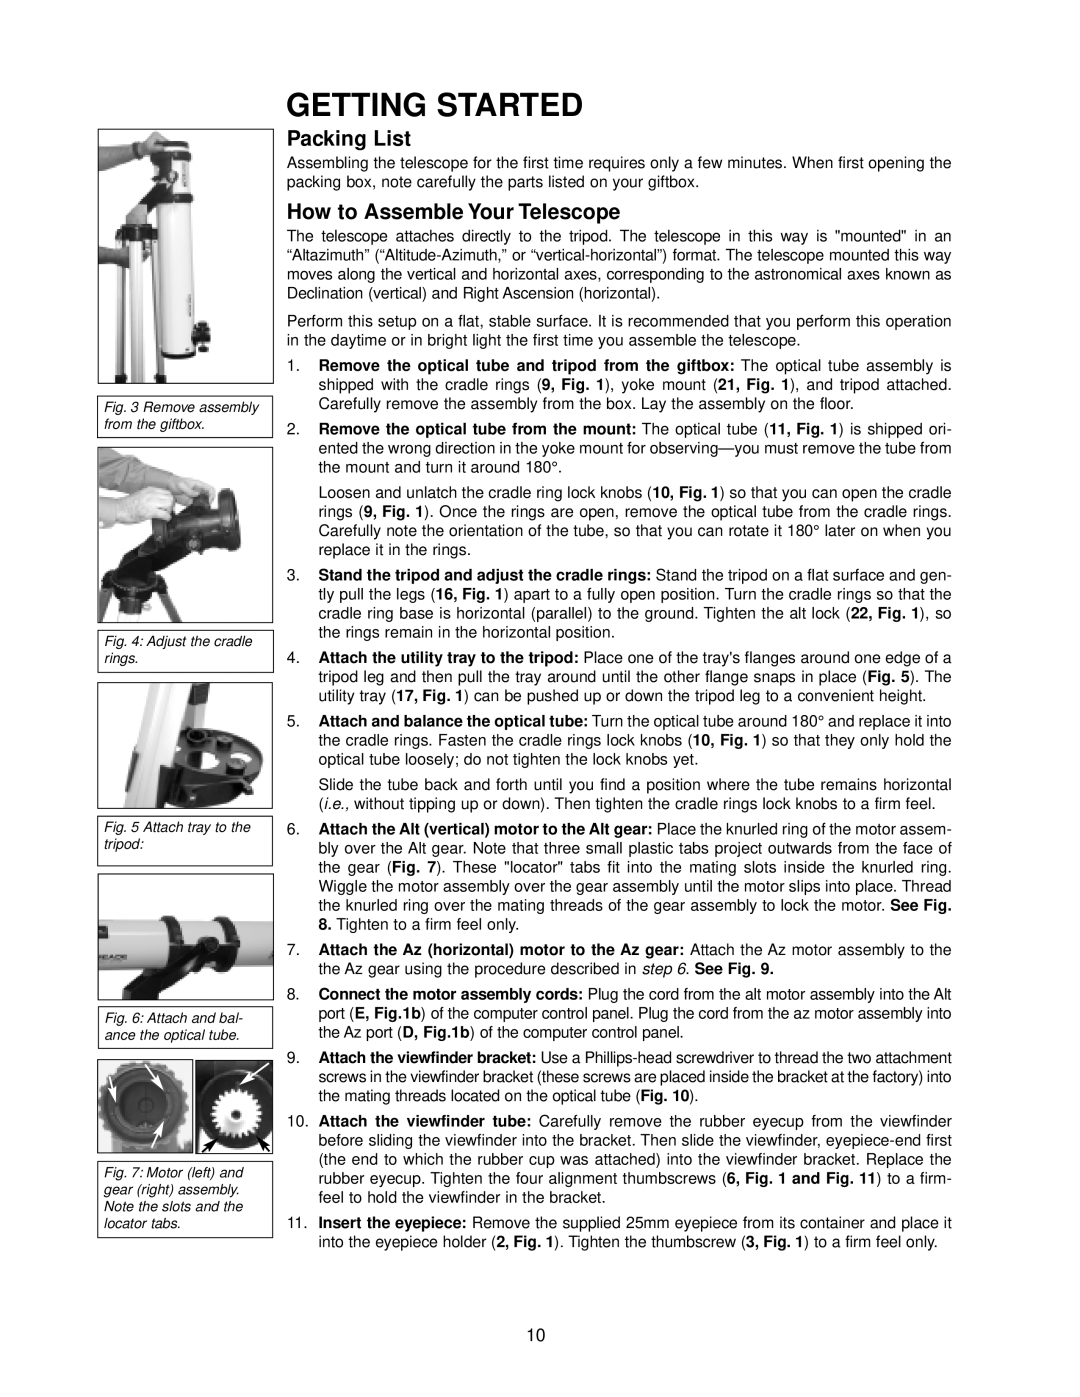
Fig. 3 Remove assembly from the giftbox.

Fig. 4: Adjust the cradle rings.

Fig. 5 Attach tray to the tripod:

Fig. 6: Attach and bal- ance the optical tube.

Fig. 7: Motor (left) and gear (right) assembly. Note the slots and the locator tabs.

GETTING STARTED

Packing List

Assembling the telescope for the first time requires only a few minutes. When first opening the packing box, note carefully the parts listed on your giftbox.

How to Assemble Your Telescope

The telescope attaches directly to the tripod. The telescope in this way is "mounted" in an “Altazimuth” (“Altitude-Azimuth,” or “vertical-horizontal”) format. The telescope mounted this way moves along the vertical and horizontal axes, corresponding to the astronomical axes known as Declination (vertical) and Right Ascension (horizontal).

Perform this setup on a flat, stable surface. It is recommended that you perform this operation in the daytime or in bright light the first time you assemble the telescope.

1.Remove the optical tube and tripod from the giftbox: The optical tube assembly is shipped with the cradle rings (9, Fig. 1), yoke mount (21, Fig. 1), and tripod attached. Carefully remove the assembly from the box. Lay the assembly on the floor.

2.Remove the optical tube from the mount: The optical tube (11, Fig. 1) is shipped ori- ented the wrong direction in the yoke mount for observing— you must remove the tube from the mount and turn it around 180°.

Loosen and unlatch the cradle ring lock knobs (10, Fig. 1) so that you can open the cradle rings (9, Fig. 1). Once the rings are open, remove the optical tube from the cradle rings. Carefully note the orientation of the tube, so that you can rotate it 180° later on when you replace it in the rings.

3.Stand the tripod and adjust the cradle rings: Stand the tripod on a flat surface and gen- tly pull the legs (16, Fig. 1) apart to a fully open position. Turn the cradle rings so that the cradle ring base is horizontal (parallel) to the ground. Tighten the alt lock (22, Fig. 1), so the rings remain in the horizontal position.

4.Attach the utility tray to the tripod: Place one of the tray's flanges around one edge of a tripod leg and then pull the tray around until the other flange snaps in place (Fig. 5). The utility tray (17, Fig. 1) can be pushed up or down the tripod leg to a convenient height.

5.Attach and balance the optical tube: Turn the optical tube around 180° and replace it into the cradle rings. Fasten the cradle rings lock knobs (10, Fig. 1) so that they only hold the optical tube loosely; do not tighten the lock knobs yet.

Slide the tube back and forth until you find a position where the tube remains horizontal (i.e., without tipping up or down). Then tighten the cradle rings lock knobs to a firm feel.

6.Attach the Alt (vertical) motor to the Alt gear: Place the knurled ring of the motor assem- bly over the Alt gear. Note that three small plastic tabs project outwards from the face of the gear (Fig. 7). These "locator" tabs fit into the mating slots inside the knurled ring. Wiggle the motor assembly over the gear assembly until the motor slips into place. Thread the knurled ring over the mating threads of the gear assembly to lock the motor. See Fig. 8. Tighten to a firm feel only.

7.Attach the Az (horizontal) motor to the Az gear: Attach the Az motor assembly to the the Az gear using the procedure described in step 6. See Fig. 9.

8.Connect the motor assembly cords: Plug the cord from the alt motor assembly into the Alt port (E, Fig.1b) of the computer control panel. Plug the cord from the az motor assembly into the Az port (D, Fig.1b) of the computer control panel.

9.Attach the viewfinder bracket: Use a Phillips-head screwdriver to thread the two attachment screws in the viewfinder bracket (these screws are placed inside the bracket at the factory) into the mating threads located on the optical tube (Fig. 10).

10.Attach the viewfinder tube: Carefully remove the rubber eyecup from the viewfinder before sliding the viewfinder into the bracket. Then slide the viewfinder, eyepiece-end first (the end to which the rubber cup was attached) into the viewfinder bracket. Replace the rubber eyecup. Tighten the four alignment thumbscrews (6, Fig. 1 and Fig. 11) to a firm- feel to hold the viewfinder in the bracket.

11.Insert the eyepiece: Remove the supplied 25mm eyepiece from its container and place it into the eyepiece holder (2, Fig. 1). Tighten the thumbscrew (3, Fig. 1) to a firm feel only.

10

Page 10
Image 10
Meade DS-114AT instruction manual Getting Started, Packing List, How to Assemble Your Telescope

DS-114AT specifications

The Meade DS-114AT is a popular entry-level telescope that combines user-friendliness with impressive optical performance, making it an excellent choice for budding astronomers and hobbyists. With its robust design and advanced features, the DS-114AT offers a gateway to the wonders of the cosmos, whether you’re observing the craters of the Moon, the rings of Saturn, or distant star clusters.

One of the standout features of the Meade DS-114AT is its 114 mm (4.5-inch) diameter aperture. This sizable opening allows for greater light-gathering capability, resulting in brighter images and improved visibility of celestial objects. The telescope is equipped with a 900 mm focal length, providing a good balance that allows for both wide-field viewing and detailed observations of planets and lunar features.

The DS-114AT utilizes high-quality optics featuring a parabolic mirror design. This design minimizes spherical aberration, ensuring crisp images of astronomical targets. The telescope is also equipped with a fully coated optical system that enhances light transmission and reduces glare, providing clearer images compared to other telescopes in its class.

Portability is another significant advantage of the Meade DS-114AT. Its lightweight and compact design allows for easy transportation, making it ideal for backyard stargazing or trips to darker skies. The telescope comes with a sturdy yet lightweight altazimuth mount that facilitates smooth movement, allowing users to easily locate and track celestial objects.

The Meade DS-114AT also features a user-friendly electronic control system, including an automated GoTo functionality that aids in navigating the night sky. With a simple push of a button, users can precisely locate thousands of celestial objects, making the telescope accessible for beginners who may not yet be familiar with star maps and constellations.

Additionally, the telescope includes two eyepieces, a 9 mm and a 25 mm, allowing for various magnifications to suit different viewing preferences. The optical finder scope aids in quick alignment, ensuring a hassle-free observing experience.

In summary, the Meade DS-114AT stands out as a versatile, user-friendly telescope that provides excellent optical performance and advanced features. Its combination of a sizable aperture, high-quality optics, portability, and automated features make it an ideal choice for those looking to explore the universe, whether for casual observations or more serious astronomical pursuits. With this telescope, the night sky is truly within reach.