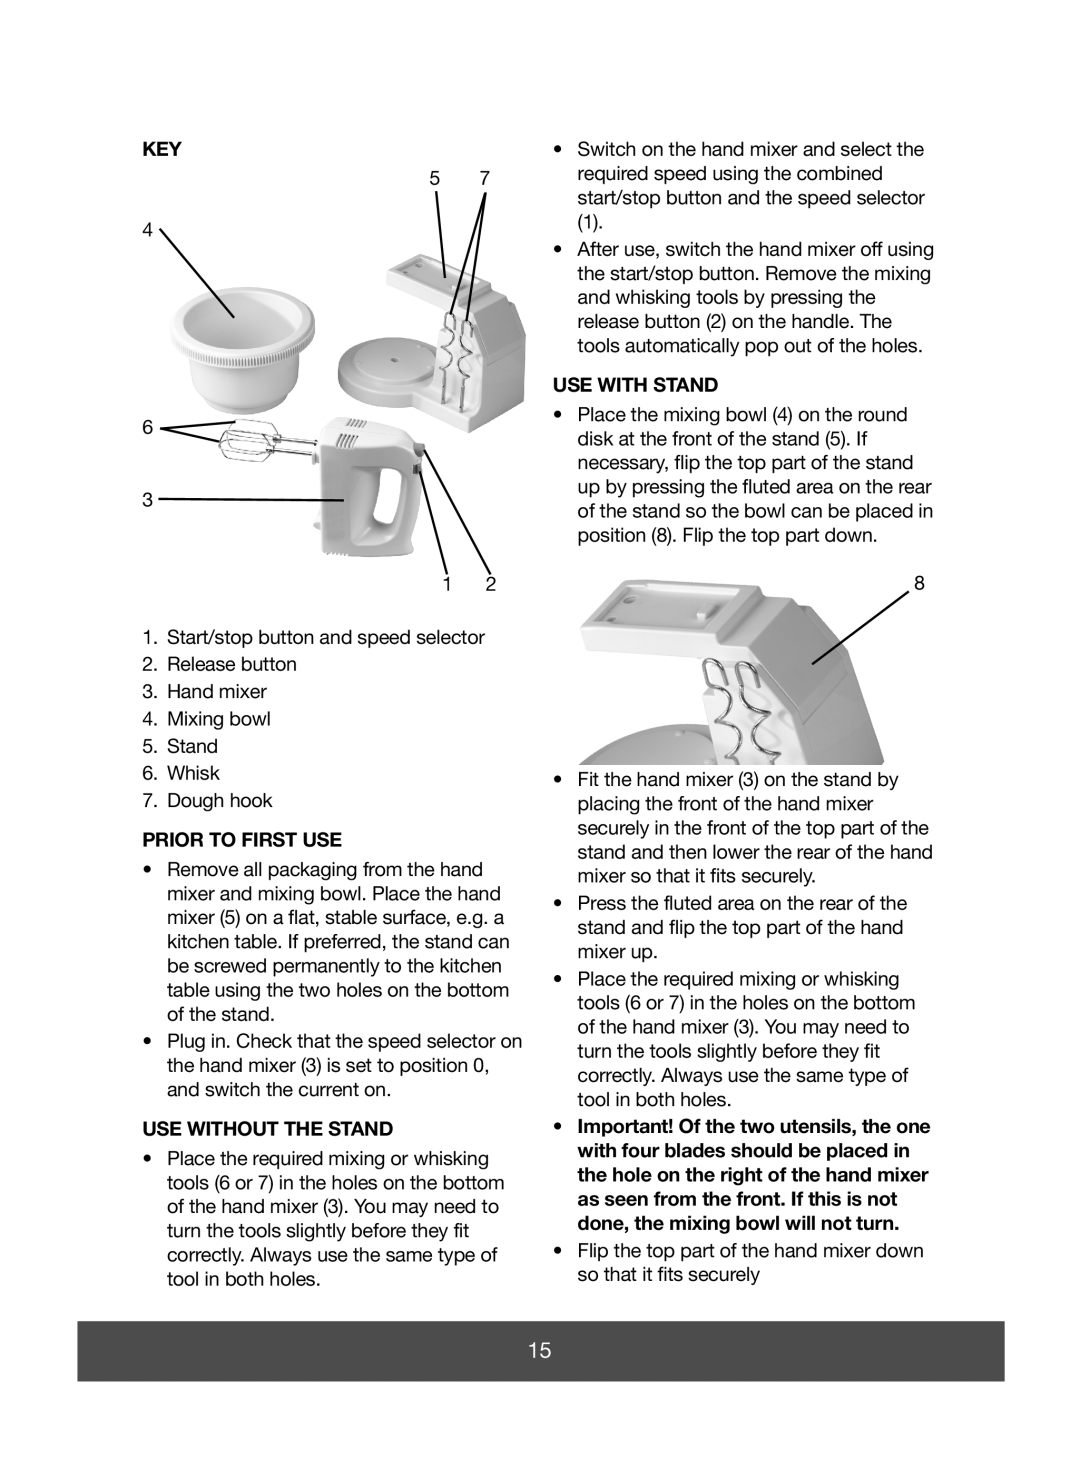
KEY
5 7
4
6 ![]()
3 ![]()
1 2
1.Start/stop button and speed selector
2.Release button
3.Hand mixer
4.Mixing bowl
5.Stand
6.Whisk
7.Dough hook
PRIOR TO FIRST USE
•Remove all packaging from the hand mixer and mixing bowl. Place the hand mixer (5) on a flat, stable surface, e.g. a kitchen table. If preferred, the stand can be screwed permanently to the kitchen table using the two holes on the bottom of the stand.
•Plug in. Check that the speed selector on the hand mixer (3) is set to position 0, and switch the current on.
USE WITHOUT THE STAND
•Place the required mixing or whisking tools (6 or 7) in the holes on the bottom of the hand mixer (3). You may need to turn the tools slightly before they fit correctly. Always use the same type of tool in both holes.
•Switch on the hand mixer and select the required speed using the combined start/stop button and the speed selector
(1).
•After use, switch the hand mixer off using the start/stop button. Remove the mixing and whisking tools by pressing the release button (2) on the handle. The tools automatically pop out of the holes.
USE WITH STAND
•Place the mixing bowl (4) on the round disk at the front of the stand (5). If necessary, flip the top part of the stand up by pressing the fluted area on the rear of the stand so the bowl can be placed in position (8). Flip the top part down.
8
•Fit the hand mixer (3) on the stand by placing the front of the hand mixer securely in the front of the top part of the stand and then lower the rear of the hand mixer so that it fits securely.
•Press the fluted area on the rear of the stand and flip the top part of the hand mixer up.
•Place the required mixing or whisking tools (6 or 7) in the holes on the bottom of the hand mixer (3). You may need to turn the tools slightly before they fit correctly. Always use the same type of tool in both holes.
•Important! Of the two utensils, the one with four blades should be placed in the hole on the right of the hand mixer as seen from the front. If this is not done, the mixing bowl will not turn.
•Flip the top part of the hand mixer down so that it fits securely
15
