Steam ironing
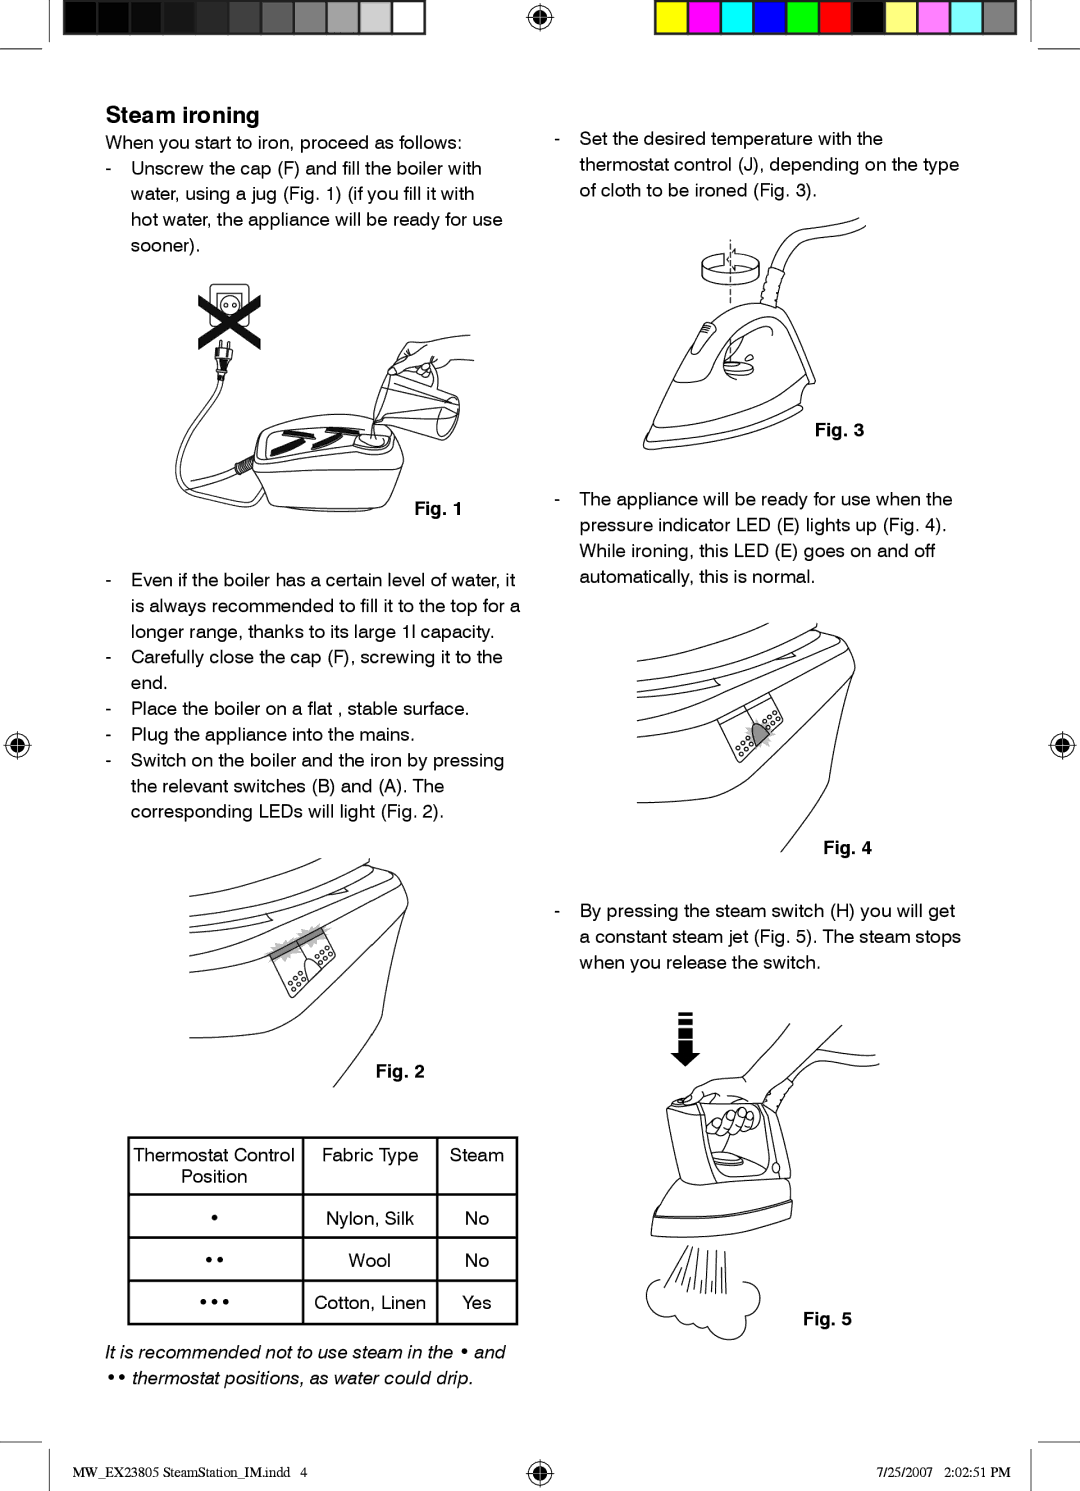
When you start to iron, proceed as follows: | - Set the desired temperature with the |
- Unscrew the cap (F) and fill the boiler with | thermostat control (J), depending on the type |
water, using a jug (Fig. 1) (if you fill it with | of cloth to be ironed (Fig. 3). |
hot water, the appliance will be ready for use |
|
sooner). |
|
Fig. 1
-Even if the boiler has a certain level of water, it is always recommended to fill it to the top for a longer range, thanks to its large 1l capacity.
-Carefully close the cap (F), screwing it to the end.
-Place the boiler on a flat , stable surface.
-Plug the appliance into the mains.
-Switch on the boiler and the iron by pressing the relevant switches (B) and (A). The corresponding LEDs will light (Fig. 2).
Fig. 3
-The appliance will be ready for use when the pressure indicator LED (E) lights up (Fig. 4). While ironing, this LED (E) goes on and off automatically, this is normal.
Fig. 4
-By pressing the steam switch (H) you will get a constant steam jet (Fig. 5). The steam stops when you release the switch.
Fig. 2
Thermostat Control | Fabric Type | Steam |
|
Position |
|
|
|
|
|
|
|
• | Nylon, Silk | No |
|
|
|
|
|
•• | Wool | No |
|
|
|
|
|
••• | Cotton, Linen | Yes | Fig. 5 |
|
|
| |
|
|
|
It is recommended not to use steam in the • and •• thermostat positions, as water could drip.
MW_EX23805 SteamStation_IM.indd 4
7/25/2007 2:02:51 PM
