Manuals
/
Memorex
/
TV and Video
/
CRT Television
Memorex
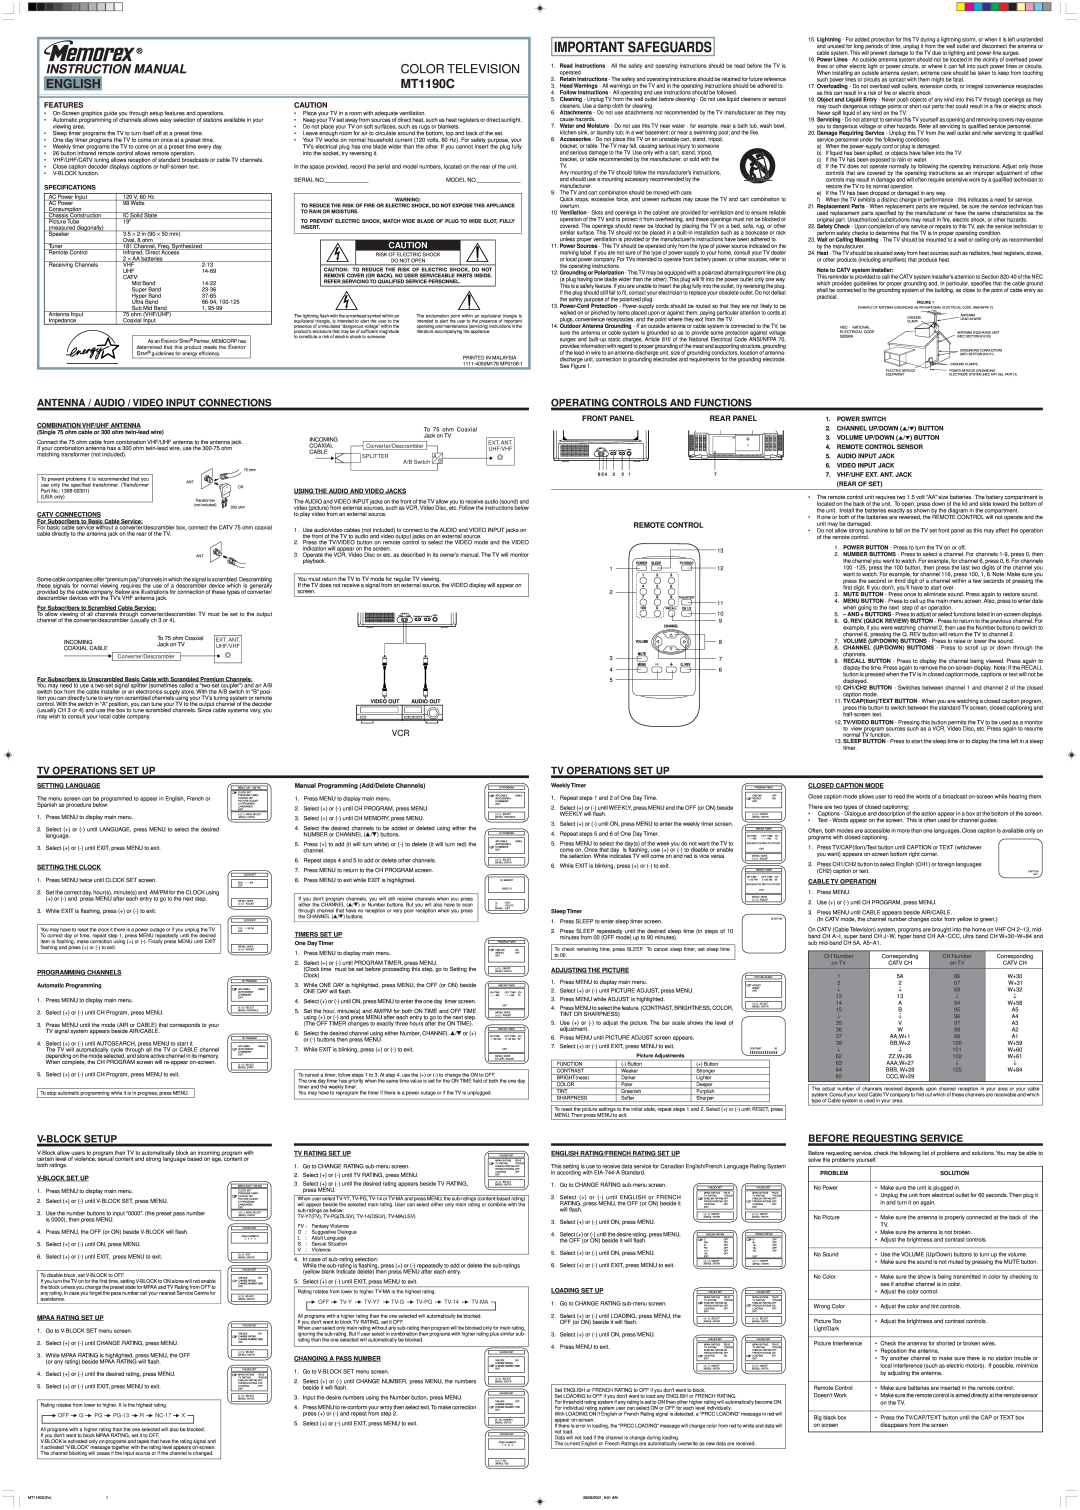
MT1190C
instruction manual
Important Safeguards, Color Television, English, V-Block Setup
Models:
MT1190C
1
1
1
Download
1 pages
1.19 Kb
1
Tv Operations Set Up
Page 1
Image 1
Page 1
Page 1
Page 1
Image 1
Page 1
Page 1
Contents
TV OPERATIONS SET UP
IMPORTANT SAFEGUARDS
V-BLOCK SETUP
BEFORE REQUESTING SERVICE
Top
Page
Image
Contents