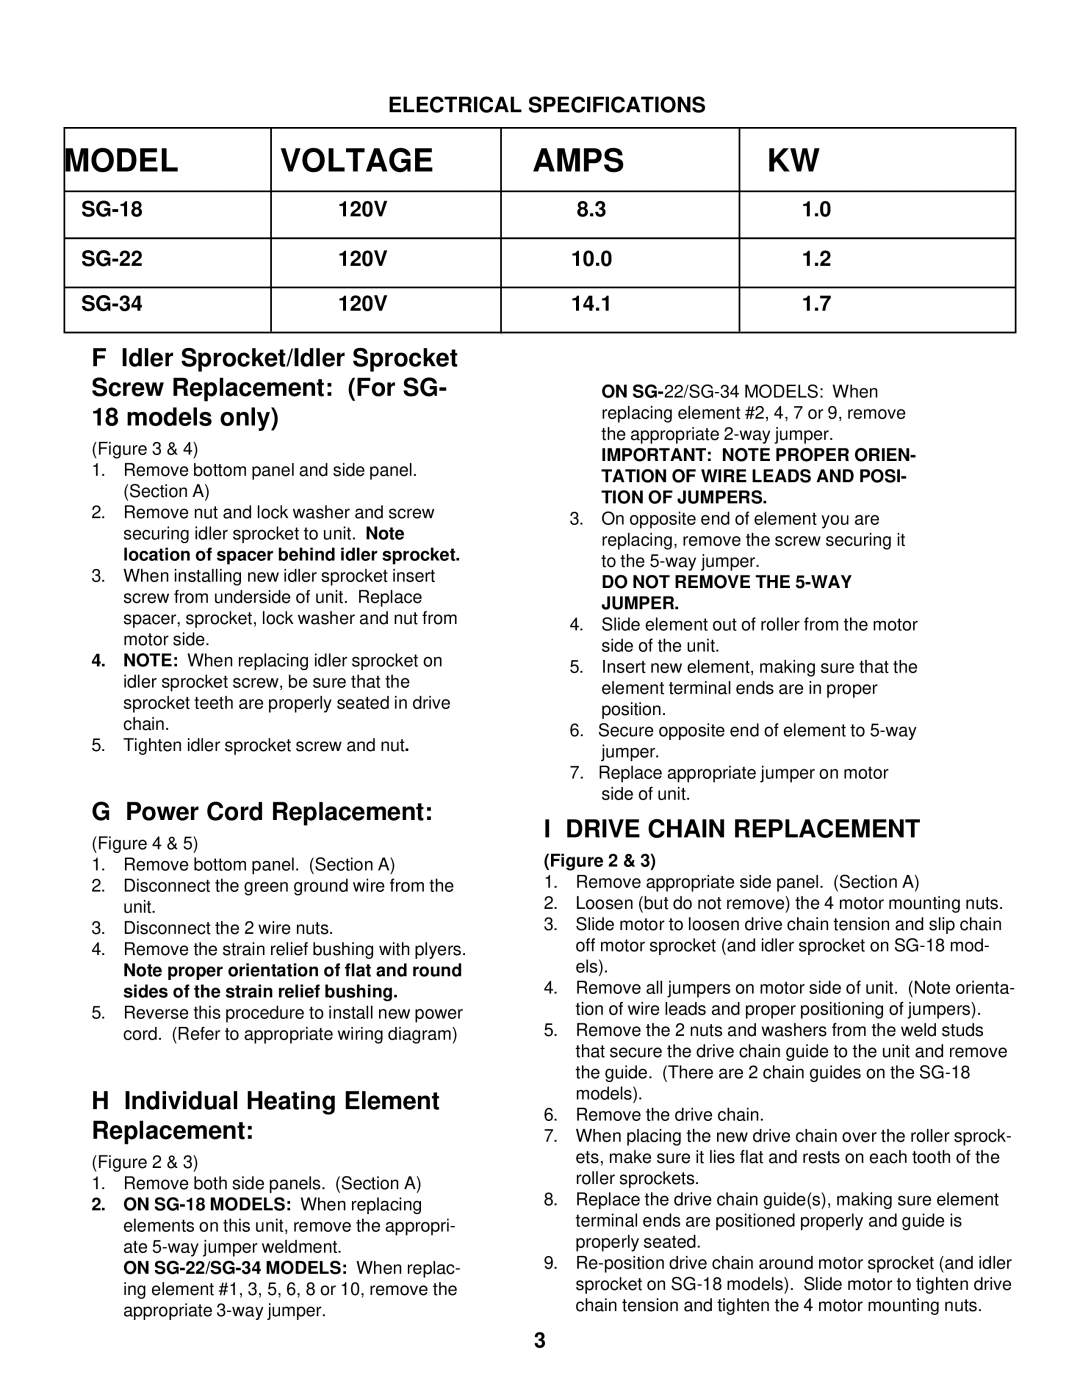
ELECTRICAL SPECIFICATIONS

MODEL

VOLTAGE

AMPS

KW


SG-18

120V

8.3

1.0


SG-22

120V

10.0

1.2


SG-34

120V

14.1

1.7


FIdler Sprocket/Idler Sprocket Screw Replacement: (For SG- 18 models only)

(Figure 3 & 4)

1.Remove bottom panel and side panel. (Section A)

2.Remove nut and lock washer and screw securing idler sprocket to unit. Note location of spacer behind idler sprocket.

3.When installing new idler sprocket insert screw from underside of unit. Replace spacer, sprocket, lock washer and nut from motor side.

4.NOTE: When replacing idler sprocket on idler sprocket screw, be sure that the sprocket teeth are properly seated in drive chain.

5.Tighten idler sprocket screw and nut.

G Power Cord Replacement:

(Figure 4 & 5)

1.Remove bottom panel. (Section A)

2.Disconnect the green ground wire from the unit.

3.Disconnect the 2 wire nuts.

4.Remove the strain relief bushing with plyers.

Note proper orientation of flat and round sides of the strain relief bushing.

5.Reverse this procedure to install new power cord. (Refer to appropriate wiring diagram)

HIndividual Heating Element Replacement:

(Figure 2 & 3)

1.Remove both side panels. (Section A)

2.ON SG-18 MODELS: When replacing elements on this unit, remove the appropri- ate 5-way jumper weldment.

ON SG-22/SG-34 MODELS: When replac- ing element #1, 3, 5, 6, 8 or 10, remove the appropriate 3-way jumper.

ON SG-22/SG-34 MODELS: When replacing element #2, 4, 7 or 9, remove the appropriate 2-way jumper.

IMPORTANT: NOTE PROPER ORIEN-

TATION OF WIRE LEADS AND POSI-

TION OF JUMPERS.

3.On opposite end of element you are replacing, remove the screw securing it to the 5-way jumper.

DO NOT REMOVE THE 5-WAY JUMPER.

4.Slide element out of roller from the motor side of the unit.

5.Insert new element, making sure that the element terminal ends are in proper position.

6.Secure opposite end of element to 5-way jumper.

7.Replace appropriate jumper on motor side of unit.

I DRIVE CHAIN REPLACEMENT

(Figure 2 & 3)

1.Remove appropriate side panel. (Section A)

2.Loosen (but do not remove) the 4 motor mounting nuts.

3.Slide motor to loosen drive chain tension and slip chain off motor sprocket (and idler sprocket on SG-18 mod- els).

4.Remove all jumpers on motor side of unit. (Note orienta- tion of wire leads and proper positioning of jumpers).

5.Remove the 2 nuts and washers from the weld studs that secure the drive chain guide to the unit and remove the guide. (There are 2 chain guides on the SG-18 models).

6.Remove the drive chain.

7.When placing the new drive chain over the roller sprock- ets, make sure it lies flat and rests on each tooth of the roller sprockets.

8.Replace the drive chain guide(s), making sure element terminal ends are positioned properly and guide is properly seated.

9.Re-position drive chain around motor sprocket (and idler sprocket on SG-18 models). Slide motor to tighten drive chain tension and tighten the 4 motor mounting nuts.

3

Page 3
Image 3
Merco Savory SG-22 service manual Power Cord Replacement, Individual Heating Element Replacement

SG-22 specifications

The Merco Savory SG-22 is an innovative cooking and holding solution that is revolutionizing the foodservice industry. Designed with the commercial kitchen in mind, the SG-22 combines advanced technology with user-friendly features to enhance food quality and operational efficiency.

One of the standout features of the SG-22 is its precise temperature control. This unit utilizes advanced thermal technology to maintain consistent cooking temperatures, ensuring that food is cooked evenly and retains optimal flavor and texture. The digital temperature display allows for accurate monitoring, providing chefs the confidence to deliver perfectly cooked dishes every time.

The SG-22 incorporates patented airflow technology that promotes uniform heat distribution throughout the cooking chamber. This innovation not only enhances cooking efficiency but also minimizes the risk of overcooking or undercooking. As a result, the SG-22 is ideal for a wide range of applications, from roasting meats to baking pastries, making it a versatile addition to any kitchen.

Another noteworthy characteristic of the Merco Savory SG-22 is its robust construction. Built with high-quality materials, the unit is designed to withstand the demands of a busy kitchen environment while ensuring longevity. The stainless-steel exterior is easy to clean and maintain, making it a practical choice for foodservice operators.

The SG-22 is equipped with user-friendly controls that simplify operation. The intuitive interface allows chefs to easily program cooking times and temperatures, streamlining the cooking process. Additionally, the unit features a built-in timer and an automatic shut-off function to enhance safety and energy efficiency.

For those interested in food safety, the Merco Savory SG-22 is designed to adhere to the highest industry standards. The unit is capable of holding food at safe temperatures without drying it out, ensuring that meals remain fresh and delicious. Its holding capabilities make it an essential tool in maintaining food quality during peak service hours.

In summary, the Merco Savory SG-22 is a high-performance cooking and holding unit that boasts precise temperature control, patented airflow technology, durable construction, and user-friendly operation. These features make it an invaluable asset for chefs looking to optimize their culinary creations while ensuring safety and efficiency in the kitchen. Whether for casual dining or high-volume service, the SG-22 is designed to meet the diverse needs of the modern foodservice landscape.