99-7603 specifications
Metra Electronics 99-7603 is a versatile and innovative dash kit designed to facilitate the installation of aftermarket car stereos in a variety of vehicle makes and models. Ideal for those looking to enhance their car audio experience, the 99-7603 kit presents a seamless integration of modern technology and aesthetic appeal, making it a popular choice for car enthusiasts and casual users alike.One of the main features of the Metra 99-7603 is its compatibility with a wide range of vehicles. This adaptability enables users to install double-DIN or single-DIN head units, ensuring that various aftermarket stereo options can be accommodated. The kit is designed to match the original factory appearance of the vehicle, ensuring that the installation looks clean and professional.
The construction of the Metra 99-7603 is noteworthy. Made from high-quality materials, it is engineered to withstand the challenges that come with automotive environments, including heat and vibration. The precision-fit design helps to ensure that the kit holds the stereo securely in place, minimizing rattles and ensuring a tight fit that enhances sound quality.
Another significant characteristic of the 99-7603 is the included wiring harness, which is crucial for a smooth and hassle-free installation. The harness allows for easy connections to the factory stereo, eliminating the need for cutting or splicing wires. This makes the installation process significantly easier, even for those with limited experience in car audio systems.
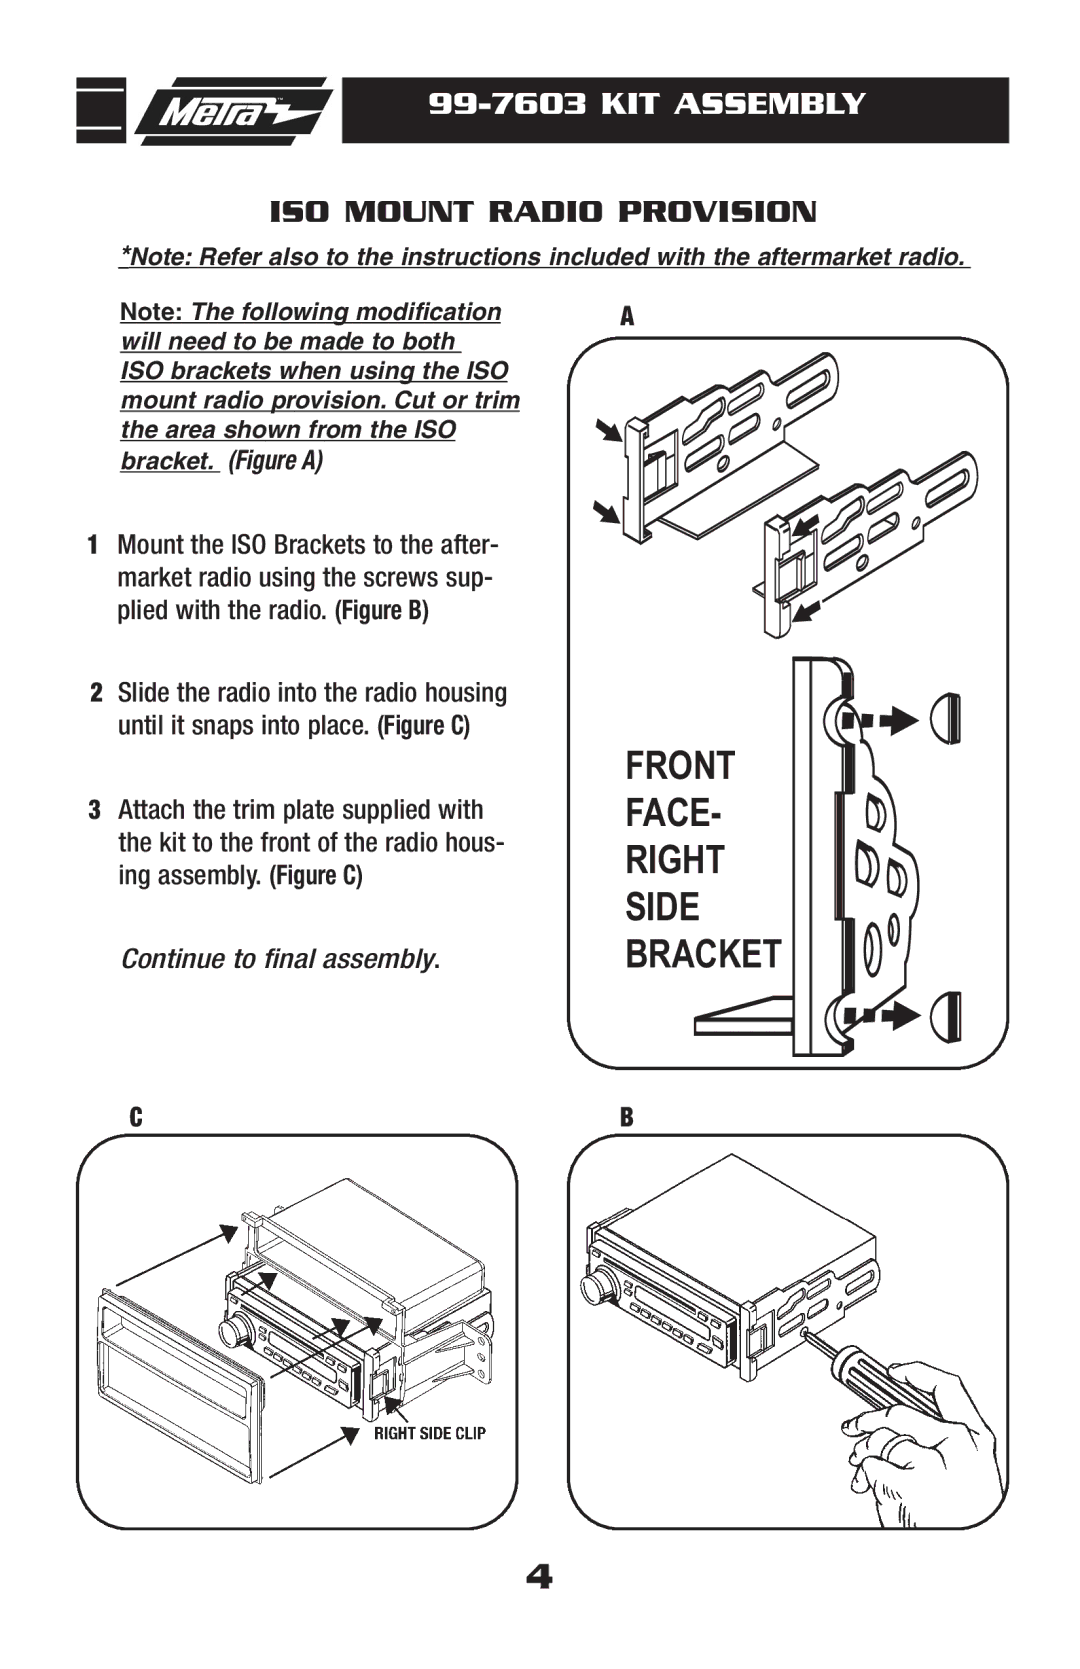
In addition to its functional benefits, the Metra 99-7603 also incorporates advanced technologies designed to enhance user experience. The ISO mount design provides flexibility in how the stereo is installed, allowing for customization based on the user's needs. Moreover, the kit typically comes with necessary accessories, such as climate control and factory features integration, ensuring that no vital functions are lost during the process.
Overall, the Metra Electronics 99-7603 dash kit stands out in the market due to its combination of durability, compatibility, and user-friendly design. Whether upgrading a vehicle's audio system or replacing a worn-out factory unit, this dash kit provides a reliable solution that balances performance with aesthetics. Its thoughtful engineering and high-quality construction make it a must-have for anyone looking to elevate their driving experience with superior audio quality.