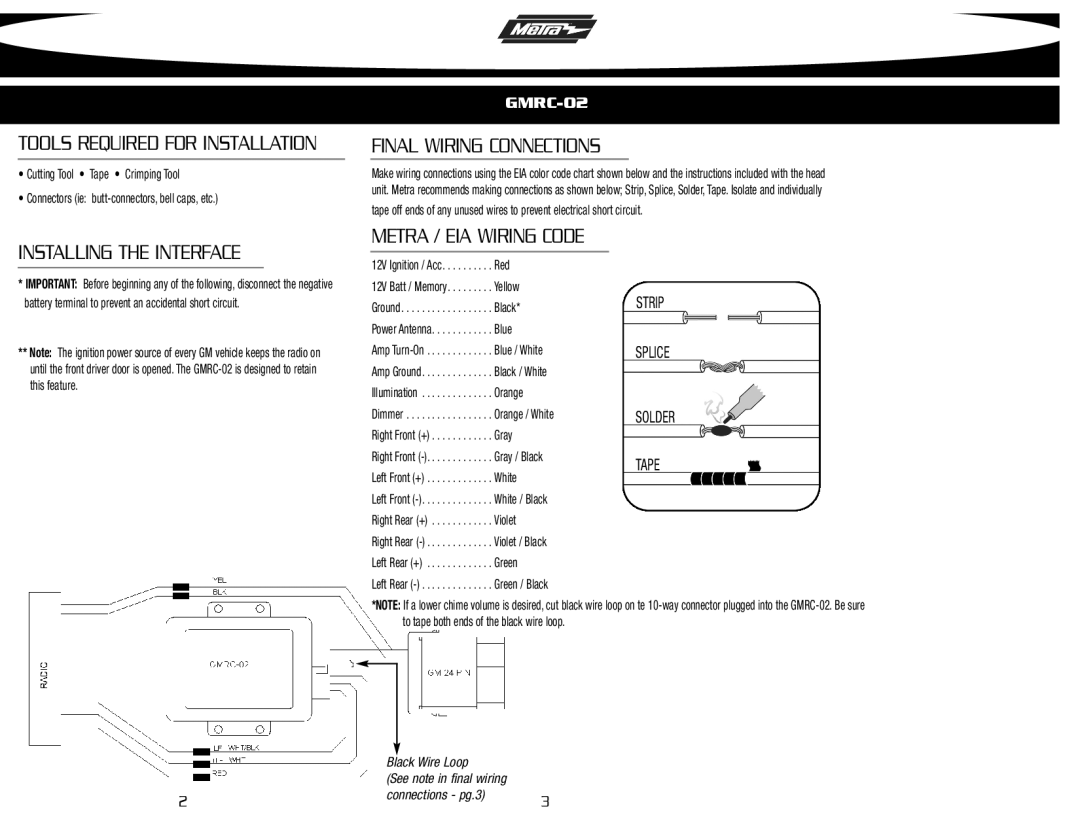
GMRC-02 specifications
Metra Electronics GMRC-02 is a sophisticated interface designed to facilitate the integration of aftermarket car stereos into select General Motors vehicles. This crucial interface allows you to enhance your vehicle’s audio system while preserving essential functionalities, ensuring a smoother transition from factory settings to upgraded options.One of the primary features of the GMRC-02 is its ability to retain the factory-installed OnStar system. OnStar is an advanced communication system that provides safety, security, and navigation features. With the GMRC-02, users can enjoy the benefits of modern audio systems without losing the integrated functionality of OnStar. This is a critical feature for those who rely on these services for emergency assistance or navigation aid.
In addition to OnStar retention, the GMRC-02 also keeps the door chimes and warning chimes operational. This is particularly important as many aftermarket radios do not inherently support these features. The interface allows users to maintain the auditory notifications vital for vehicle operation, ensuring a seamless driving experience.
The GMRC-02 is equipped with high-quality connectors and wiring, making installation straightforward. The harness is designed to plug directly into the factory wiring harness, eliminating the need for cutting or splicing wires. This plug-and-play setup is a significant advantage for DIY enthusiasts who may lack advanced automotive electronic skills. Additionally, the interface includes a universal power harness, providing compatibility with a wide range of aftermarket head units.
Another remarkable feature is its ability to provide a 12-volt accessory output, which is crucial for powering aftermarket radios. The GMRC-02 also features a built-in adjustable RCA output, allowing for connection to amplifiers and subwoofers, thus enabling users to customize their audio setup further.
The GMRC-02 is designed to work with various GM vehicles, making it a versatile choice for many users. Its compatibility extends to several models manufactured around the 2000s and beyond, giving users confidence in their choice regardless of their specific vehicle.
In conclusion, the Metra Electronics GMRC-02 interface is a powerful tool for those looking to upgrade their car's audio system while retaining the convenience and safety features of their factory setup. It combines ease of installation, compatibility, and essential functional retention, making it a preferred choice for many automotive enthusiasts.

