
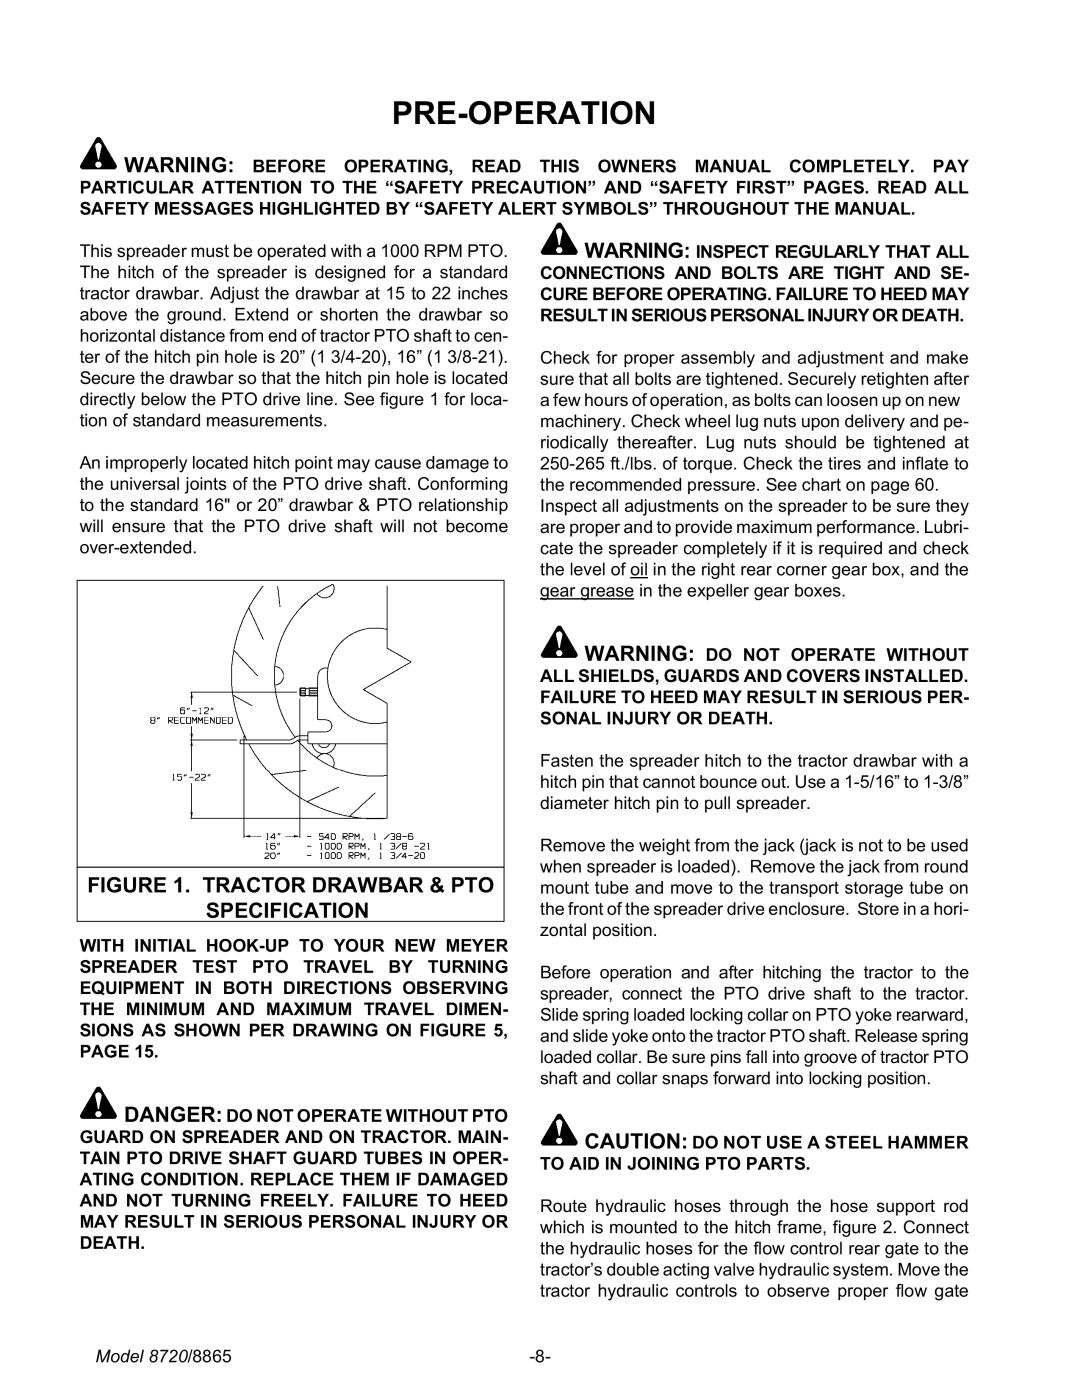
8865, 8720 specifications
Meyer 8720 and 8865 represent two innovative models in Meyer’s lineup of agricultural equipment, specifically designed for efficiency and performance in farming operations. These tractors are built to meet the rigorous demands of modern agriculture, combining advanced technologies with user-friendly features.One of the most notable aspects of both models is their powerful engine performance. The Meyer 8720 is equipped with a robust engine that delivers impressive horsepower, ensuring that it can handle a variety of heavy-duty tasks, from plowing to hauling. The 8865 takes this a step further, offering an even more powerful engine that provides enhanced torque and acceleration, perfect for demanding agricultural applications.
The transmission system in both models is designed for seamless operation. The Meyer 8720 features a precision gearbox that allows for smooth gear changes, enhancing overall driving comfort and efficiency. In the 8865, the advanced transmission offers multiple speed settings, giving operators greater control over their work speed depending on the task at hand.
Both the 8720 and 8865 come with state-of-the-art hydraulic systems that improve implement efficiency. The hydraulic controls are highly responsive, allowing for precise maneuvering and operation of various attachments such as seeders, cultivators, or trailers. This efficiency contributes to improved productivity across a range of farming tasks.
Another standout feature of these tractors is their advanced cab design. The operator's cabin provides excellent visibility and comfort, with ergonomic controls positioned for easy access. Both models feature climate control systems, ensuring that operators can work in comfort regardless of weather conditions. The dashboard includes modern digital displays that provide real-time information on performance metrics, improving situational awareness.
In terms of durability, the Meyer 8720 and 8865 are built with high-quality materials, ensuring longevity even in challenging conditions. Their frames are engineered to withstand heavy loads and rough terrain, which is essential for field work.
Finally, both tractors are compatible with a range of precision farming technologies. This includes GPS guidance systems, which enhance accuracy and reduce overlap during planting or spraying. The integration of technology further contributes to resource efficiency and cost savings in farming operations.
With their combination of powerful performance, advanced features, and reliability, the Meyer 8720 and 8865 are excellent choices for farmers looking to enhance their productivity and operational efficiency.