Model WR11 Owner’s Manual
|
|
|
|
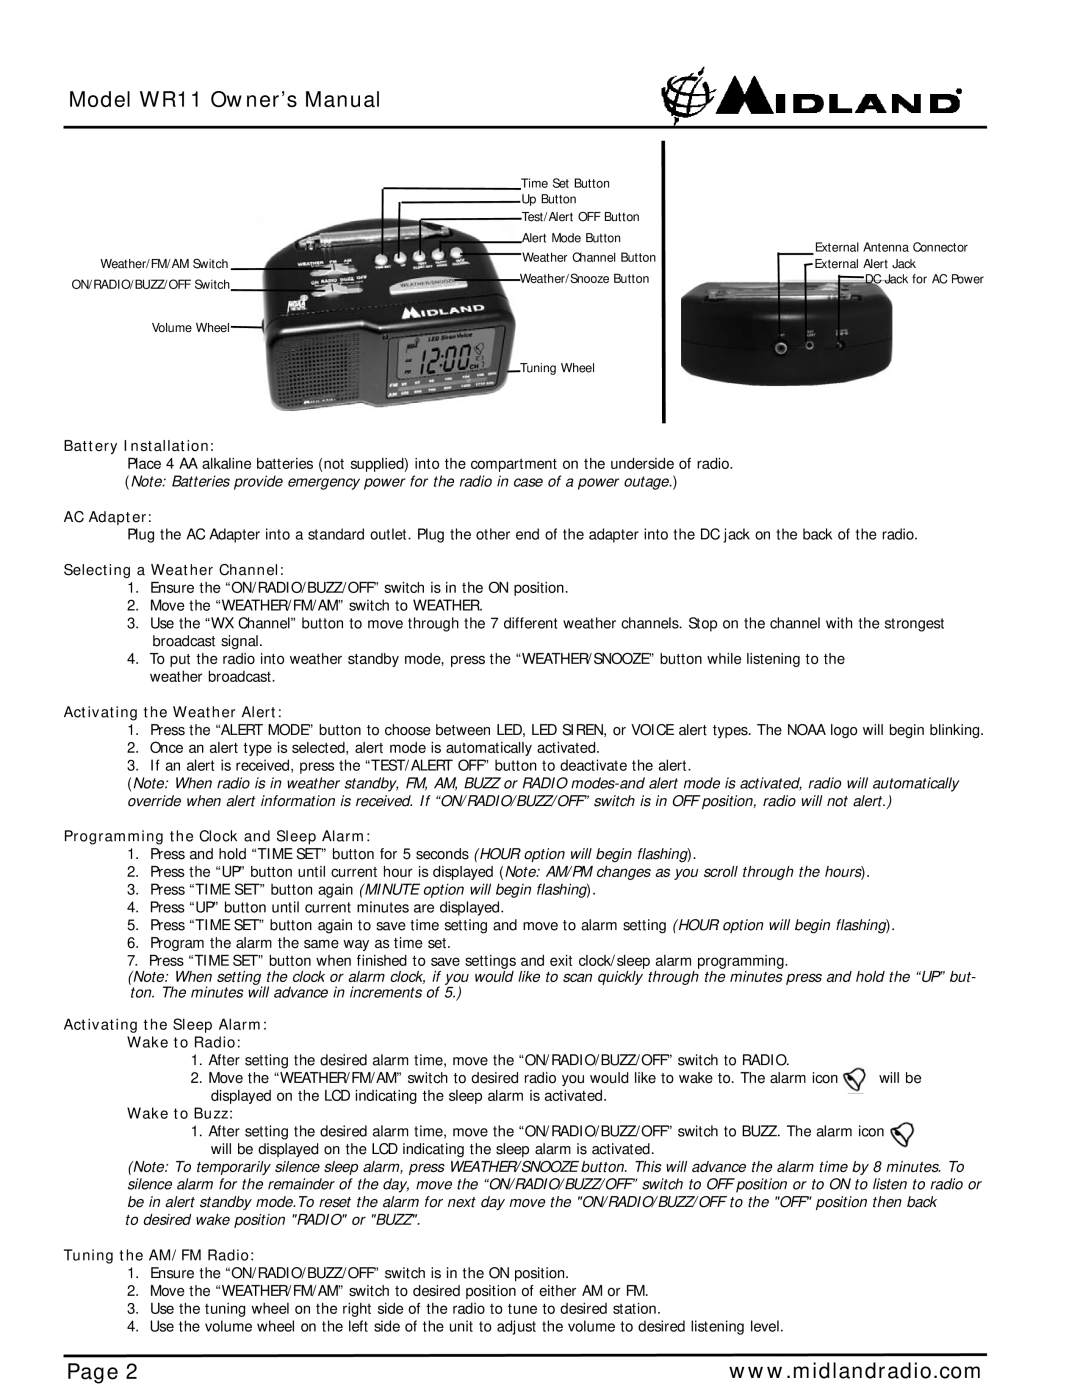
| Time Set Button |
|
| |
|
|
|
|
| Up Button |
|
| |
|
|
|
|
|
| Test/Alert OFF Button |
|
|
|
|
|
|
|
| Alert Mode Button |
| External Antenna Connector |
|
|
|
|
|
| Weather Channel Button |
| |
Weather/FM/AM Switch |
|
|
|
|
|
| External Alert Jack | |
|
|
|
| Weather/Snooze Button |
| |||
ON/RADIO/BUZZ/OFF Switch |
|
|
|
|
| DC Jack for AC Power | ||
|
|
|
| |||||
|
|
|
|
|
|
|
| |
Volume Wheel
Tuning Wheel
Battery Installation:
Place 4 AA alkaline batteries (not supplied) into the compartment on the underside of radio. (Note: Batteries provide emergency power for the radio in case of a power outage.)
AC Adapter:
Plug the AC Adapter into a standard outlet. Plug the other end of the adapter into the DC jack on the back of the radio.
Selecting a Weather Channel:
1.Ensure the “ON/RADIO/BUZZ/OFF” switch is in the ON position.
2.Move the “WEATHER/FM/AM” switch to WEATHER.
3.Use the “WX Channel” button to move through the 7 different weather channels. Stop on the channel with the strongest broadcast signal.
4.To put the radio into weather standby mode, press the “WEATHER/SNOOZE” button while listening to the weather broadcast.
Activating the Weather Alert:
1.Press the “ALERT MODE” button to choose between LED, LED SIREN, or VOICE alert types. The NOAA logo will begin blinking.
2.Once an alert type is selected, alert mode is automatically activated.
3.If an alert is received, press the “TEST/ALERT OFF” button to deactivate the alert.
(Note: When radio is in weather standby, FM, AM, BUZZ or RADIO
Programming the Clock and Sleep Alarm:
1.Press and hold “TIME SET” button for 5 seconds (HOUR option will begin flashing).
2.Press the “UP” button until current hour is displayed (Note: AM/PM changes as you scroll through the hours).
3.Press “TIME SET” button again (MINUTE option will begin flashing).
4.Press “UP” button until current minutes are displayed.
5.Press “TIME SET” button again to save time setting and move to alarm setting (HOUR option will begin flashing).
6.Program the alarm the same way as time set.
7.Press “TIME SET” button when finished to save settings and exit clock/sleep alarm programming.
(Note: When setting the clock or alarm clock, if you would like to scan quickly through the minutes press and hold the “UP” but- ton. The minutes will advance in increments of 5.)
Activating the Sleep Alarm:
Wake to Radio:
1. After setting the desired alarm time, move the “ON/RADIO/BUZZ/OFF” switch to RADIO.
2. Move the “WEATHER/FM/AM” switch to desired radio you would like to wake to. The alarm icon will be displayed on the LCD indicating the sleep alarm is activated.
Wake to Buzz:
1.After setting the desired alarm time, move the “ON/RADIO/BUZZ/OFF” switch to BUZZ. The alarm icon will be displayed on the LCD indicating the sleep alarm is activated.
(Note: To temporarily silence sleep alarm, press WEATHER/SNOOZE button. This will advance the alarm time by 8 minutes. To silence alarm for the remainder of the day, move the “ON/RADIO/BUZZ/OFF” switch to OFF position or to ON to listen to radio or be in alert standby mode.To reset the alarm for next day move the "ON/RADIO/BUZZ/OFF to the "OFF" position then back
to desired wake position "RADIO" or "BUZZ".
Tuning the AM/FM Radio:
1.Ensure the “ON/RADIO/BUZZ/OFF” switch is in the ON position.
2.Move the “WEATHER/FM/AM” switch to desired position of either AM or FM.
3.Use the tuning wheel on the right side of the radio to tune to desired station.
4.Use the volume wheel on the left side of the unit to adjust the volume to desired listening level.
Page 2 | www.midlandradio.com |