Manuals
/
Miele
/
Kitchen Appliance
/
Food Warmer
Miele
ESW4810, ESW4820, ESW4710, ESW 4800, ESW4720, ESW 4700 Dimensions for Solo Installation ESW
Models:
ESW 4700
ESW4720
ESW4810
ESW 4800
ESW4710
ESW4820
1
27
36
36
Download
36 pages
12.61 Kb
24
25
26
27
28
29
30
31
Install
FAQ
Timer
Dimension
Temperature selector
Safety
Technical Service
Using the warming drawer
Page 27
Image 27
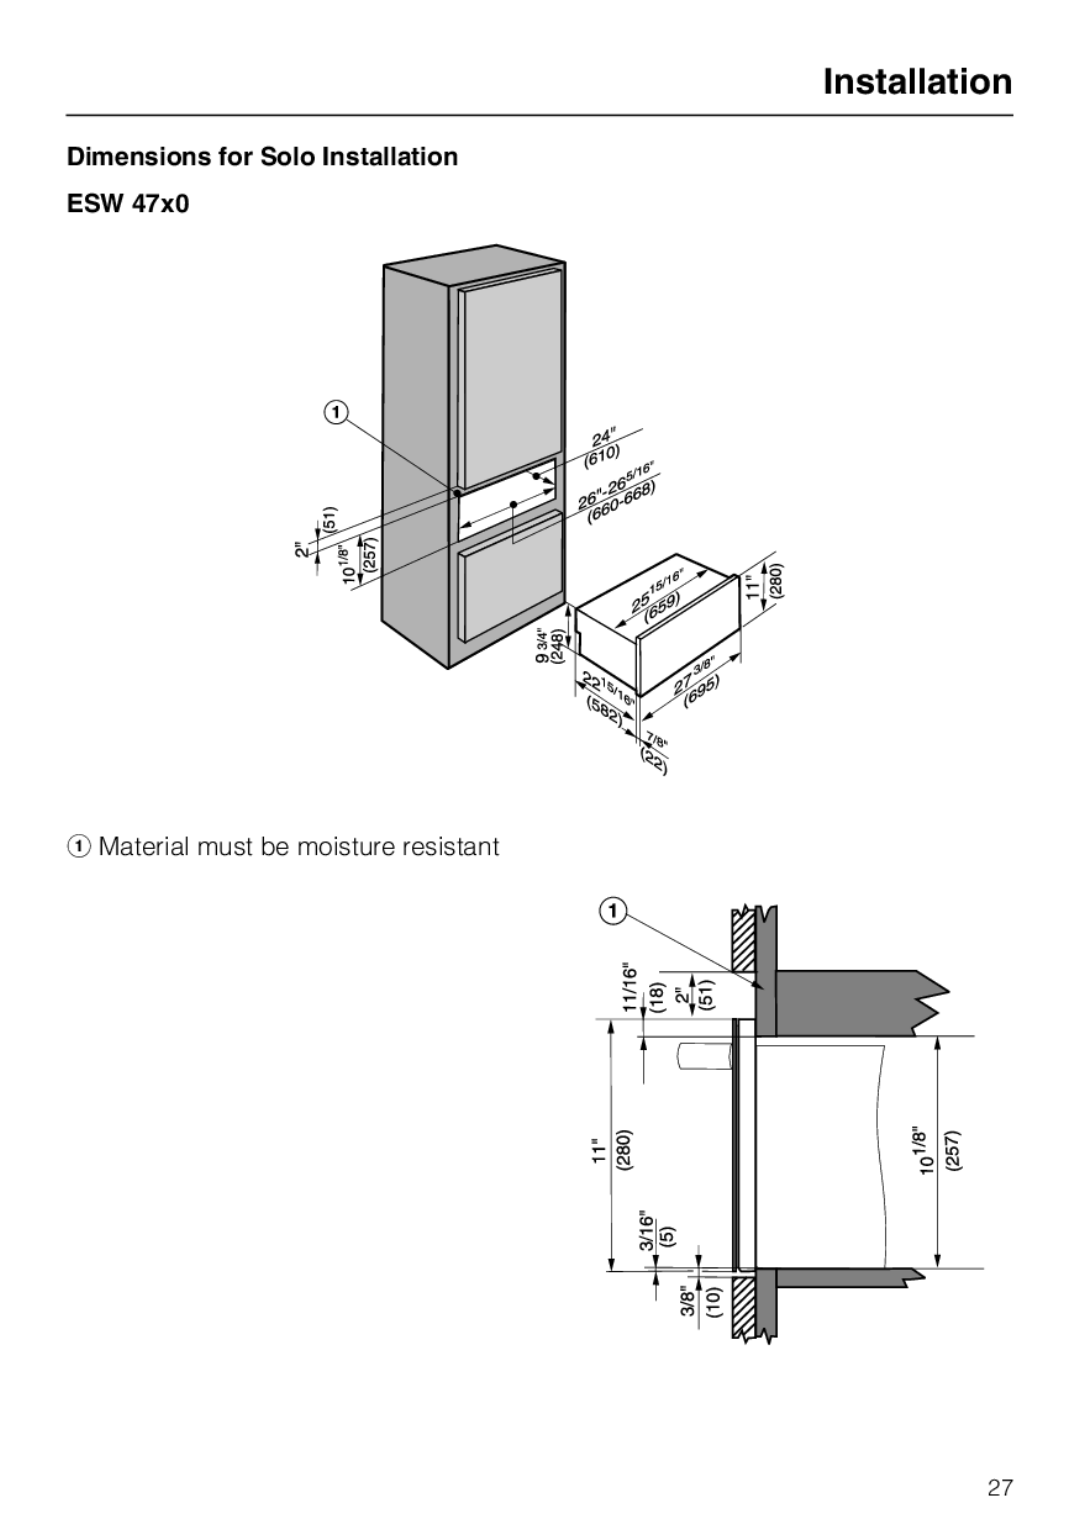
Installation
Dimensions for Solo Installation
ESW 47x0
a
Material must be moisture resistant
27
Page 26
Page 28
Page 27
Image 27
Page 26
Page 28
Contents
Page
Page
Contents
Technical safety
Important Safety Instructions
Use
Important Safety Instructions
General notes
Guide to the warming drawer
To set an unlimited time
Timer
Guide to the controls
To set a limited time
Temperature selector
Humidity control
Food Temperature Humidity control
Temperature and Humidity Suggestions
Loading the warming drawer
Tips
Keeping food warm
Using the warming drawer
Warming dishes
Stainless steel
Warming drawer care
Appliance front and control panel
Glass
Removing the drawer
Drawer
Non-slip mat
Rack
Frequently asked questions
What if the drawer cannot be closed properly?
MieleCare
Technical Service
Page
Installation Instructions
Help protect our environment
Disposal of the packing materials
Disposal of an old appliance
Electrical connection
Installation in combination with an oven
Installation
Installation tips
Solo Installation
Dimensions for Solo Installation ESW
582
Dimensions for a combination installation with an oven ESW
Installation
Inserting the drawer
Installing the warming drawer
Integrated installations Models 4700 FB and 4800 FB
Panel dimensions 4700 FB
4800 FB
Installation
Page
Page
Alteration rights reserved
Top
Page
Image
Contents