FUNCTIONAL DESCRIPTION
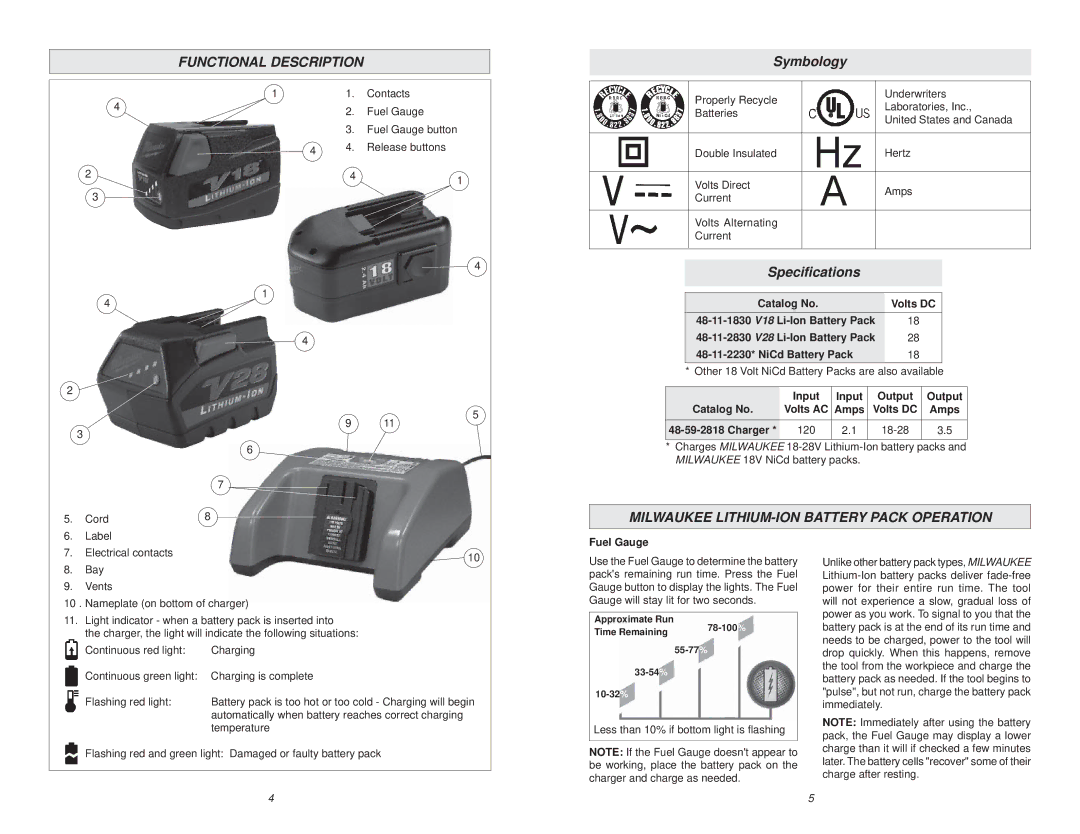
1 | 1. | Contacts |
4 | 2. | Fuel Gauge |
| ||
| 3. | Fuel Gauge button |
4 | 4. | Release buttons |
2 | 4 | 1 |
|
| |
3 |
|
|
Symbology
| Properly Recycle |
| Underwriters |
|
| Laboratories, Inc., | |
| Batteries |
| |
|
| United States and Canada | |
|
|
| |
|
|
|
|
| Double Insulated |
| Hertz |
|
|
|
|
| Volts Direct |
| Amps |
| Current |
| |
|
|
| |
|
|
|
|
| Volts Alternating |
|
|
| Current |
|
|
|
|
|
|
4
2
3
1
4
9 11
4
5
Specifications
Catalog No. | Volts DC |
18 | |
28 | |
18 | |
* Other 18 Volt NiCd Battery Packs are also available | |
Catalog No. | Input | Input | Output | Output |
Volts AC | Amps | Volts DC | Amps | |
120 | 2.1 | 3.5 | ||
|
|
|
|
|
6
7
5. Cord | 8 |
* Charges MILWAUKEE
MILWAUKEE LITHIUM-ION BATTERY PACK OPERATION
6.Label
7. Electrical contacts | 10 |
|
8.Bay
9.Vents
10 . Nameplate (on bottom of charger)
11.Light indicator - when a battery pack is inserted into
the charger, the light will indicate the following situations:
Continuous red light: | Charging |
Continuous green light: | Charging is complete |
Flashing red light: | Battery pack is too hot or too cold - Charging will begin |
| automatically when battery reaches correct charging |
| temperature |
Flashing red and green light: Damaged or faulty battery pack
Fuel Gauge
Use the Fuel Gauge to determine the battery pack's remaining run time. Press the Fuel Gauge button to display the lights. The Fuel Gauge will stay lit for two seconds.
Approximate Run
Time Remaining | |
| |
| |
| |
|
Less than 10% if bottom light is flashing
NOTE: If the Fuel Gauge doesn't appear to be working, place the battery pack on the charger and charge as needed.
Unlike other battery pack types, MILWAUKEE
NOTE: Immediately after using the battery pack, the Fuel Gauge may display a lower charge than it will if checked a few minutes later. The battery cells "recover" some of their charge after resting.
4 | 5 |