3. Slide the lower guard lever up to raise |
the lower guard. Remove the blade from |
the spindle. Always clean the spindle, |
Fig. 5
APPLICATIONS
upper guard and lower guard to remove |
any dirt and dust. |
NOTE: Do not remove inner blade |
flange. Larger diameter of inner flange |
(Fig. 3) should face the blade. |
Fig. 3 Spindle | Bolt |
Inner flange | Outer flange |
4.To install a blade, place the blade on the spindle with the teeth pointing in the same direction as the arrow on the lower guard (Fig. 4). Release the lower guard lever.
Fig. 4
5.Place the blade flange on the spindle and hand tighten the bolt.
6.While holding in the spindle lock button, use the wrench to turn the bolt counter- clockwise and tighten.
Adjusting Depth
1.Remove battery pack.
2.To adjust the depth of the cut, hold the saw by the handle and loosen the depth adjusting lever by pushing it down toward the shoe (Fig. 5).
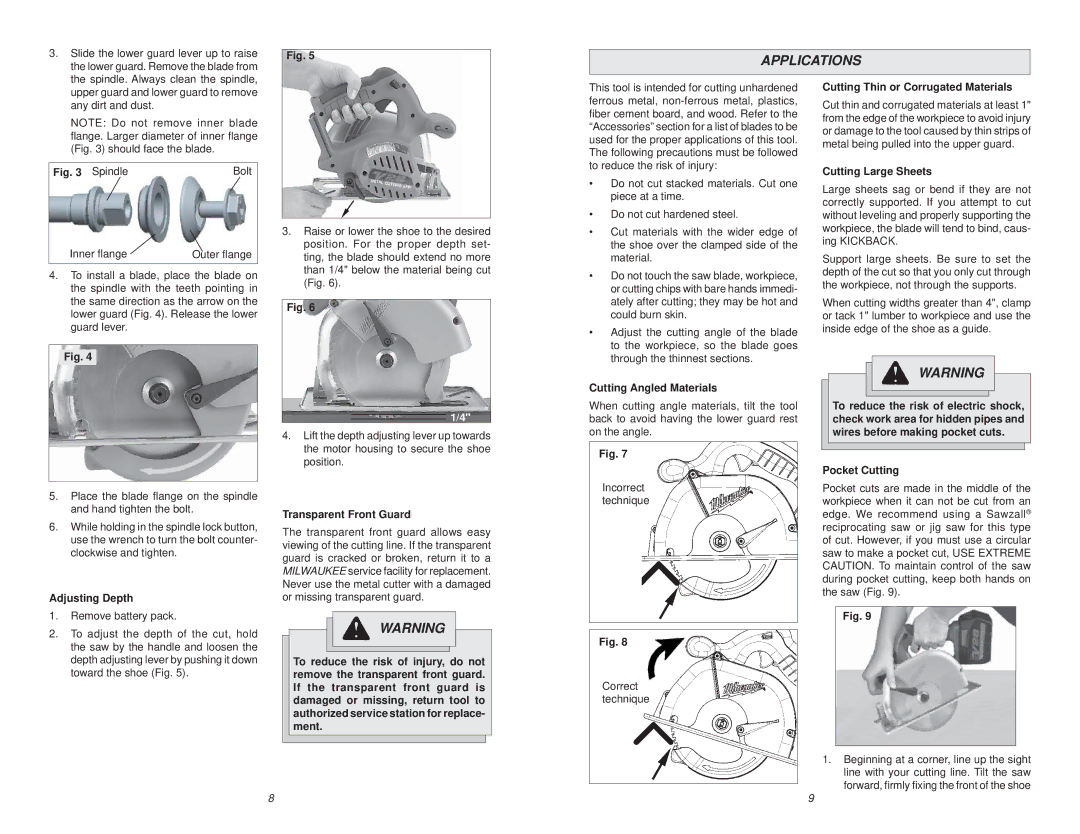
3.Raise or lower the shoe to the desired position. For the proper depth set- ting, the blade should extend no more than 1/4" below the material being cut (Fig. 6).
Fig. 6
1/4"
4.Lift the depth adjusting lever up towards the motor housing to secure the shoe position.
Transparent Front Guard
The transparent front guard allows easy viewing of the cutting line. If the transparent guard is cracked or broken, return it to a MILWAUKEE service facility for replacement. Never use the metal cutter with a damaged or missing transparent guard.
WARNING
To reduce the risk of injury, do not remove the transparent front guard. If the transparent front guard is damaged or missing, return tool to authorized service station for replace- ment.
This tool is intended for cutting unhardened ferrous metal,
•Do not cut stacked materials. Cut one piece at a time.
•Do not cut hardened steel.
•Cut materials with the wider edge of the shoe over the clamped side of the material.
•Do not touch the saw blade, workpiece, or cutting chips with bare hands immedi- ately after cutting; they may be hot and could burn skin.
•Adjust the cutting angle of the blade to the workpiece, so the blade goes through the thinnest sections.
Cutting Angled Materials
When cutting angle materials, tilt the tool back to avoid having the lower guard rest on the angle.
Fig. 7
Incorrect technique
Fig. 8
Correct technique
Cutting Thin or Corrugated Materials
Cut thin and corrugated materials at least 1" from the edge of the workpiece to avoid injury or damage to the tool caused by thin strips of metal being pulled into the upper guard.
Cutting Large Sheets
Large sheets sag or bend if they are not correctly supported. If you attempt to cut without leveling and properly supporting the workpiece, the blade will tend to bind, caus- ing KICKBACK.
Support large sheets. Be sure to set the depth of the cut so that you only cut through the workpiece, not through the supports.
When cutting widths greater than 4", clamp or tack 1" lumber to workpiece and use the inside edge of the shoe as a guide.
WARNING
To reduce the risk of electric shock, check work area for hidden pipes and wires before making pocket cuts.
Pocket Cutting
Pocket cuts are made in the middle of the workpiece when it can not be cut from an edge. We recommend using a Sawzall® reciprocating saw or jig saw for this type of cut. However, if you must use a circular saw to make a pocket cut, USE EXTREME CAUTION. To maintain control of the saw during pocket cutting, keep both hands on the saw (Fig. 9).
Fig. 9
1.Beginning at a corner, line up the sight line with your cutting line. Tilt the saw forward, firmly fixing the front of the shoe
8 | 9 |