OPERATION
WARNING!
To reduce the risk of injury, wear safety goggles or glasses with side shields. Unplug the tool before changing accessories or making adjustments.
Adjusting the orbital action
The amount of orbital action may be adjusted with the orbital action selector lever. In general, a large orbital action (III) should be used with soft materials and a small orbital action (0) should be used with hard materials. When a smooth cut is required no orbit (0) should be used. Recommended orbit settings for different material compositions are pre- sented below. The optimum orbital action should be determined by the user for their specific cutting requirements. Orbital action may be ad- justed when the tool is running or stopped.
The 6266 and 6276 Orbital Action jig saws can cut a wide variety of materials including metal, wood and plastic. Cuts may be straight lines, bevels, curves or internal
•Rapid blade change without tools with the
•Adjustable Orbital Action blade stroke cuts faster by pressing the blade against the work only during the upstroke. This is particularly effective when rough cutting thick wooden boards.
Material | Orbital action |
|
|
Wood | l I I |
Metal | 0 |
Plastic | l |
Smooth Cut | 0 |
|
|
•Electronic dial speed control maintains the
•Adjustable shoe can be tilted by up to 45 degrees in either direction for bevel cuts.
•
•Sawdust blower removes the sawdust ahead of the cut for im- proved visibility.
Making the Cut
1.Set the stroke and orbital action according the material to be cut.
2.Position the tool with the front part of the shoe on the workpiece and switch on.
3.Hold the machine firmly against the workpiece and guide it along the desired cutting line. Do not feed into the work too hard, light pres- sure on the saw blade will achieve the optimum cutting speed.
•Built in manifold for vacuum assisted dust collection (hose is op- tional).
•Transparent blade cover improves dust extraction.
•Vibration dampened mechanism permits quieter, smoother running.
Starting and stopping the tool
For Model No. 6266
1.To start the tool, press the On/Off switch.
2.To stop the tool, release the On/Off switch. For Model No. 6276
1.To start the tool, push the On/Off switch forward until “I” is visible.
2.To stop the tool, push the On/Off switch backwards until “0” is visible.
Locking the On/Off Switch
The lock button holds the trigger in the ON position for continuous use. (Model No. 6266 only)
1.To lock the On/Off switch, hold the lock button in while pressing the On/Off switch. Then release the On/Off switch.
2.To unlock the On/Off switch, press the On/Off switch and release. The lock button will pop out.
Adjusting stroke per minute
The strokes per minute may be adjusted with the speed control dial. The numbers 1 through 7 are printed on the dial with 1 being the slowest speed and 7 the highest speed. Recommended cutting speeds for vari- ous materials are listed below. Optimum cutting speeds should be deter- mined by the user for specific cutting requirements. Strokes per minute may be adjusted when the tool is running or stopped.
Material | Recommended saw speed |
|
|
Wood | 7 |
Metal | |
Plastic | 2 |
|
|
Special Cutting Techniques
1.Straight cuts — To obtain a perfectly straight cut, clamp a strip of wood as a guide along the workpiece or use the parallel guide (accessory).
2.Cutting at a bevel angle — adjust the shoe to the correct angle (see Adjusting the Shoe).
3.Cutting close to obstacles — move the shoe backward to provide greater clearance (see Adjusting the Shoe).
4.Cutting Sheet Metal — sheet metal may vibrate when being cut. To minimize this vibration clamp the workpiece to a wood base.
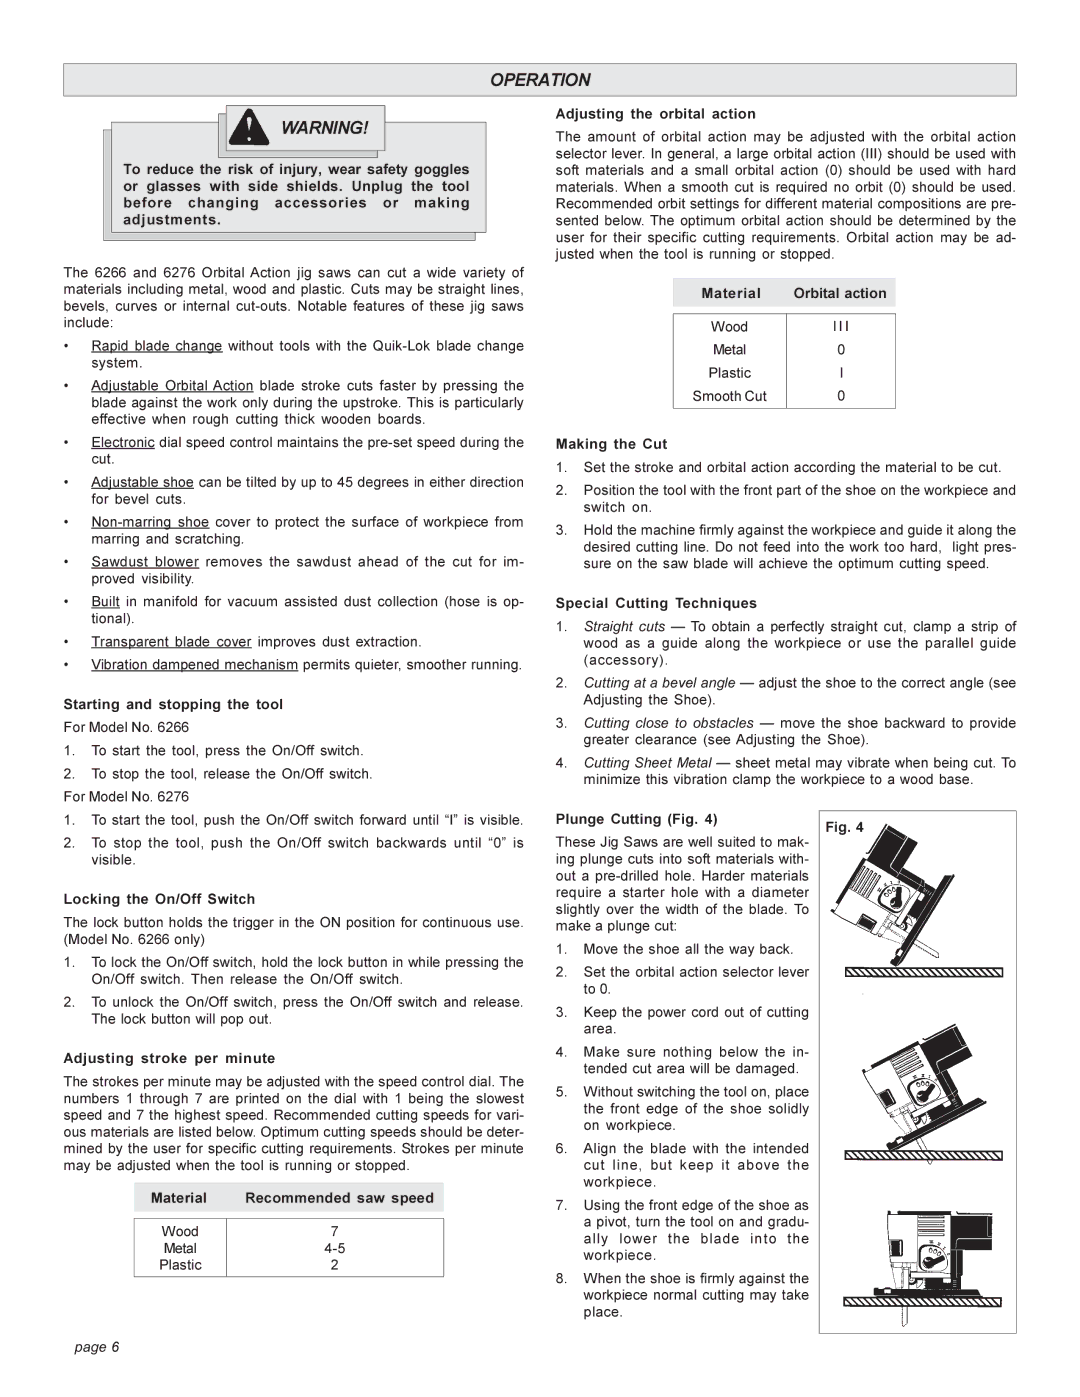
Plunge Cutting (Fig. 4) | Fig. 4 |
|
These Jig Saws are well suited to mak- ing plunge cuts into soft materials with- out a
1.Move the shoe all the way back.
2.Set the orbital action selector lever to 0.
3.Keep the power cord out of cutting area.
4.Make sure nothing below the in- tended cut area will be damaged.
5.Without switching the tool on, place the front edge of the shoe solidly on workpiece.
6.Align the blade with the intended cut line, but keep it above the workpiece.
7.Using the front edge of the shoe as a pivot, turn the tool on and gradu- ally lower the blade into the workpiece.
8.When the shoe is firmly against the workpiece normal cutting may take place.
page 6