3INSTALLATION AND CONNECTION

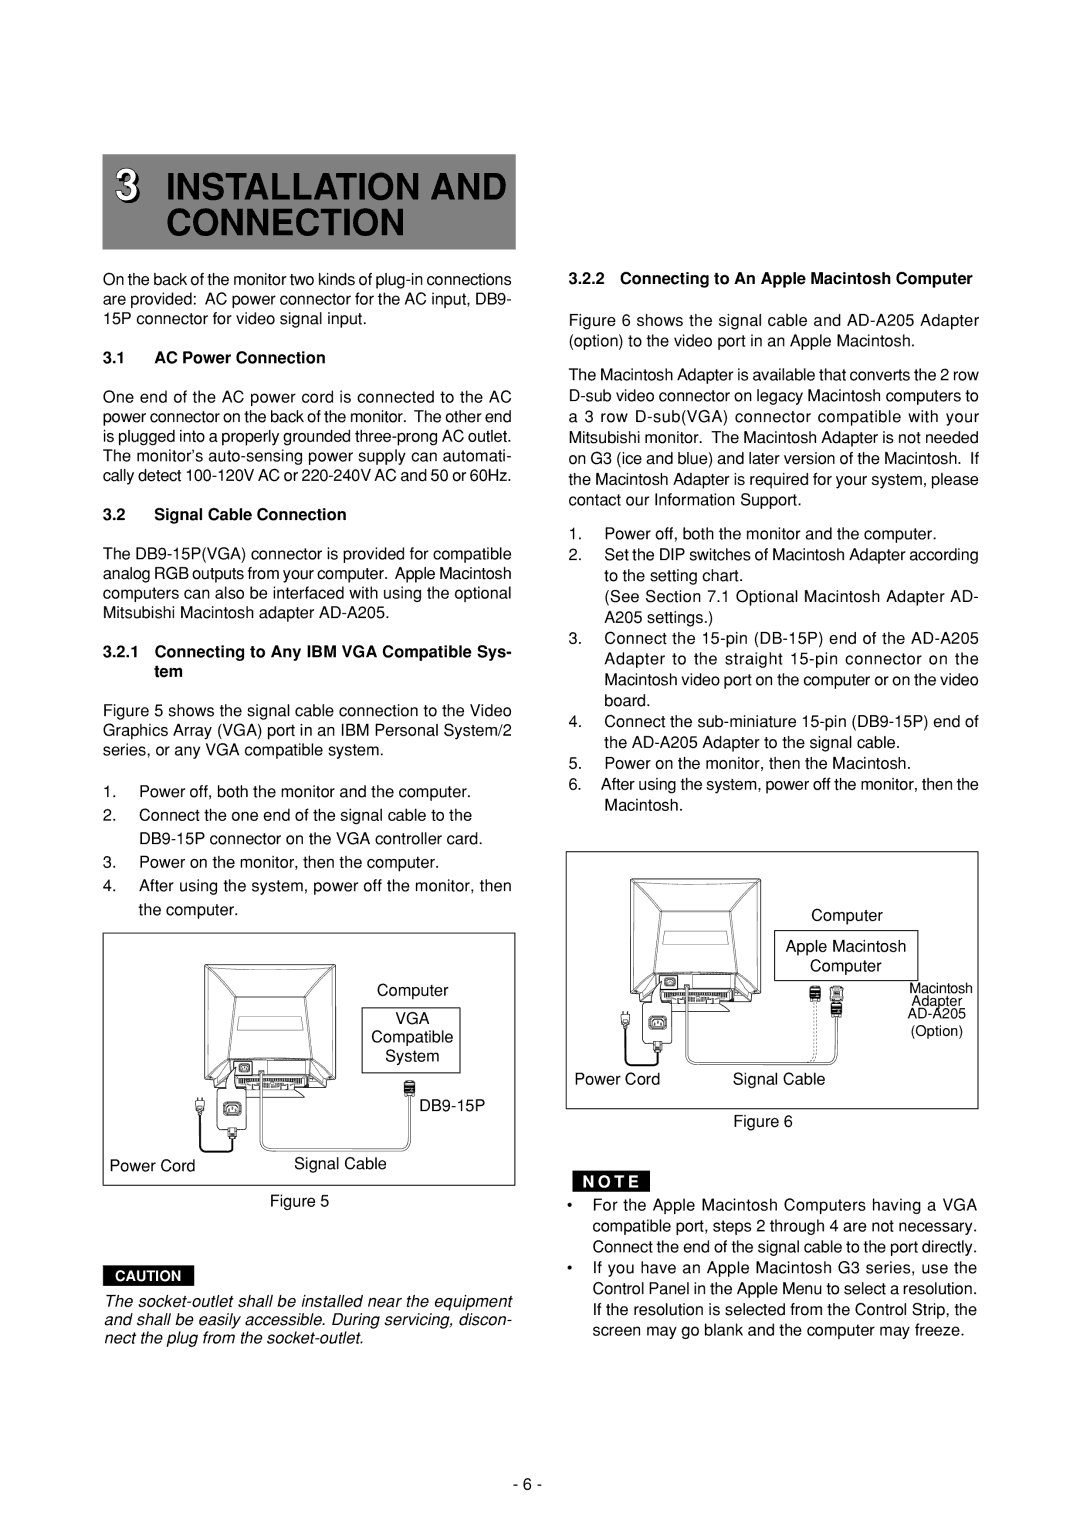
On the back of the monitor two kinds of plug-in connections are provided: AC power connector for the AC input, DB9- 15P connector for video signal input.

3.1AC Power Connection

One end of the AC power cord is connected to the AC power connector on the back of the monitor. The other end is plugged into a properly grounded three-prong AC outlet. The monitor’s auto-sensing power supply can automati- cally detect 100-120V AC or 220-240V AC and 50 or 60Hz.

3.2Signal Cable Connection

The DB9-15P(VGA) connector is provided for compatible analog RGB outputs from your computer. Apple Macintosh computers can also be interfaced with using the optional Mitsubishi Macintosh adapter AD-A205.

3.2.1Connecting to Any IBM VGA Compatible Sys- tem

Figure 5 shows the signal cable connection to the Video Graphics Array (VGA) port in an IBM Personal System/2 series, or any VGA compatible system.

1.Power off, both the monitor and the computer.

2.Connect the one end of the signal cable to the DB9-15P connector on the VGA controller card.

3.Power on the monitor, then the computer.

4.After using the system, power off the monitor, then the computer.

Computer

VGA

Compatible

System

DB9-15P

Power Cord

Signal Cable

Figure 5

CAUTION

The socket-outlet shall be installed near the equipment and shall be easily accessible. During servicing, discon- nect the plug from the socket-outlet.

3.2.2 Connecting to An Apple Macintosh Computer

Figure 6 shows the signal cable and AD-A205 Adapter (option) to the video port in an Apple Macintosh.

The Macintosh Adapter is available that converts the 2 row D-sub video connector on legacy Macintosh computers to

a3 row D-sub(VGA) connector compatible with your Mitsubishi monitor. The Macintosh Adapter is not needed on G3 (ice and blue) and later version of the Macintosh. If the Macintosh Adapter is required for your system, please contact our Information Support.

1.Power off, both the monitor and the computer.

2.Set the DIP switches of Macintosh Adapter according to the setting chart.

(See Section 7.1 Optional Macintosh Adapter AD- A205 settings.)

3.Connect the 15-pin (DB-15P) end of the AD-A205 Adapter to the straight 15-pin connector on the Macintosh video port on the computer or on the video board.

4.Connect the sub-miniature 15-pin (DB9-15P) end of the AD-A205 Adapter to the signal cable.

5.Power on the monitor, then the Macintosh.

6.After using the system, power off the monitor, then the Macintosh.

Computer

Apple Macintosh

Computer

Macintosh Adapter AD-A205

(Option)

Power Cord

Signal Cable


Figure 6

For the Apple Macintosh Computers having a VGA compatible port, steps 2 through 4 are not necessary. Connect the end of the signal cable to the port directly.

If you have an Apple Macintosh G3 series, use the Control Panel in the Apple Menu to select a resolution. If the resolution is selected from the Control Strip, the screen may go blank and the computer may freeze.

- 6 -

Page 10
Image 10
Mitsubishi Electronics Diamond Plus 92 manual Installation and Connection, AC Power Connection, Signal Cable Connection

Diamond Plus 92 specifications

Mitsubishi Electronics Diamond Plus 92 is a notable addition to the realm of display technology, bringing impressive image quality and user-friendly features. Launched during the height of CRT technology, this monitor became a favorite for both professional and personal use, thanks to its cutting-edge components and innovative design.

One of the main features of the Diamond Plus 92 is its remarkable screen size, boasting a 19-inch diagonal display. This large viewing area allows for an immersive experience, whether for graphic design, gaming, or simply enjoying multimedia content. The monitor's 1280x1024 resolution ensures that images and text are sharp, clear, and well-defined, which is particularly beneficial for tasks that require precision.

The Diamond Plus 92 employs Mitsubishi's advanced Diamondtron aperture grill technology, which enhances color accuracy and contrast levels significantly. This technology enables a wider color gamut, producing vibrant and detailed visuals. With a refresh rate of up to 85Hz, the monitor minimizes flicker, making long viewing sessions more comfortable and reducing eye strain, a critical factor for professionals who spend extended hours in front of a screen.

Another highlight of the Diamond Plus 92 is its ergonomic design. The monitor is equipped with an adjustable neck that allows users to customize the height and angle for optimal viewing comfort. This feature is essential for maintaining proper posture and ensuring a healthy workspace. Additionally, it has a sleek appearance that fits seamlessly into a variety of settings, be it an office or a home environment.

The Diamond Plus 92 is also known for its extensive connectivity options. With multiple input ports including VGA and DVI, it can easily connect to various devices such as computers and video sources. This versatility makes it an excellent choice for users with diverse technological needs.

In terms of build quality, Mitsubishi ensured that the Diamond Plus 92 is durable and reliable. The monitor's construction is robust, and it has been designed to handle the rigors of daily use without compromising performance. Furthermore, it is equipped with user-friendly controls that allow adjustments to brightness, contrast, and color settings, facilitating a personalized viewing experience.

In summary, the Mitsubishi Electronics Diamond Plus 92 is a standout display monitor, delivering superior image quality, user comfort, versatile connectivity, and robust design. It remains a preferred choice for professionals and enthusiasts alike, embodying the high standards of Mitsubishi's commitment to excellence in electronic products.