C. Projecting images

Preparation:

Remove the lens cap.

Turn on the power of the connected computer.

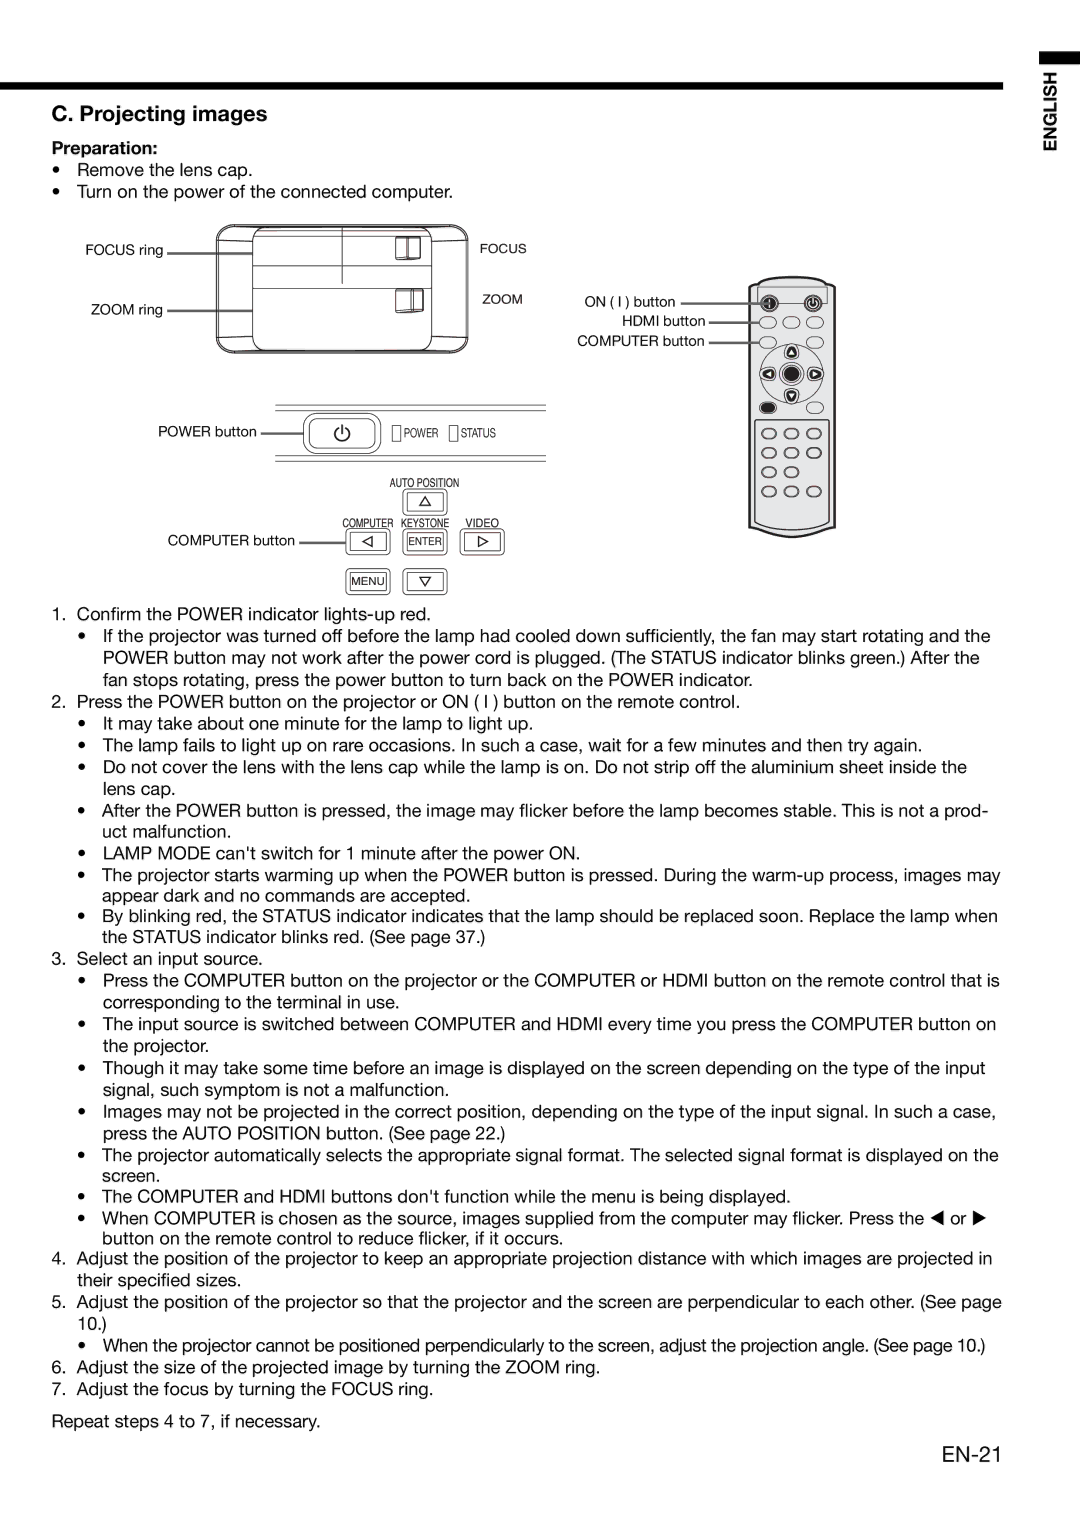
FOCUS ring

ZOOM ring

POWER button


POWER STATUS


COMPUTER button

ON ( I ) button HDMI button

COMPUTER button

ENGLISH

1.Confirm the POWER indicator lights-up red.

If the projector was turned off before the lamp had cooled down sufficiently, the fan may start rotating and the POWER button may not work after the power cord is plugged. (The STATUS indicator blinks green.) After the fan stops rotating, press the power button to turn back on the POWER indicator.

2.Press the POWER button on the projector or ON ( I ) button on the remote control.

It may take about one minute for the lamp to light up.

The lamp fails to light up on rare occasions. In such a case, wait for a few minutes and then try again.

Do not cover the lens with the lens cap while the lamp is on. Do not strip off the aluminium sheet inside the lens cap.

After the POWER button is pressed, the image may flicker before the lamp becomes stable. This is not a prod- uct malfunction.

LAMP MODE can't switch for 1 minute after the power ON.

The projector starts warming up when the POWER button is pressed. During the warm-up process, images may appear dark and no commands are accepted.

By blinking red, the STATUS indicator indicates that the lamp should be replaced soon. Replace the lamp when the STATUS indicator blinks red. (See page 37.)

3.Select an input source.

Press the COMPUTER button on the projector or the COMPUTER or HDMI button on the remote control that is corresponding to the terminal in use.

The input source is switched between COMPUTER and HDMI every time you press the COMPUTER button on the projector.

Though it may take some time before an image is displayed on the screen depending on the type of the input signal, such symptom is not a malfunction.

Images may not be projected in the correct position, depending on the type of the input signal. In such a case, press the AUTO POSITION button. (See page 22.)

The projector automatically selects the appropriate signal format. The selected signal format is displayed on the screen.

The COMPUTER and HDMI buttons don't function while the menu is being displayed.

• When COMPUTER is chosen as the source, images supplied from the computer may flicker. Press the or button on the remote control to reduce flicker, if it occurs.

4.Adjust the position of the projector to keep an appropriate projection distance with which images are projected in their specified sizes.

5.Adjust the position of the projector so that the projector and the screen are perpendicular to each other. (See page 10.)

• When the projector cannot be positioned perpendicularly to the screen, adjust the projection angle. (See page 10.)

6.Adjust the size of the projected image by turning the ZOOM ring.

7.Adjust the focus by turning the FOCUS ring.

Repeat steps 4 to 7, if necessary.

EN-21

Page 21
Image 21
Mitsubishi Electronics HD4000 user manual Projecting images, EN-21

HD4000 specifications

Mitsubishi Electronics has long been a pioneer in the field of electronics, and their HD4000 model stands as a testament to their commitment to innovation and quality. Designed for both commercial and residential applications, the HD4000 integrates advanced technologies to deliver exceptional performance and versatility.

One of the standout features of the Mitsubishi HD4000 is its high-definition capabilities. With native support for 4K resolution, this model ensures crystal-clear images with stunning detail. The enhanced picture quality is complemented by advanced image processing technologies, including HDR (High Dynamic Range) support, which allows for a broader range of colors and contrasts. This results in a more lifelike viewing experience, making any visual content come alive.

In terms of connectivity, the HD4000 is equipped with multiple input options, including HDMI, USB, and VGA ports. This versatility enables seamless integration with various devices such as PCs, gaming consoles, and multimedia players. The built-in Wi-Fi capability further enhances its functionality, allowing users to stream content directly from the internet without the need for additional cables.

Mitsubishi has also prioritized energy efficiency in the HD4000. With its eco-friendly design and energy-saving features, this model not only reduces electricity consumption but also contributes to a lesser environmental impact. The automatic brightness adjustment feature is particularly noteworthy, as it optimizes the display according to ambient light conditions, ensuring optimal visibility while conserving energy.

The build quality of the HD4000 is robust, designed for longevity and reliability. The sleek design makes it suitable for various settings – from modern offices to home entertainment centers. The intuitive user interface simplifies navigation through the extensive features, making it accessible for users of all technical levels.

Additionally, the HD4000 comes equipped with advanced audio technologies that enhance the auditory experience. With integrated surround sound systems and support for various audio formats, users can expect rich and immersive sound quality that complements the stunning visuals.

Overall, the Mitsubishi Electronics HD4000 combines cutting-edge technology, energy efficiency, and superior build quality, making it an excellent choice for those seeking high-performance display solutions. Whether for professional use or home entertainment, the HD4000 promises to deliver an impressive viewing experience that meets the demands of modern users.