Manuals
/
Mitsubishi Electronics
/
Computer Equipment
/
Computer Monitor
Mitsubishi Electronics
LCD1760VM
user manual
Contents, Quick Start, English-3
Models:
LCD1760VM
1
4
17
17
Download
17 pages
30.84 Kb
1
2
3
4
5
6
7
8
Troubleshooting
Specs
Auto Adjust Analog input only
Features
Page 4
Image 4
Page 3
Page 5
Page 4
Image 4
Page 3
Page 5
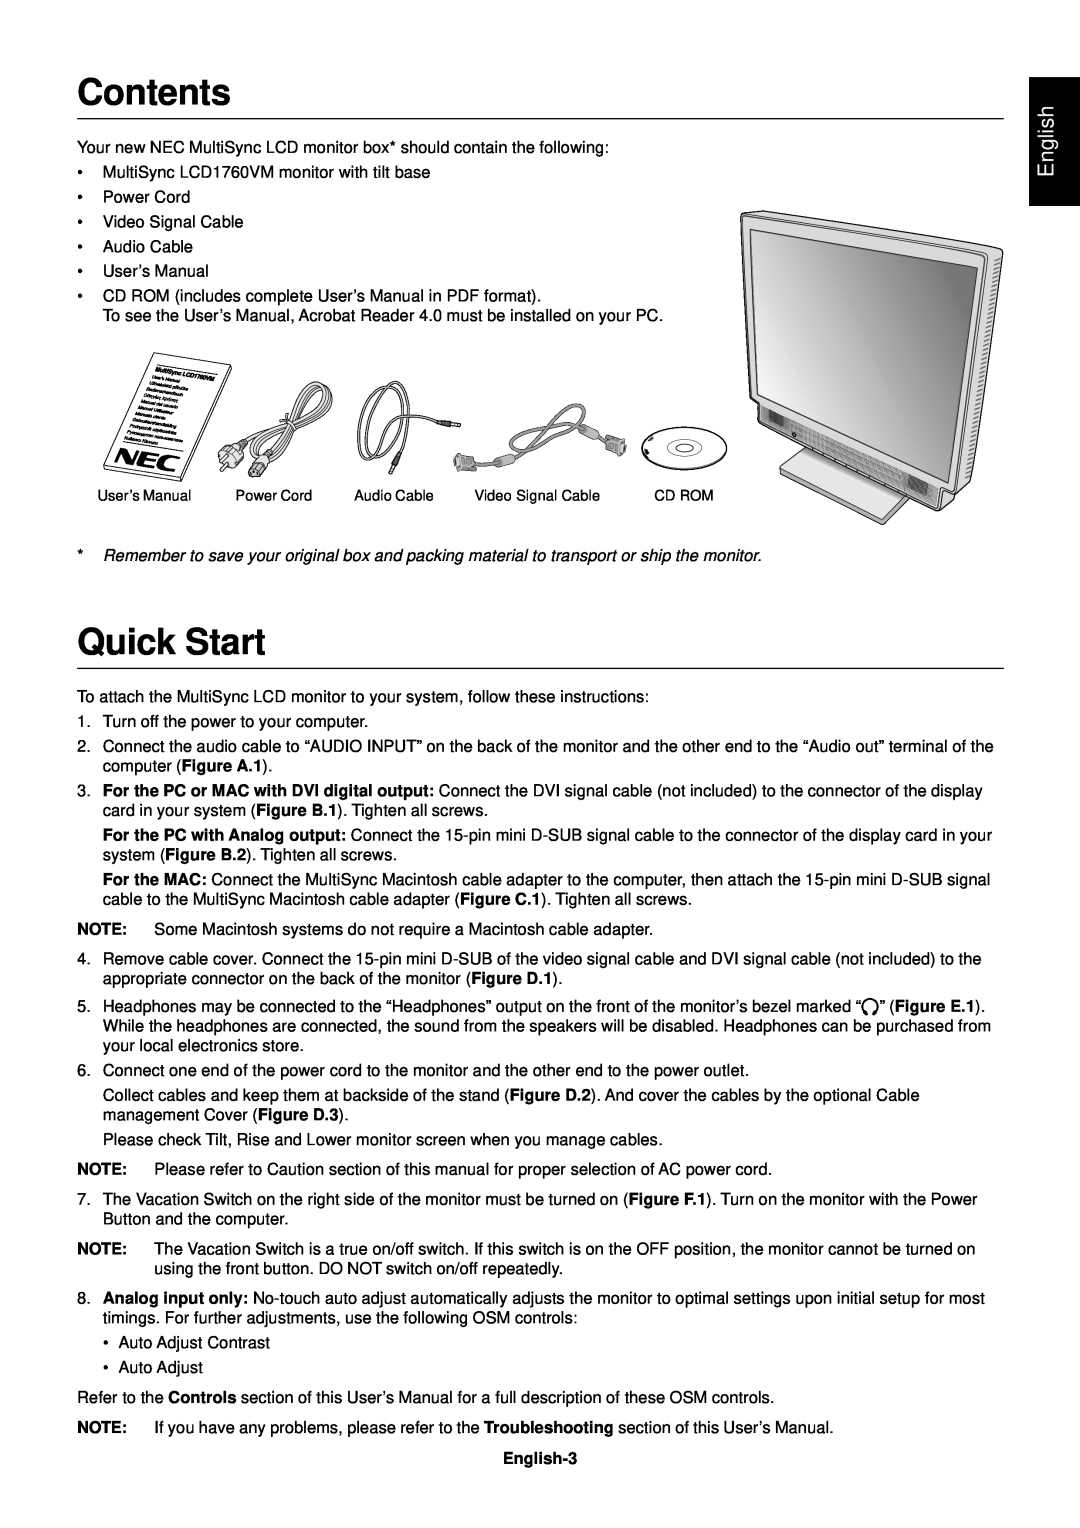
Contents
MultiSync LCD1760VM
User’s Manual
English
Declaration
Declaration of the Manufacturer
For the Customer to use in U.S.A. or Canada
Declaration of Conformity
Canadian Department of Communications Compliance Statement
FCC Information
Quick Start
Contents
English-3
Figure A.1
Figure B.1
Figure B.2
Figure D.1
Raise and Lower Monitor Screen
Tilt and Swivel
Remove Monitor Stand for Mounting
Figure F.1
Figure R.1 Figure R.2 Figure R.3
English-6
Figure R.4
English-7
Auto Adjust Analog input only
Controls
OSM On-Screen-Manager Controls
Sound
Position Controls Analog input only
Colour Control Systems
LEFT/RIGHT
DOWN/UP
Information
Tools
OSM Warning
Safety Precautions and Maintenance
Recommended use
English-11
Ergonomics
English-12
Specifications
Monitor Specifications
MultiSync LCD1760VM Monitor
English-13
Features
English-14
Troubleshooting
TCO’99
Why do we have environmentally labelled computers?
What does labelling involve?
Environmental Requirements Flame retardants
Top
Page
Image
Contents