Adjustment of the image from the computer

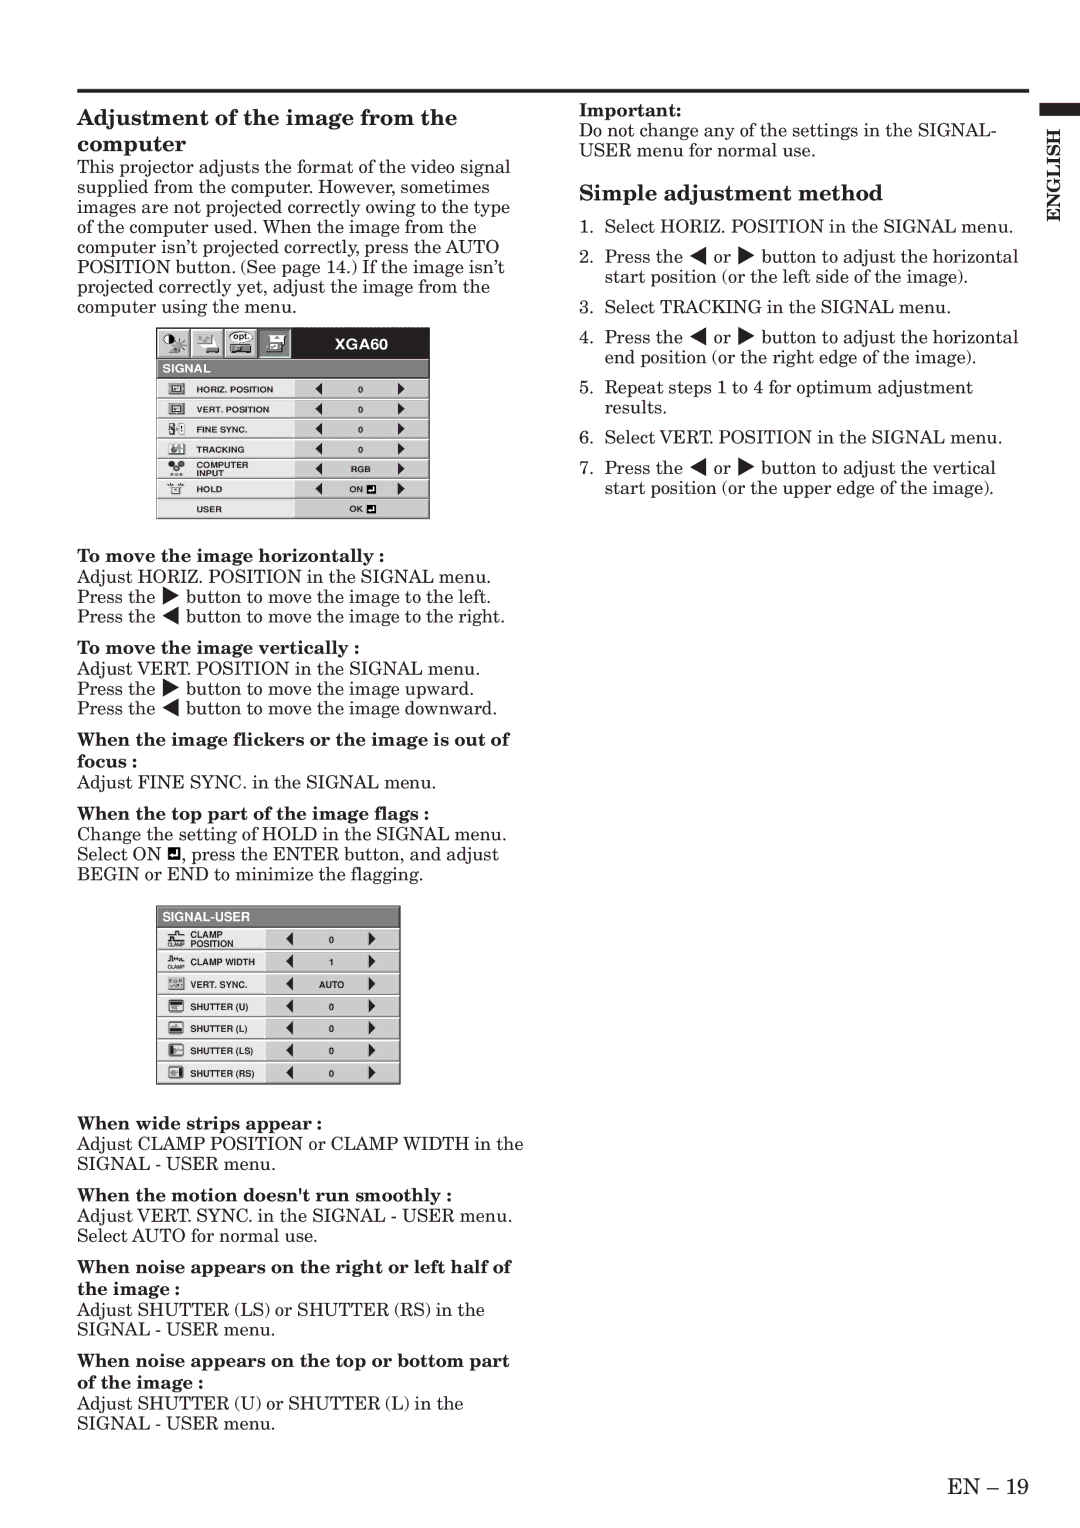
This projector adjusts the format of the video signal supplied from the computer. However, sometimes images are not projected correctly owing to the type of the computer used. When the image from the computer isn’t projected correctly, press the AUTO POSITION button. (See page 14.) If the image isn’t projected correctly yet, adjust the image from the computer using the menu.

Important:

Do not change any of the settings in the SIGNAL- USER menu for normal use.

Simple adjustment method

1.

Select HORIZ. POSITION in the SIGNAL menu.

2.

Press the $ or % button to adjust the horizontal


start position (or the left side of the image).

3.

Select TRACKING in the SIGNAL menu.

ENGLISH

opt.

SIGNAL

XGA60

4. Press the $ or % button to adjust the horizontal

end position (or the right edge of the image).


HORIZ. POSITION


0


VERT. POSITION


0


FINE SYNC.


0


TRACKING


0


COMPUTER

RGB


RRGGBB INPUT


HOLD


ON


USER


OK


To move the image horizontally :

Adjust HORIZ. POSITION in the SIGNAL menu. Press the % button to move the image to the left. Press the $ button to move the image to the right.

To move the image vertically :

Adjust VERT. POSITION in the SIGNAL menu. Press the % button to move the image upward. Press the $ button to move the image downward.

When the image flickers or the image is out of focus :

Adjust FINE SYNC. in the SIGNAL menu.

When the top part of the image flags :

Change the setting of HOLD in the SIGNAL menu. Select ON , press the ENTER button, and adjust BEGIN or END to minimize the flagging.

SIGNAL-USER


CLAMP


0


POSITION


CLAMP WIDTH


1


?

VERT. SYNC.


AUTO


SHUTTER (U)


0


SHUTTER (L)


0


SHUTTER (LS)


0


SHUTTER (RS)


0


When wide strips appear :

Adjust CLAMP POSITION or CLAMP WIDTH in the SIGNAL - USER menu.

When the motion doesn't run smoothly :

Adjust VERT. SYNC. in the SIGNAL - USER menu. Select AUTO for normal use.

When noise appears on the right or left half of the image :

Adjust SHUTTER (LS) or SHUTTER (RS) in the SIGNAL - USER menu.

When noise appears on the top or bottom part of the image :

Adjust SHUTTER (U) or SHUTTER (L) in the SIGNAL - USER menu.

5.

Repeat steps 1 to 4 for optimum adjustment


results.

6.

Select VERT. POSITION in the SIGNAL menu.

7.

Press the $ or % button to adjust the vertical


start position (or the upper edge of the image).

EN – 19

Page 19
Image 19
Mitsubishi Electronics SL4SU user manual Adjustment of the image from the computer, Simple adjustment method

SL4SU specifications

The Mitsubishi Electronics SL4SU is a cutting-edge servo drive that has made a significant impact in the field of automation and industrial control. Designed for precision and efficiency, the SL4SU series embodies a perfect blend of technology, precision engineering, and user-friendly operation.

One of the standout features of the SL4SU is its compact design, which allows for easy integration into various industrial applications without occupying excessive space. This makes it an ideal choice for businesses looking to optimize their machinery while enhancing operational effectiveness. Additionally, its lightweight structure facilitates easier installation and maintenance.

Performance-wise, the SL4SU is characterized by high-speed control capabilities, which provide outstanding torque and velocity control. The product utilizes advanced control algorithms, ensuring that movements are smooth and precise, which is essential for applications involving robotics, CNC machines, and conveyor systems. This level of precision enables manufacturers to maintain higher production quality and efficiency.

The SL4SU also incorporates innovative technologies such as real-time feedback control, allowing the system to adjust dynamically to varying load conditions. This responsiveness ensures consistent performance while reducing the chances of error, making it a reliable choice for critical applications. Furthermore, the regenerative braking feature helps in energy conservation by capturing energy during braking and feeding it back into the system, thereby lowering operational costs.

User experience is further enhanced with the SL4SU through its integrated communication protocols, including Ethernet/IP and CC-Link, making it compatible with various industrial networks. This connectivity is crucial for seamless integration into the Industry 4.0 landscape, facilitating data exchange and process monitoring.

Moreover, Mitsubishi Electronics emphasizes safety with the SL4SU by incorporating various safety features, including overcurrent protection and thermal protection, ensuring reliable operation and minimizing downtime.

In conclusion, the Mitsubishi Electronics SL4SU represents a significant advancement in servo drive technology, combining a compact design, high-speed control, real-time feedback, and robust safety features. These characteristics make it a preferred choice for manufacturers looking to enhance automation and optimize their industrial processes. With the SL4SU, businesses can expect improved productivity, efficiency, and reliability in their operations.