MOD E R NO M6R SST S I NG LE-STE R EO TECH NOLOGY® S PEAKE R
C O N T I N U E D F R O M PAG E 1
Step 7. Speaker performance can be enhanced by insulating the wall or ceiling cavity with fiberglass insula- tion. When insulating speakers, it is best to use a sheet of unfaced fiber- glass insulation behind and around the sides of the speaker.
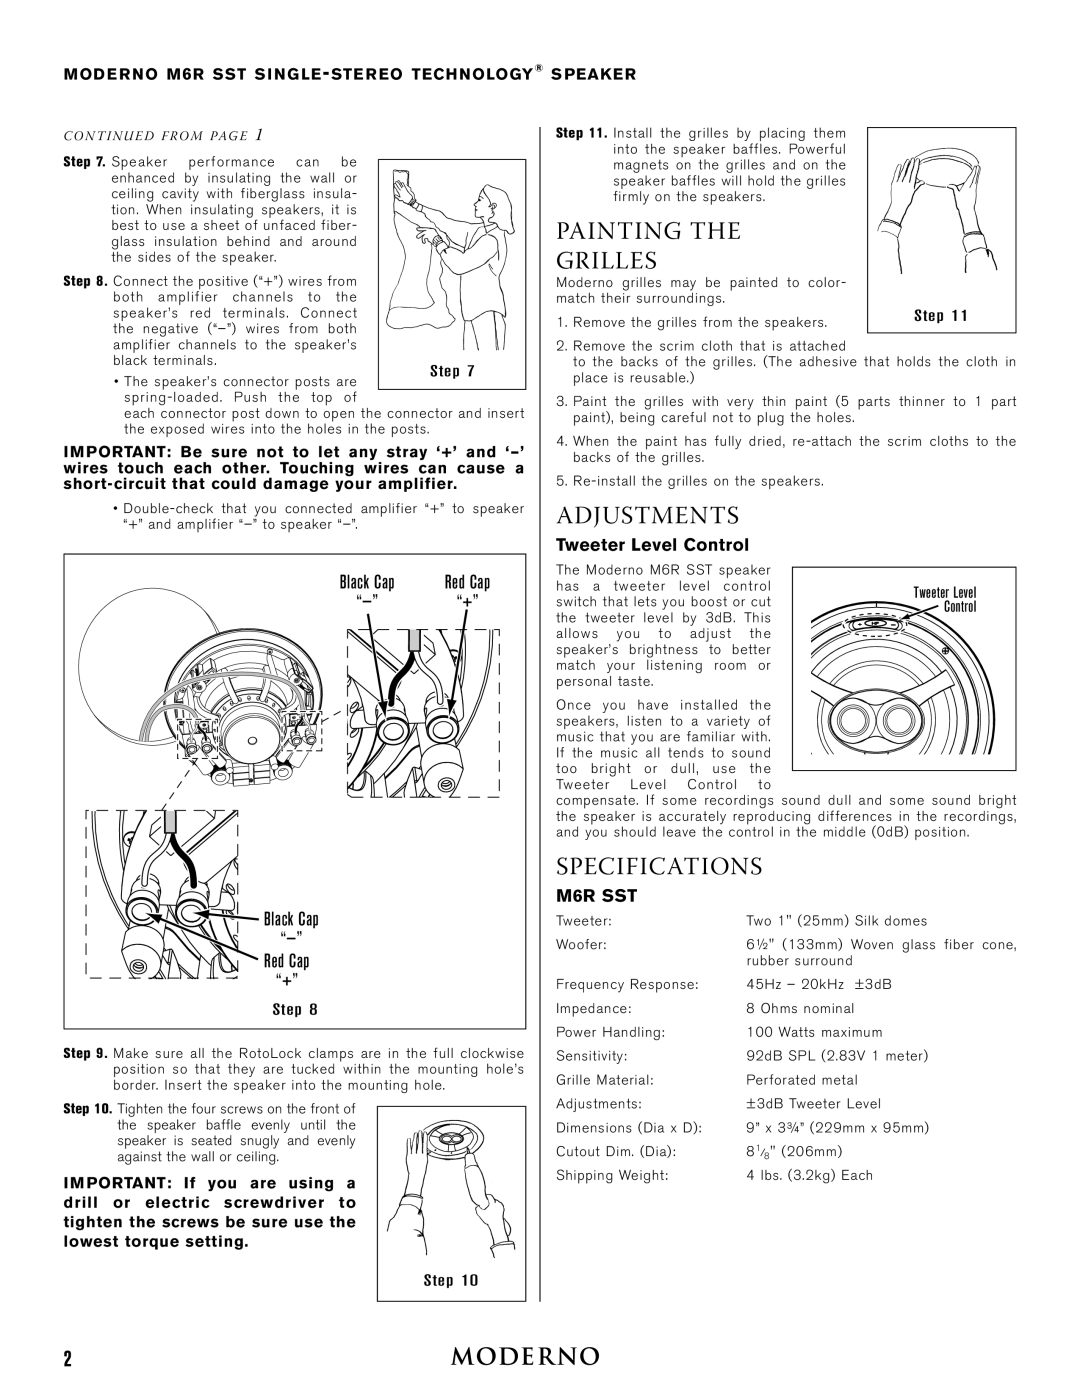
Step 8. Connect the positive (“+”) wires from both amplifier channels to the speaker’s red terminals. Connect the negative
• The speaker’s connector posts are
each connector post down to open the connector and insert the exposed wires into the holes in the posts.
IMPORTANT: Be sure not to let any stray ‘+’ and
•
Black Cap | Red Cap |
“+” | |
Black Cap |
|
| |
Red Cap |
|
“+” |
|
Step 8 |
|
Step 9. Make sure all the RotoLock clamps are in the full clockwise position so that they are tucked within the mounting hole’s border. Insert the speaker into the mounting hole.
Step 10. Tighten the four screws on the front of the speaker baffle evenly until the speaker is seated snugly and evenly against the wall or ceiling.
IMPORTANT: If you are using a drill or electric screwdriver to tighten the screws be sure use the lowest torque setting.
Step 11. Install the grilles by placing them into the speaker baffles. Powerful magnets on the grilles and on the speaker baffles will hold the grilles firmly on the speakers.
PAINTING THE |
|
GRILLES |
|
Moderno grilles may be painted to color- |
|
match their surroundings. |
|
1. Remove the grilles from the speakers. | Step 11 |
|
2.Remove the scrim cloth that is attached
to the backs of the grilles. (The adhesive that holds the cloth in place is reusable.)
3.Paint the grilles with very thin paint (5 parts thinner to 1 part paint), being careful not to plug the holes.
4.When the paint has fully dried,
5.
ADJUSTMENTS
Tweeter Level Control
The Moderno M6R SST speaker |
| ||||
has a tweeter | level | control | Tweeter Level | ||
switch that lets you boost or cut | |||||
Control | |||||
the tweeter level by 3dB. This |
| ||||
allows you to adjust the |
| ||||
speaker’s | brightness to | better |
| ||
match your listening room or |
| ||||
personal taste. |
|
|
| ||
Once you have installed the |
| ||||
speakers, listen to a variety of |
| ||||
music that you are familiar with. |
| ||||
If the music all tends to sound |
| ||||
too bright or dull, use the |
| ||||
| |||||
Tweeter | Level | Control to |
| ||
compensate. If some recordings sound dull and some sound bright the speaker is accurately reproducing differences in the recordings, and you should leave the control in the middle (0dB) position.
SPECIFICATIONS
M6R SST
Tweeter: | Two 1" (25mm) Silk domes |
Woofer: | 6½" (133mm) Woven glass fiber cone, |
| rubber surround |
Frequency Response: | 45Hz – 20kHz ±3dB |
Impedance: | 8 Ohms nominal |
Power Handling: | 100 Watts maximum |
Sensitivity: | 92dB SPL (2.83V 1 meter) |
Grille Material: | Perforated metal |
Adjustments: | ±3dB Tweeter Level |
Dimensions (Dia x D): | 9” x 3¾” (229mm x 95mm) |
Cutout Dim. (Dia): | 81/8" (206mm) |
Shipping Weight: | 4 lbs. (3.2kg) Each |
Step 10
2