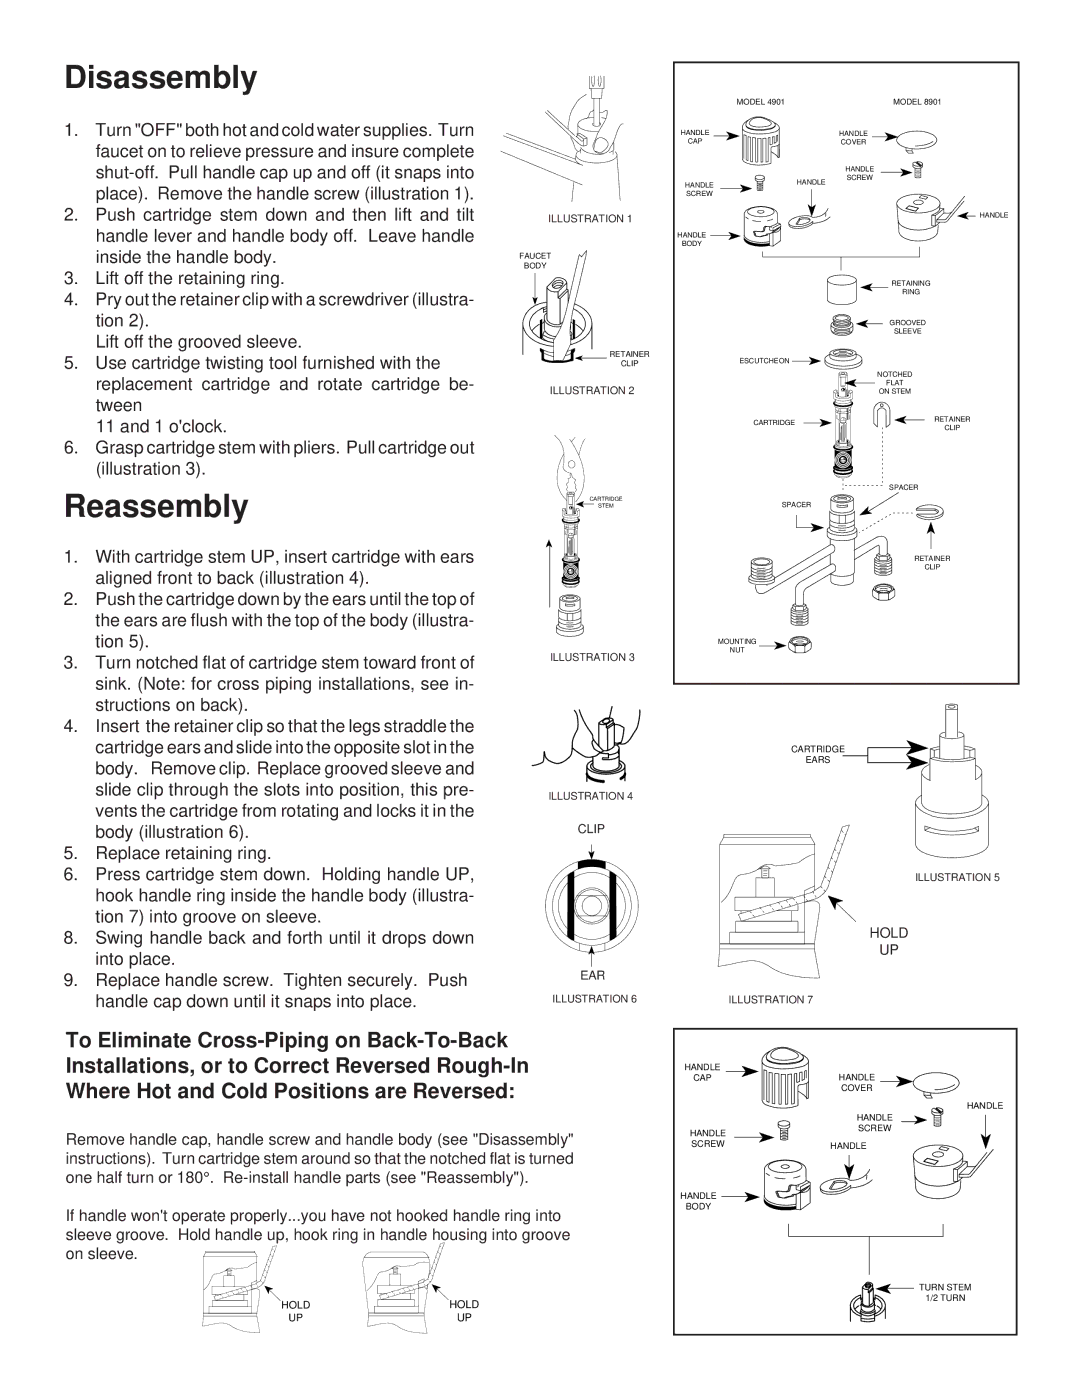
4901, 8901 specifications
The Moen 4901 and 8901 are cutting-edge faucet models that exemplify both style and functionality for modern kitchens and bathrooms. Designed with the latest technologies, these faucets cater to the needs of the discerning homeowner seeking efficiency and aesthetics.One of the standout features of both models is the innovative MotionSense technology. This allows for touchless activation, meaning you can start and stop the water flow with a simple wave of your hand. This not only enhances convenience, especially when cooking or cleaning, but also effectively minimizes the spread of germs, keeping your family safe and healthy.
Another significant characteristic of the Moen 4901 and 8901 is the Spot Resist finish, which helps to maintain a clean and polished look. This finish is designed to resist fingerprints, water spots, and other marks, making maintenance hassle-free and ensuring your faucet remains looking new for years. The fabulous chrome and stainless steel options further enhance the aesthetic appeal, fitting seamlessly into any modern décor.
The installation of these faucets is straightforward due to the Power Clean technology that provides a powerful, concentrated spray for efficient cleaning without the need for excessive water usage. This is particularly beneficial for those who strive for sustainability in their home, as it helps reduce overall water consumption while still ensuring effective cleaning.
Furthermore, the Moen 4901 and 8901 have a 360-degree swivel spout, allowing for greater flexibility and range of motion, which is particularly useful for large sinks or multi-tasking. The high-arc design provides ample space for filling pots and maneuvering large kitchen utensils, making cooking more convenient.
In terms of durability, both models are built with Moen’s high standards for quality and longevity. The ceramic disc cartridge ensures a lifespan of smooth operation and prevents leaks, which is a common issue in many faucet designs.
Overall, the Moen 4901 and 8901 models present an impressive blend of advanced technology, elegant design, and practicality. Whether you are looking to upgrade your kitchen or bathroom, these faucets deliver exceptional performance while enhancing the overall aesthetic of your space. With their innovative features and sleek design, they are a smart investment for any home.

