1071-8041-210, Monarch 314 Datalogging Humidity Temperature Meter specifications
The Monarch Monarch 314 Datalogging Humidity Temperature Meter, model number 1071-8041-210, is a cutting-edge instrument designed for professionals seeking precise environmental monitoring. This multi-functional meter combines advanced technologies to measure both humidity and temperature accurately, making it an essential tool for various industries including HVAC, food storage, pharmaceuticals, and agricultural applications.One of the standout features of the Monarch 314 is its dual-functionality. It measures relative humidity in a range from 0 to 100% with an impressive accuracy of ±2% RH. Simultaneously, it records ambient temperature across an extensive range, from -40°C to 125°C (-40°F to 257°F). This broad functionality allows users to gain comprehensive insights into environmental conditions critical for maintaining product quality and safety.
The robust design of the Monarch 314 includes a user-friendly interface equipped with a large, backlit LCD screen that displays readings clearly. The data logging capability allows the device to store thousands of readings over time, making it convenient for long-term monitoring. Readings can be easily retrieved and analyzed via a USB interface, where users can connect the meter to a computer for further data processing.
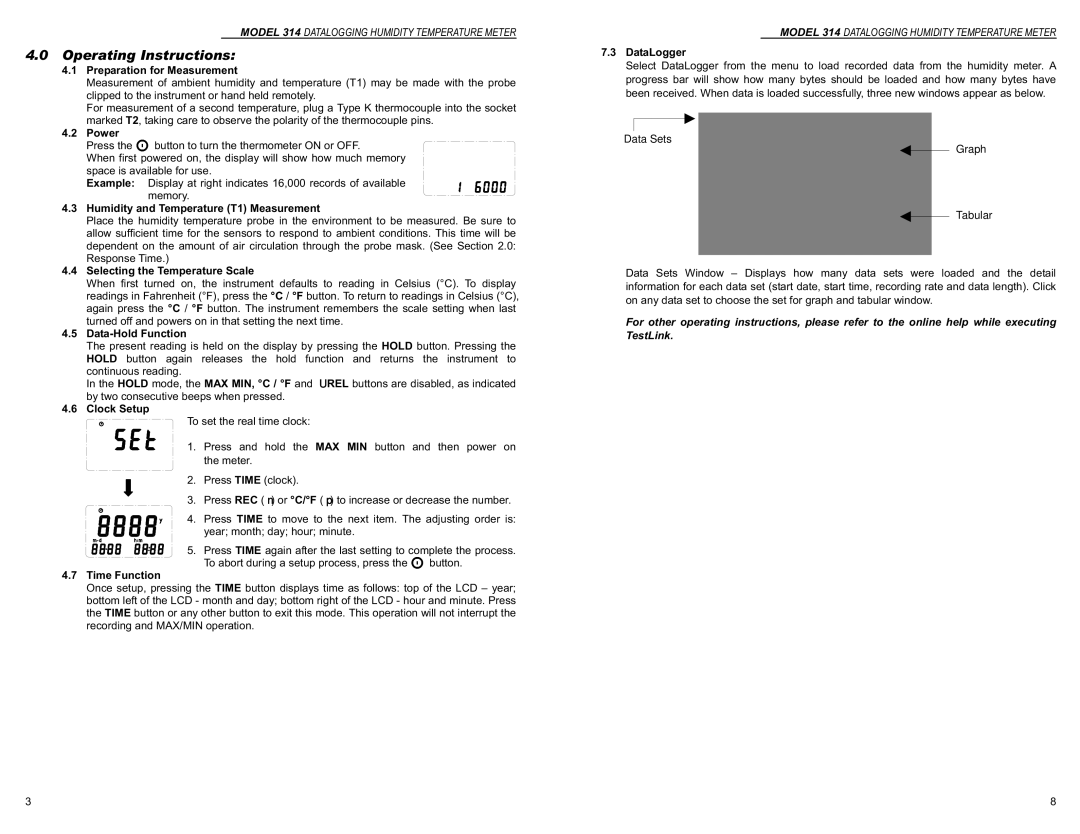
In addition, the device is designed to be highly portable with a lightweight structure and a protective case, making it easy to carry around to various locations. Its compact design doesn't compromise on durability; it is capable of withstanding daily wear and tear in challenging environments.
The Monarch 314 includes advanced calibration capabilities, ensuring that users can maintain accuracy over time. This feature is critical for industries requiring strict compliance with regulatory standards, as it allows for easy recalibration whenever necessary.
Furthermore, the meter is equipped with programmable alarms, which alert users when humidity or temperature readings exceed predetermined thresholds. This proactive functionality helps in preventing costly product spoilage and enhances overall operational efficiency.
In conclusion, the Monarch Monarch 314 Datalogging Humidity Temperature Meter, 1071-8041-210, is an exemplary tool for monitoring environmental conditions with its comprehensive features, advanced technologies, and user-friendly design. Its reliability and accuracy make it a valuable asset for professionals in various fields, ensuring optimal conditions for their products and processes.