
5LCR52 specifications
The Monte Carlo Fan Company 5LCR52 is an elegant and efficient ceiling fan that combines style with functionality, making it an excellent choice for both contemporary and traditional interiors. With its sleek design and versatile features, this fan is engineered to enhance any living space while providing reliable airflow.One of the standout characteristics of the 5LCR52 is its size. Measuring 52 inches in blade span, it is ideally suited for medium to large rooms, such as living rooms, bedrooms, or dining areas. The fan comes with five blades, which are well-balanced for optimal airflow circulation. This ensures that the fan operates quietly while effectively cooling the room.
The 5LCR52 employs advanced motor technology that results in powerful but efficient performance. The fan is equipped with a DC motor, which is not only energy-efficient but also operates with minimal noise. This makes it perfect for quiet environments such as bedrooms or study areas. The energy-saving aspect of the motor contributes to lower electricity bills, making it an environmentally friendly option.
One of the key features of the Monte Carlo 5LCR52 is its stylish finish options. Available in various finishes like brushed steel, matte black, and white, it can easily complement various interior design styles. Additionally, the fan’s integrated light kit, available on select models, adds to its functionality, providing illumination while seamlessly blending into the fan’s aesthetic.
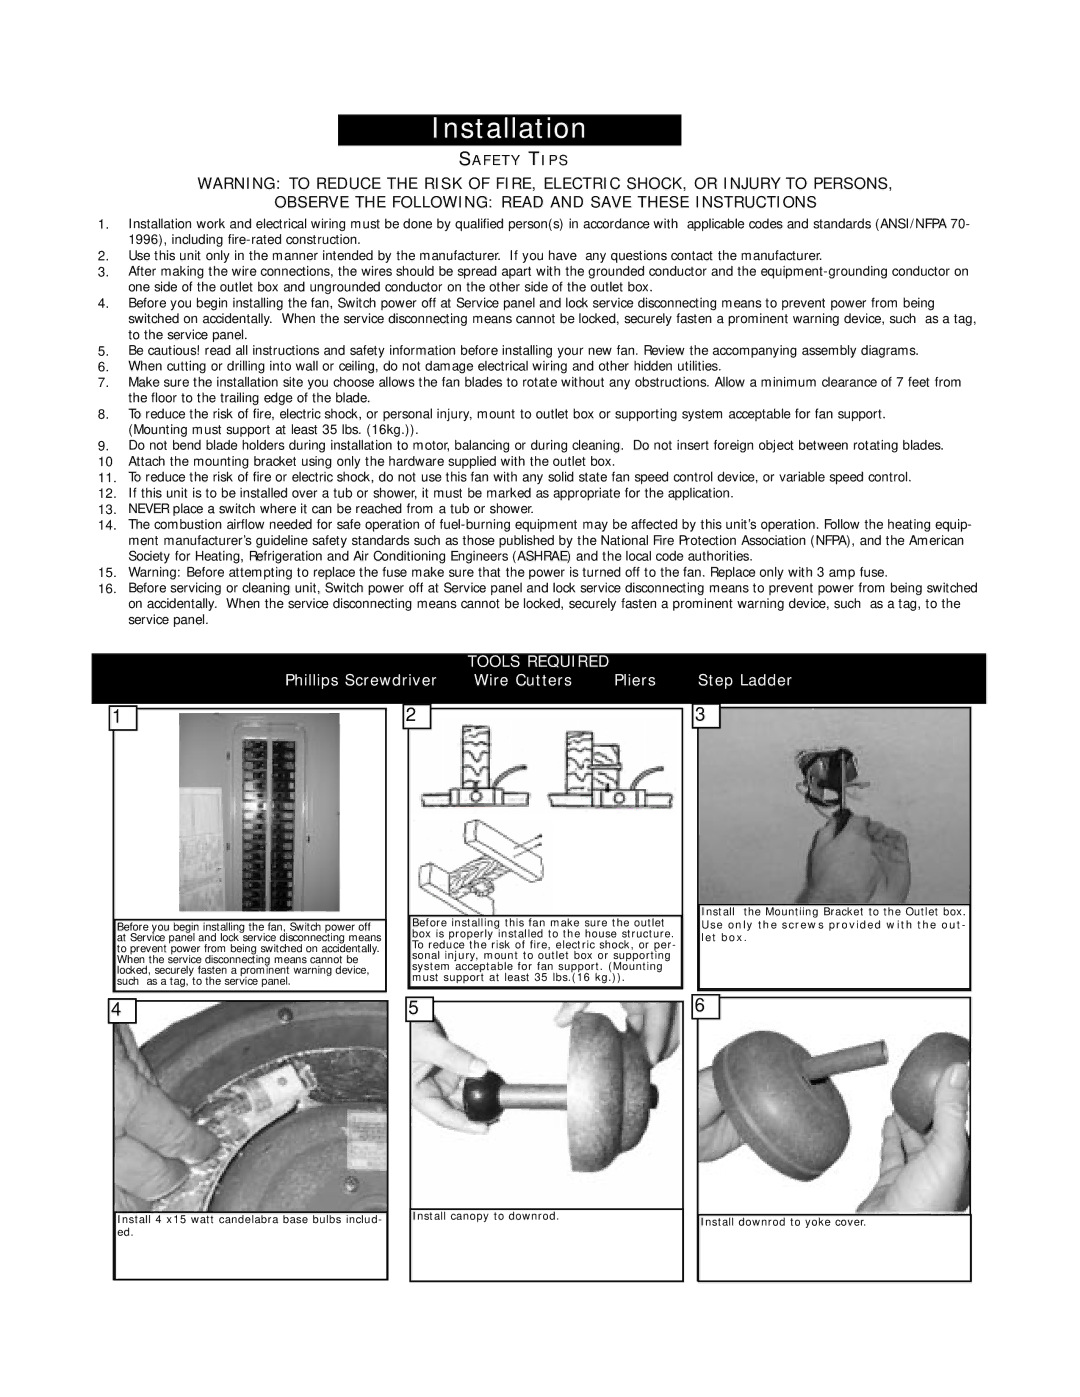
Installation is made simple with the 5LCR52, as it comes with a straightforward mounting system. Depending on the ceiling height, the fan can be installed flush or with a downrod, allowing for versatility in different rooms.
Moreover, the fan is equipped with a remote control that provides convenience and ease of operation. Users can easily control the fan’s speed settings and light functions from a distance, enhancing the overall user experience.
In conclusion, the Monte Carlo Fan Company 5LCR52 is an impressive combination of style, performance, and modern technology. With its efficient motor, elegant design, and user-friendly features, it stands out as an excellent choice for homeowners looking to enhance their spaces while enjoying a comfortable atmosphere.