MSF radio controlled alarm clock
28023 | OPERATING INSTRUCTIONS |
Electrical requirements
Check that the voltage on the rating plate of your alarm clock corresponds with your house electricity supply which must be A.C. (Alternating current).
For alarm clocks with fitted plug.
If the socket outlets in your home are not suitable for the plug supplied with this appliance the plug should be removed and the appropriate one fitted.
IMP0RTANT : THE PLUG REMOVED FROM THE MAINS LEAD, IF SEVERED, MUST BE DESTROYED AS A PLUG WITH A BARED FLEXIBLE CORD IS HAZARDOUS IF ENGAGED INTO A LIVE SOCKET OUTLET.
Should the fuse in the 13 amp mains plug require changing a 3 amp BS1362 fuse must be fitted.
The socket outlet should be installed near the equipment and shall be easily accessible.
Battery
1Remove the battery compartment cover (located underneath the unit) by pushing in the clip and lifting off.
2Insert 3 x AA size 1.5V batteries and connect to terminals (Ensure the batteries are inserted correctly).
3Replace the battery compartment cover. (Batteries not supplied).
Should a power interruption occur the clock will continue to run, however, time keeping will not be accurate. The display will be extinguished to conserve battery life but the memory will retain details of the clock time and alarm settings.
If the optional battery is not installed in case of the AC power failure when power is restored, the clock will go through the automatic msf clock setting. You will need to set the alarm.
Battery
If the unit is not to be used for a prolonged period, remove the battery to avoid battery leakage.
In the interests of environmental safety : dispose of batteries safely.
P.3
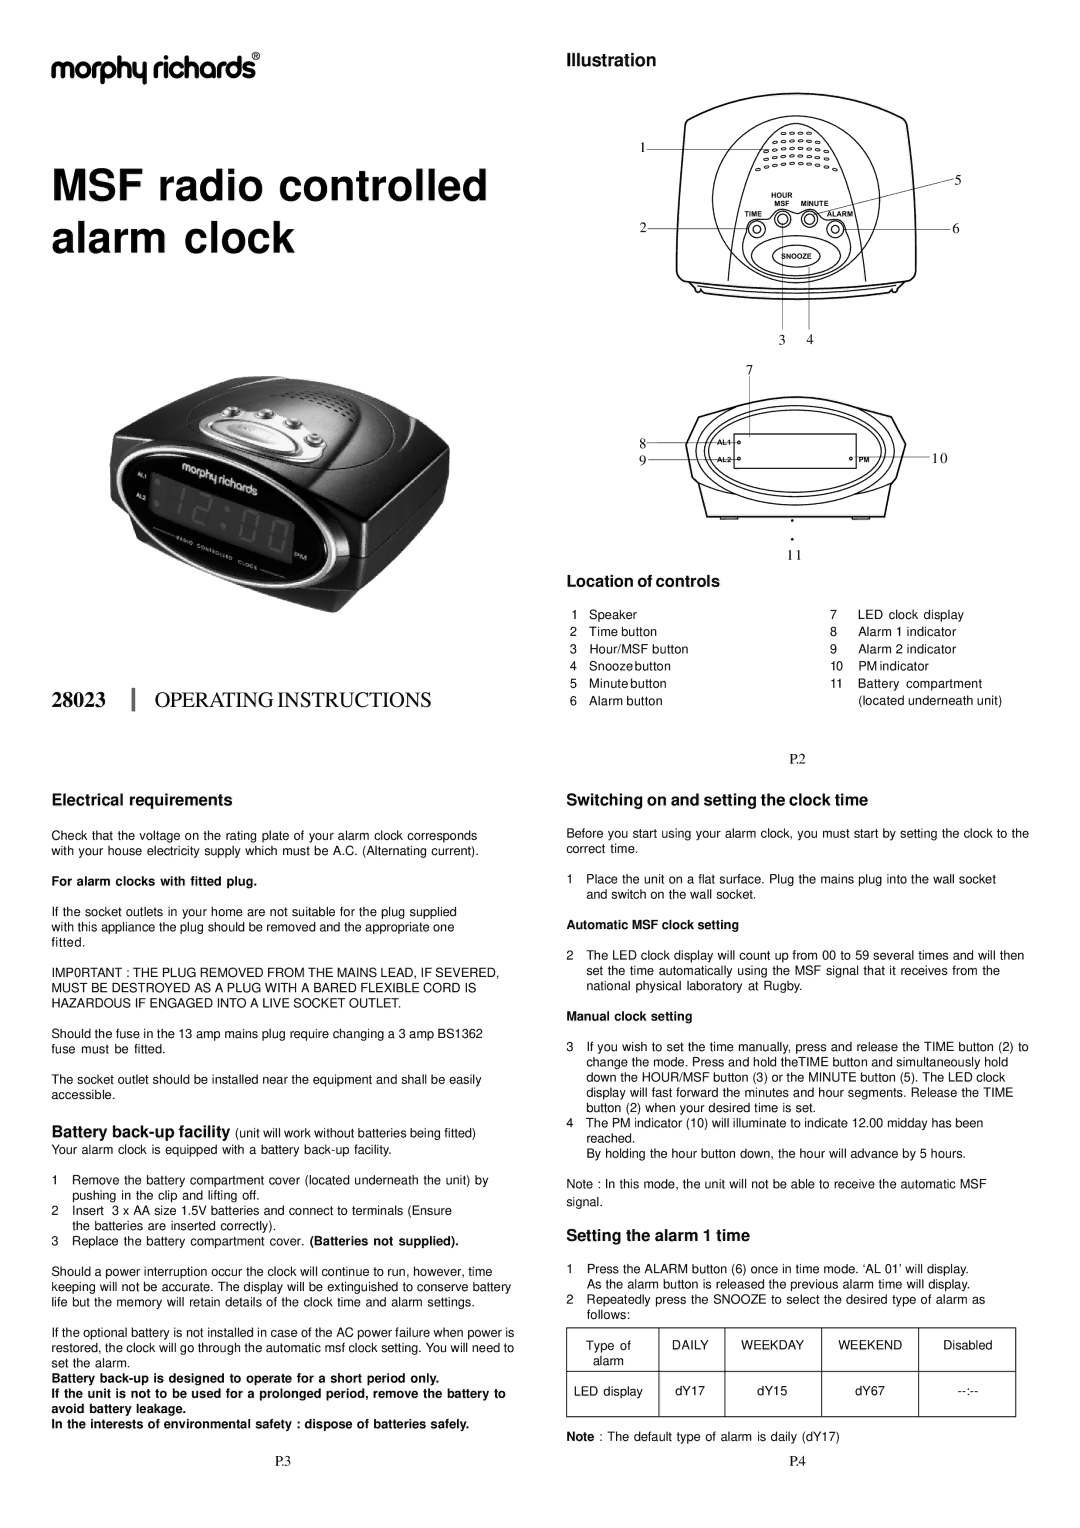
Illustration
1
|
|
| 5 |
| HOUR |
|
|
| MSF | MINUTE |
|
| TIME | ALARM |
|
2 |
|
| 6 |
| SNOOZE |
| |
| 3 | 4 |
|
| 7 |
|
|
8 | AL1 |
| 1 0 |
9 | AL2 | PM | |
1 1
Location of controls
1 | Speaker | 7 | LED clock display |
2 | Time button | 8 | Alarm 1 indicator |
3 | Hour/MSF button | 9 | Alarm 2 indicator |
4 | Snooze button | 10 | PM indicator |
5 | Minute button | 11 | Battery compartment |
6 | Alarm button |
| (located underneath unit) |
P.2
Switching on and setting the clock time
Before you start using your alarm clock, you must start by setting the clock to the correct time.
1Place the unit on a flat surface. Plug the mains plug into the wall socket and switch on the wall socket.
Automatic MSF clock setting
2The LED clock display will count up from 00 to 59 several times and will then set the time automatically using the MSF signal that it receives from the national physical laboratory at Rugby.
Manual clock setting
3If you wish to set the time manually, press and release the TIME button (2) to change the mode. Press and hold theTIME button and simultaneously hold down the HOUR/MSF button (3) or the MINUTE button (5). The LED clock display will fast forward the minutes and hour segments. Release the TIME button (2) when your desired time is set.
4The PM indicator (10) will illuminate to indicate 12.00 midday has been reached.
By holding the hour button down, the hour will advance by 5 hours.
Note : In this mode, the unit will not be able to receive the automatic MSF signal.
Setting the alarm 1 time
1Press the ALARM button (6) once in time mode. ‘AL 01’ will display. As the alarm button is released the previous alarm time will display.
2Repeatedly press the SNOOZE to select the desired type of alarm as follows:
Type of | DAILY | WEEKDAY | WEEKEND | Disabled |
alarm |
|
|
|
|
|
|
|
|
|
LED display | dY17 | dY15 | dY67 | |
|
|
|
|
|
Note : The default type of alarm is daily (dY17)
P.4