WARNING: Do not immerse the plastic body of the fryer or pod in water.

Dry all parts of your fryer thoroughly and replace the lid, bowl and basket(s).

Replace the bowl with the max/min lines to the rear. (Please follow the cleaning instructions).

Disassembly sequence

The fryer has to be disassembled and assembled following this procedure.

Open the lid and remove.

Remove the baskets.

Lift out the tank.

Pull out the control pod.

Assembly is the reverse of the above process.

Removal of control pod

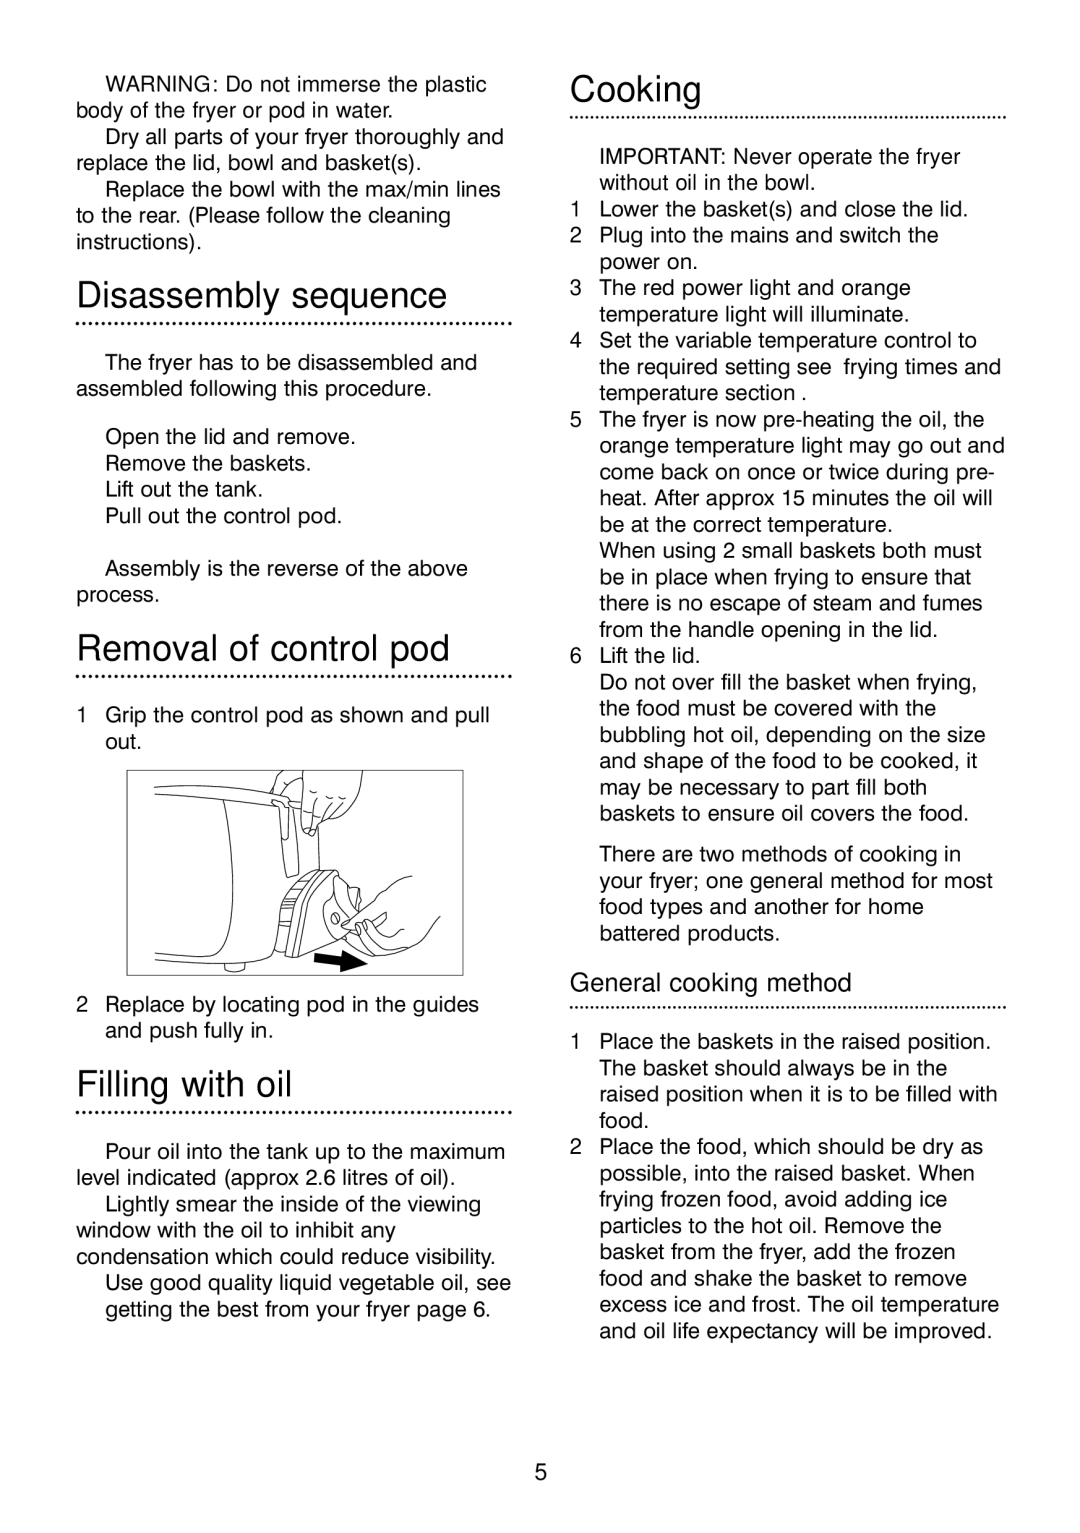
1Grip the control pod as shown and pull out.

2Replace by locating pod in the guides and push fully in.

Filling with oil

Pour oil into the tank up to the maximum level indicated (approx 2.6 litres of oil).

Lightly smear the inside of the viewing window with the oil to inhibit any condensation which could reduce visibility.

Use good quality liquid vegetable oil, see getting the best from your fryer page 6.

Cooking

IMPORTANT: Never operate the fryer without oil in the bowl.

1Lower the basket(s) and close the lid.

2Plug into the mains and switch the power on.

3The red power light and orange temperature light will illuminate.

4Set the variable temperature control to the required setting see ‘frying times and temperature section’.

5The fryer is now pre-heating the oil, the orange temperature light may go out and come back on once or twice during pre-

heat. After approx 15 minutes the oil will be at the correct temperature.

When using 2 small baskets both must be in place when frying to ensure that there is no escape of steam and fumes

from the handle opening in the lid.

6Lift the lid.

Do not over fill the basket when frying, the food must be covered with the bubbling hot oil, depending on the size and shape of the food to be cooked, it may be necessary to part fill both baskets to ensure oil covers the food.

There are two methods of cooking in your fryer; one general method for most food types and another for home battered products.

General cooking method

1Place the baskets in the raised position. The basket should always be in the raised position when it is to be filled with food.

2Place the food, which should be dry as possible, into the raised basket. When frying frozen food, avoid adding ice particles to the hot oil. Remove the basket from the fryer, add the frozen food and shake the basket to remove excess ice and frost. The oil temperature and oil life expectancy will be improved.

5

Page 5
Image 5
Morphy Richards 3-in-1 basket fryer manual Disassembly sequence, Removal of control pod, Filling with oil, Cooking

3-in-1 basket fryer specifications

The Morphy Richards 3-in-1 basket fryer is a versatile kitchen appliance designed to simplify cooking and enhance the culinary experience for home chefs. This innovative fryer combines three cooking methods—frying, baking, and grilling—all in one compact unit. Its multifunctionality makes it ideal not just for frying crispy chips or chicken wings, but also for preparing healthier meals by utilizing baking and grilling options.

One of the standout features of the Morphy Richards 3-in-1 fryer is its large capacity. The basket design enables users to cook larger portions, making it suitable for families or gatherings. The adjustable temperature control allows for precise cooking, ensuring that foods are cooked thoroughly yet remain tender and juicy inside.

Another impressive aspect of this fryer is its rapid air technology. This innovative feature circulates hot air around the food, achieving a crispy finish with significantly less oil than traditional frying methods. This not only results in healthier meals but also reduces cooking odors, making it a pleasant addition to any kitchen setting.

The fryer also includes a digital timer, allowing users to set cooking times accurately. This ensures that food is cooked to perfection, minimizing the risk of overcooking. Additionally, the non-stick coating on the basket ensures easy food release and simplifies cleaning, making the entire cooking process hassle-free.

For those who appreciate convenience, the Morphy Richards 3-in-1 basket fryer comes with a user-friendly interface. With clearly marked buttons and intuitive controls, it's easy to switch between frying, baking, and grilling. This appliance is perfect for those looking to experiment with various recipes and cooking techniques, from crispy vegetable chips to succulent grilled meats.

Durability is also a key characteristic of the Morphy Richards fryer. Made from high-quality materials, it promises long-lasting performance. The elegant design and compact size make it an attractive addition to any kitchen counter without taking up too much space.

In conclusion, the Morphy Richards 3-in-1 basket fryer stands out as a multifunctional cooking appliance that offers an array of features and technologies. Its ease of use, combined with the ability to create healthier meals, makes it a valuable asset for both novice cooks and seasoned chefs alike.