
109041 specifications
Mr. Coffee has long been synonymous with home brewing, and the Mr. Coffee 109041 model takes that reputation into an innovative realm of coffee-making. This coffee maker is equipped with features designed for coffee aficionados and casual drinkers alike, ensuring that everyone can enjoy a perfect cup every time.One of the standout features of the Mr. Coffee 109041 is its programmable functionality. Users can set the coffee maker to brew at specific times, allowing for that perfectly brewed cup to greet you first thing in the morning. The 24-hour programming feature is simple to use, putting fresh coffee at your fingertips without the morning rush. Additionally, the auto shut-off feature is a great safety addition, turning off the machine after 2 hours, which lends peace of mind if you’re heading out the door in a hurry.
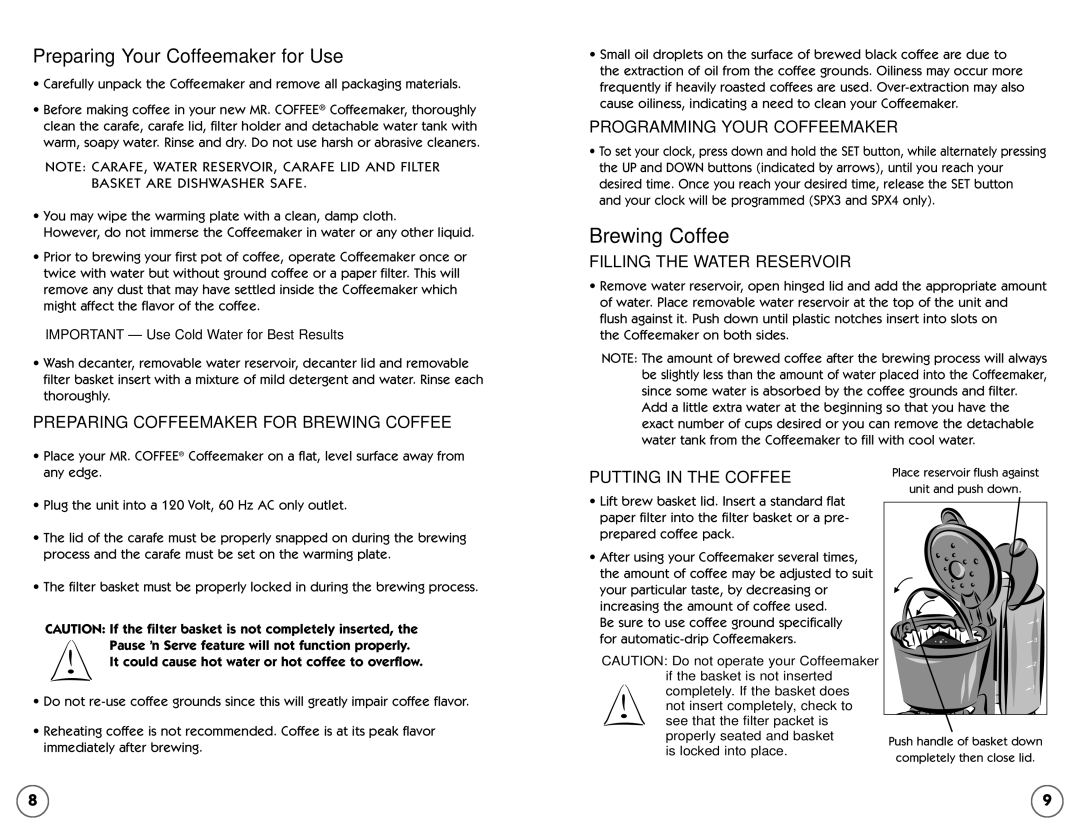
In terms of brewing capacity, the Mr. Coffee 109041 has a generous 12-cup capacity, making it ideal for families or anyone who enjoys sharing coffee with guests. The brewing process is enhanced by a brewing pause feature, allowing users to sneak a cup mid-brew without making a mess. This feature is particularly attractive for those who cannot wait for the entire pot to brew.
The technology behind the Mr. Coffee 109041 focuses on efficiency and quality. The optimal brewing temperature ensures that the coffee extracts its full range of flavors, providing you with rich and aromatic coffee. Additionally, the dual water window allows you to monitor the water level easily, preventing overflows and ensuring precise measurements for every brew.
The Mr. Coffee 109041 is also designed with user convenience in mind; it includes a removable filter basket that simplifies cleanup. The clean-up process is made even easier with the dishwasher-safe components, allowing busy individuals to enjoy their coffee without the hassle of extensive maintenance. The sleek design of the coffee maker fits seamlessly into any kitchen aesthetic, combining functionality with modern elegance.
In summary, the Mr. Coffee 109041 brings together advanced features, user-friendly technology, and stylish design, making it a standout choice for coffee lovers everywhere. Whether you’re brewing for one or many, this coffee maker is designed to deliver a delicious cup of coffee with every brew.