Manuals
/
MTD
/
Lawn and Garden
/
Chipper
MTD
462 thru 464
warranty
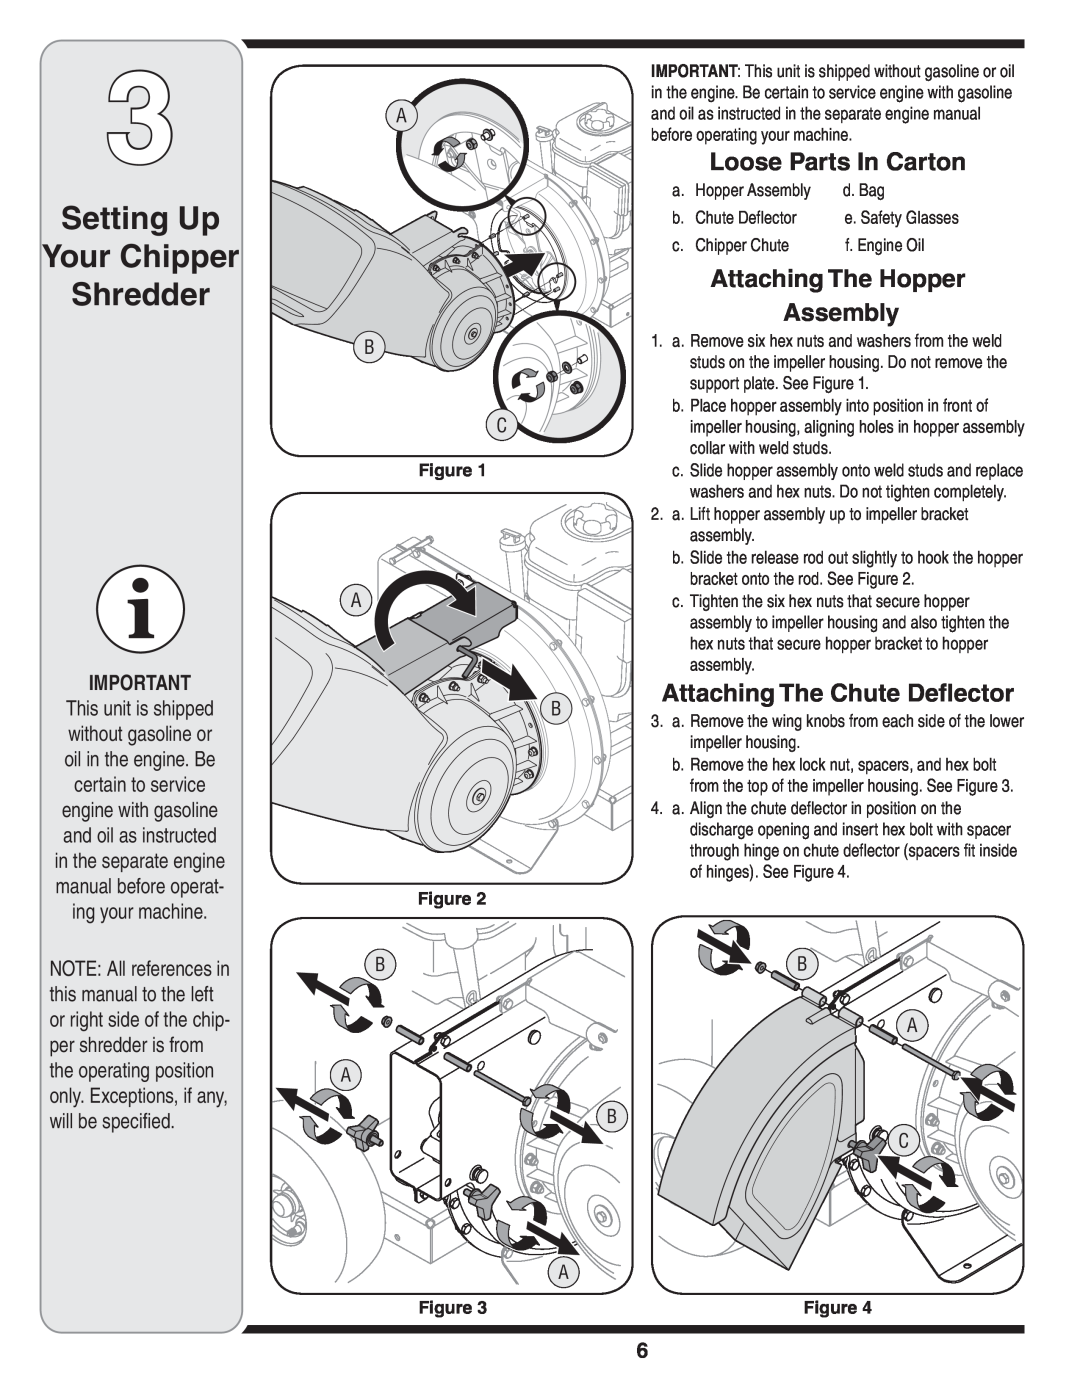
Setting Up Your Chipper Shredder, Loose Parts In Carton
Models:
462 thru 464
1
6
20
20
Download
20 pages
27.59 Kb
3
4
5
6
7
8
9
10
Troubleshooting
Parts list
Maintenance
Attaching The Hopper Assembly
Safety
Page 6
Image 6
Page 5
Page 7
Page 6
Image 6
Page 5
Page 7
Contents
OPERATOR’S MANUAL
Chipper Shredder - Model Series 462 thru
MTD LLC, P.O. BOX 361131 CLEVELAND, OHIO
Customer Support
Table of Contents
Finding and Recording Model Number
Model Number
Safety Labels
Your Responsibility
HEED ITS WARNING
Training
Safe Operation
Practices
Preparation
Operation
Maintenance & Storage
Safe Operation Practices
Do not modify engine
Loose Parts In Carton
Setting Up Your Chipper Shredder
Attaching The Hopper Assembly
Attaching The Chute Deflector
Attaching The Chipper Chute
Attaching The Bag
Operating Your Chipper Shredder
Know Your Chipper Shredder
Tow Bar If Equipped
WARNING Never run the engine
Operating
Your Chipper Shredder
ide, an odorless and deadly gas
Lubrication
Maintaining Your Chipper Shredder
General Recommendations
Engine Care
Sharpening Or Replacing The Shredder Blade
Storing Your Chipper Shredder
Cause
Trouble Shooting
Problem
Remedy
For parts and/or accessories please call
Model Series 462 Thru
Parts List
† Model Series 464 †† Model 464G Only
Pop Rivet
Page
Page
MANUFACTURER’S LIMITED WARRANTY FOR
Top
Page
Image
Contents