Manuals
/
MTD
/
Lawn and Garden
/
Lawn Mower
MTD
769-01445
manual
Safety and Decorative LABELS/ Étiquettes
Models:
769-01445
1
19
36
36
Download
36 pages
46.57 Kb
16
17
18
19
20
21
22
23
Troubleshooting
Install
Parts list
Warranty
Maintenance
Motor/Blade Control Assembly
Height Adjustment Lever
Lame la de Remplacement
Service
Page 19
Image 19
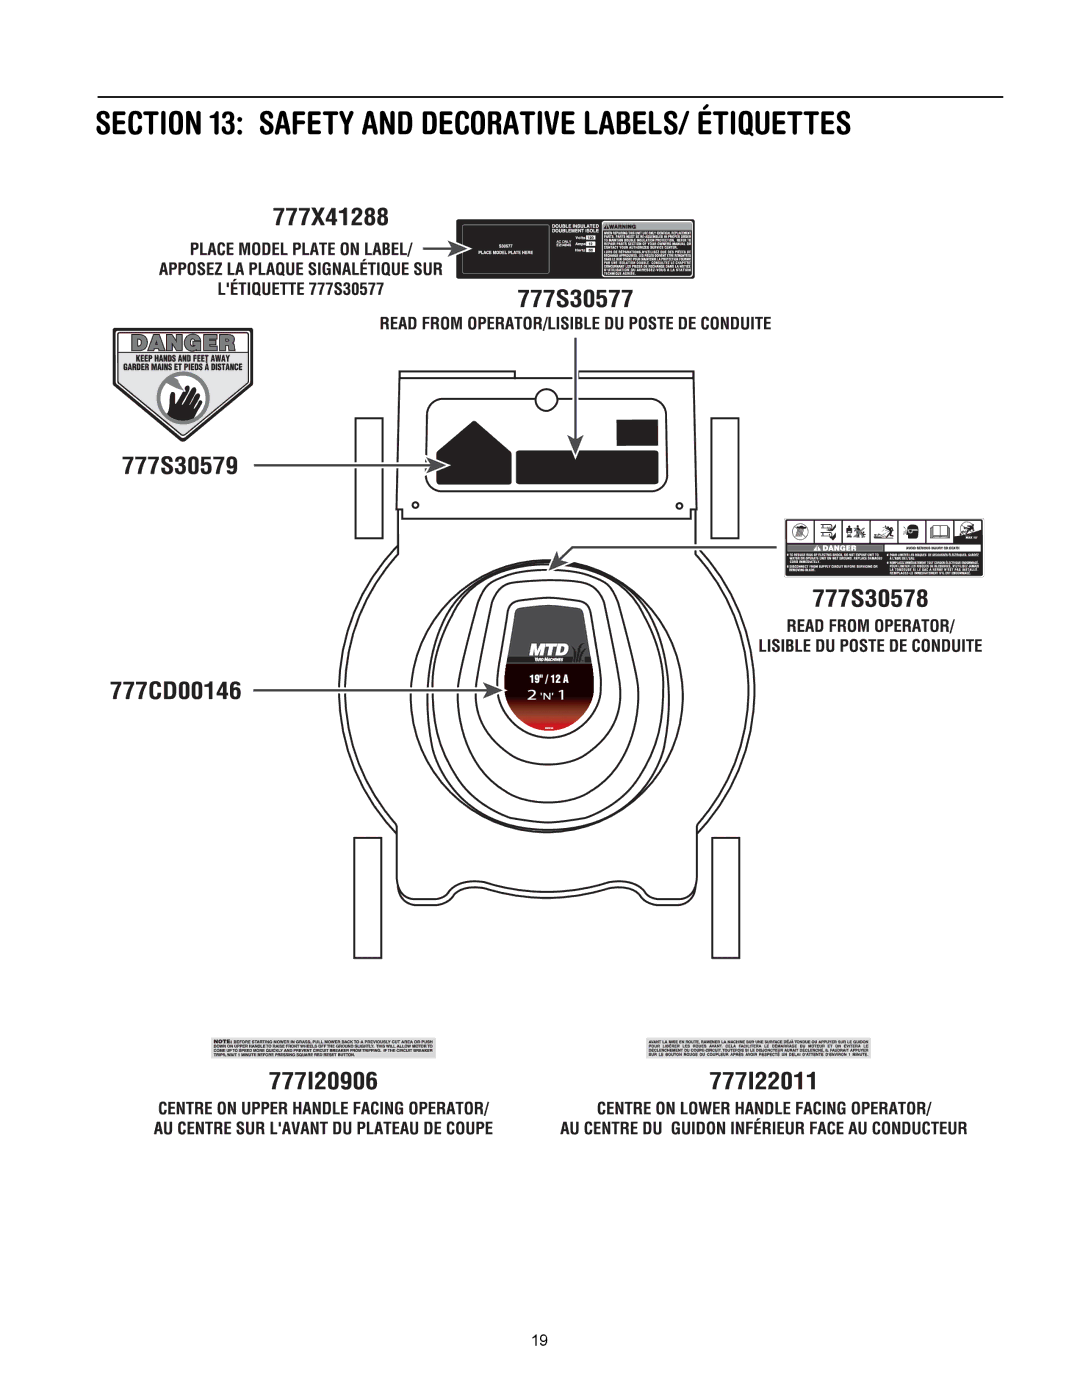
SECTION 13: SAFETY AND DECORATIVE LABELS/ ÉTIQUETTES
19
Page 18
Page 20
Page 19
Image 19
Page 18
Page 20
Contents
OPERATOR’S Manual
Finding Model Number
Table of Contents
Calling Customer Support
General Operation
Important Safe Operation Practices
Children
Slope Operation
Double Insulated Lawn Mower
Service
Slope Gauge
Assembling Your Lawn Mower
Unpacking Instructions
Attaching The Grass Catcher
Assembling the Grass Catcher
Circuit Breaker
Motor/Blade Control Assembly
Know Your Lawn Mower
Rear Trailing Shield
Cord Connection
Height Adjustment Lever
Operating Your Lawn Mower
Cord Restraint
Mowing Your Lawn
Stopping the Motor and Blade
Maintenance
Making Adjustments
Lubrication
Mower Deck
OFF-SEASON Storage
Trouble Possible Causes Corrective Action
Trouble Shooting Guide
Parts LIST/LISTE DES Pièces
Part RÉF Pièce Description
TWO Year Limited Warranty
Safety and Decorative LABELS/ Étiquettes
Vente Après Service ET Garantie Sous Pièces 11 Section
Tonte Capot le Inadéquat
Dépannage 10 Section
Lubrification
Saison Hors Entreposage 9 Section
Entretien 8 Section
Lame la de Remplacement
Disjoncteur du Réenclenchement
Guidon du hauteur la de Réglage
Pelouse la de Tonte
Rallonge d’une choix Le
Utilisation 6 Section
Familiarisation 5 Section
Herbe à sac du Assemblage
Herbe à sac du Installation
Détachées Pièces
Tondeuse la de Déballage
Déballer Pour Instructions 3 Section
Guidon du Assemblage
TRE Pour DÉ Terminer LES Pentes SUR Lesquelles IL Serait
Terrain DU Pente LA DE Calcul 2 Section
Garde EN Mise DE Étiquettes
Entretien
Double Isolation
’enfants présence en Utilisation
Risques des présentant Utilisation
Courante Utilisation
Sécurité DE Consignes 1 Section
Matières DES Table
Modèle DE Numéro
’UTILISATION Notice
Top
Page
Image
Contents