SECTION 3: KNOW YOUR SNOW THROWER
WARNING: Be familiar with all the controls on the snow thrower and their proper operation. Know how to stop the machine and disengage them quickly.
| Auger Control Handle |
| Recoil Starter |
Gasoline Cap |
|
Primer |
|
Key | Electric Starter(If Equipped) |
| Spark Plug Access |
Discharge |
|
Chute |
|
| Oil Fill Plug |
| Choke |
Auger | Lever |
| |
Shave Plate |
|
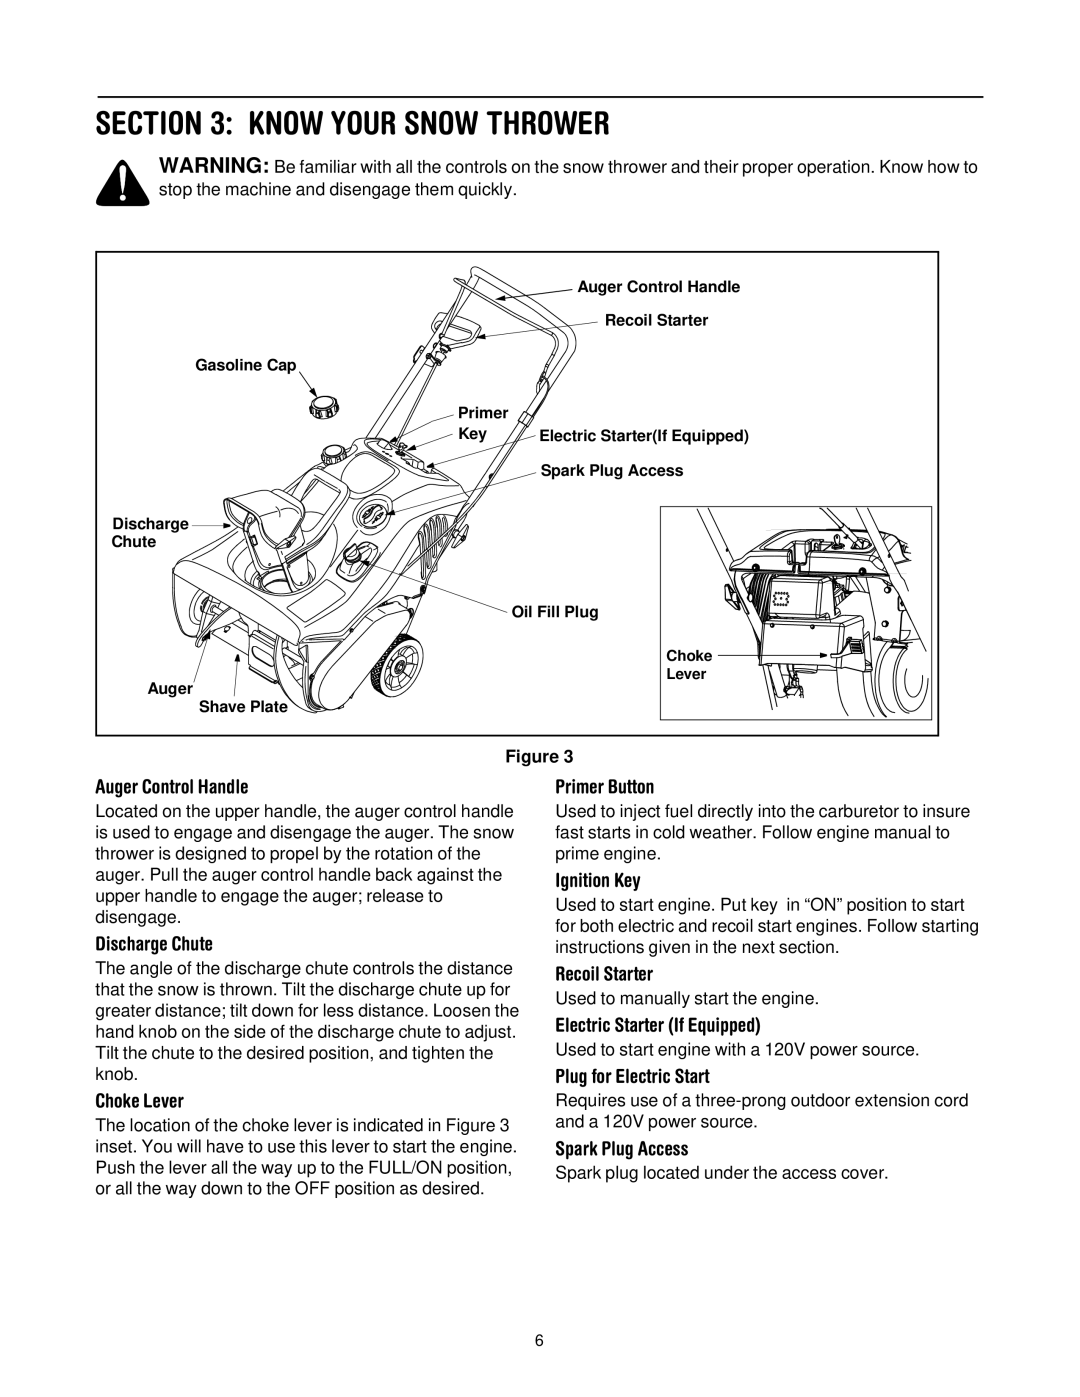
Figure 3
Auger Control Handle
Located on the upper handle, the auger control handle is used to engage and disengage the auger. The snow thrower is designed to propel by the rotation of the auger. Pull the auger control handle back against the upper handle to engage the auger; release to disengage.
Discharge Chute
The angle of the discharge chute controls the distance that the snow is thrown. Tilt the discharge chute up for greater distance; tilt down for less distance. Loosen the hand knob on the side of the discharge chute to adjust. Tilt the chute to the desired position, and tighten the knob.
Choke Lever
The location of the choke lever is indicated in Figure 3 inset. You will have to use this lever to start the engine. Push the lever all the way up to the FULL/ON position, or all the way down to the OFF position as desired.
Primer Button
Used to inject fuel directly into the carburetor to insure fast starts in cold weather. Follow engine manual to prime engine.
Ignition Key
Used to start engine. Put key in “ON” position to start for both electric and recoil start engines. Follow starting instructions given in the next section.
Recoil Starter
Used to manually start the engine.
Electric Starter (If Equipped)
Used to start engine with a 120V power source.
Plug for Electric Start
Requires use of a
Spark Plug Access
Spark plug located under the access cover.
6
