HS62A CUT-OFF SAW — MAINTENANCE
V-Belt Changing Procedure
N
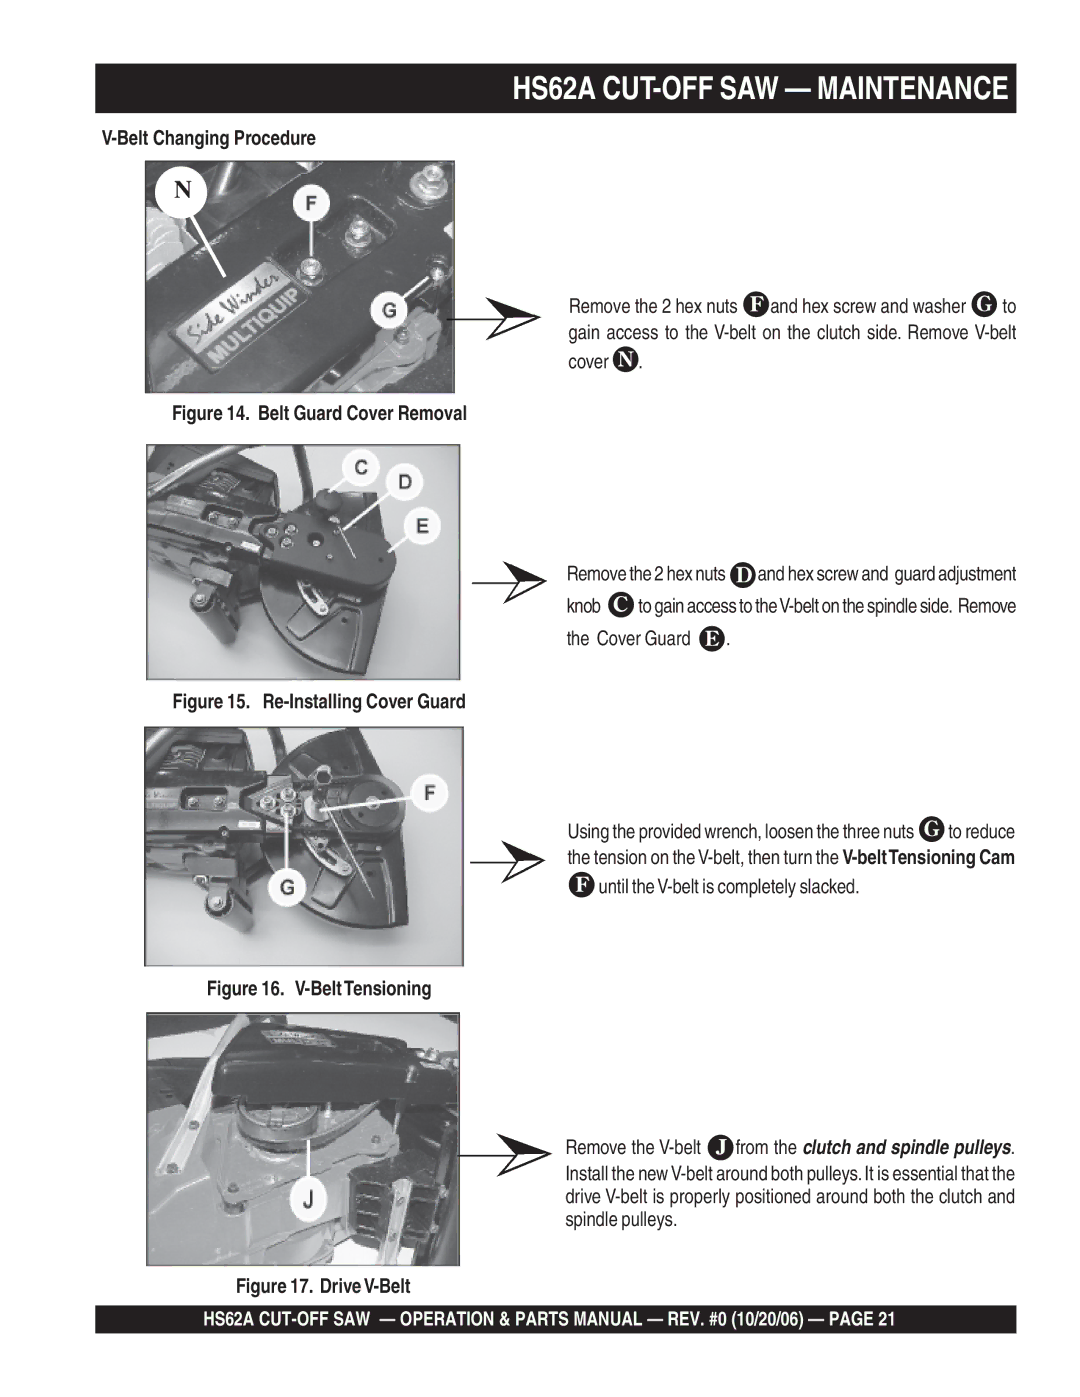
Remove the 2 hex nuts | and hex screw and washer | to |
gain access to the
cover .
Figure 14. Belt Guard Cover Removal
Remove the 2 hex nuts | and hex screw and guard adjustment | |
knob | to gain access to | |
the Cover Guard | . | |
Figure 15. Re-Installing Cover Guard
Using the provided wrench, loosen the three nuts | to reduce |
the tension on the
until the V-belt is completely slacked.
Figure 16. V-Belt Tensioning
Remove the | from the clutch and spindle pulleys. |
Install the new
Figure 17. Drive V-Belt
HS62A
