HS81A
1 | 2 | 3 | 4 |
12
11
10 9 8 7 6 5
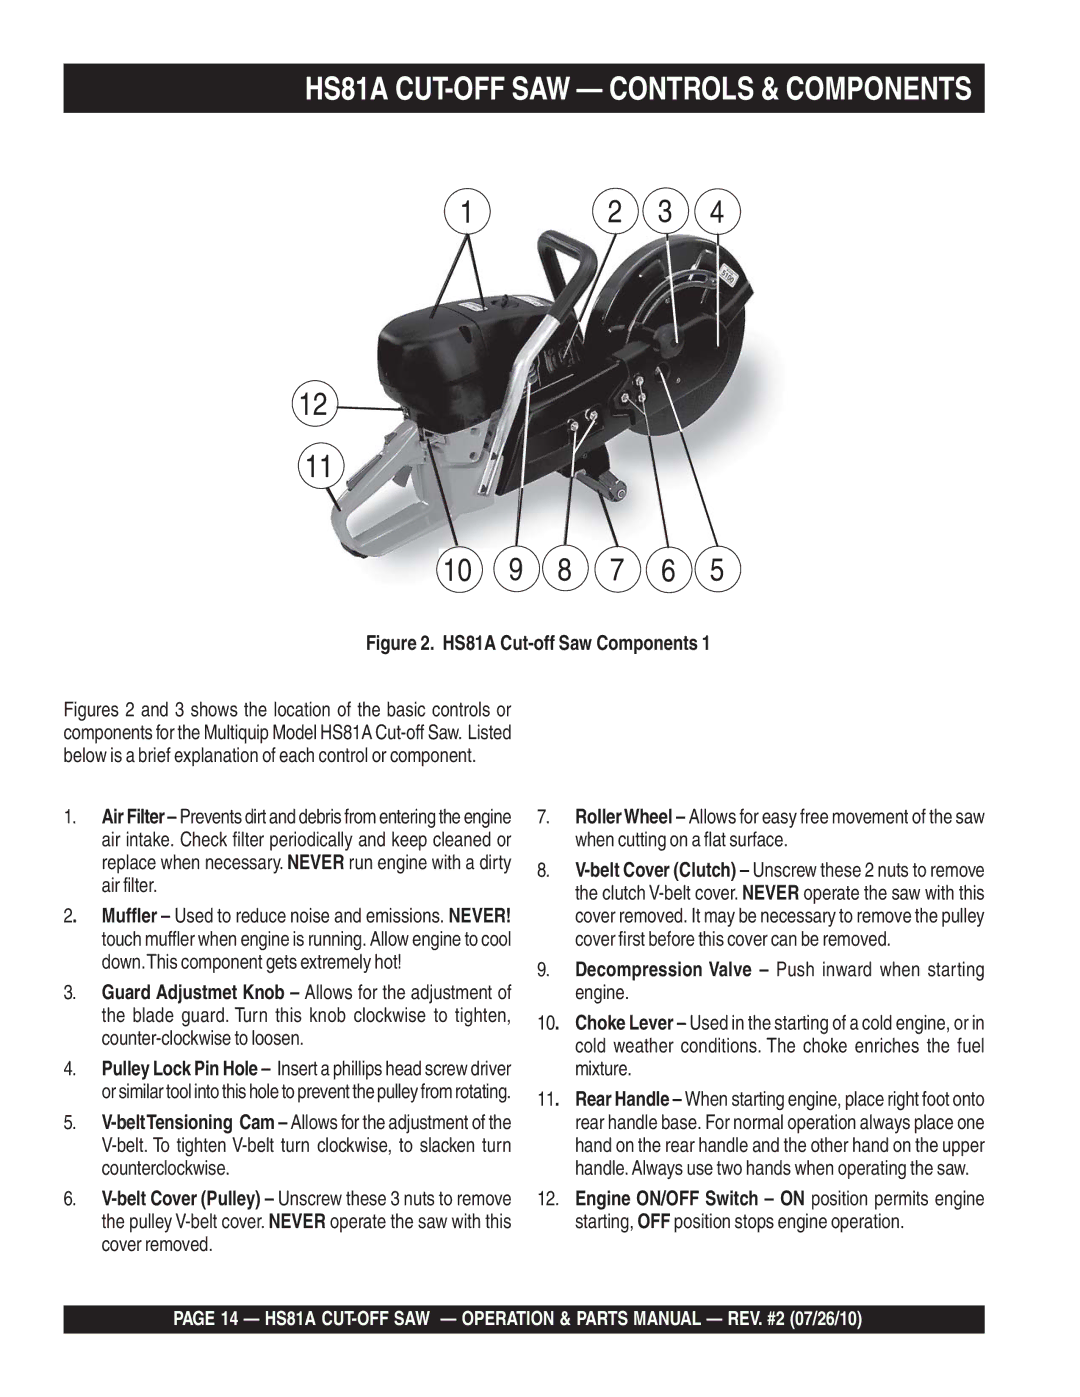
Figure 2. HS81A Cut-off Saw Components 1
Figures 2 and 3 shows the location of the basic controls or components for the Multiquip Model HS81A Cut-off Saw. Listed below is a brief explanation of each control or component.
1.Air Filter – Prevents dirt and debris from entering the engine air intake. Check filter periodically and keep cleaned or replace when necessary. NEVER run engine with a dirty air filter.
2. Muffler – Used to reduce noise and emissions. NEVER! touch muffler when engine is running. Allow engine to cool down.This component gets extremely hot!
3.Guard Adjustmet Knob – Allows for the adjustment of the blade guard. Turn this knob clockwise to tighten,
4.Pulley Lock Pin Hole – Insert a phillips head screw driver or similar tool into this hole to prevent the pulley from rotating.
5.
6.
7.RollerWheel – Allows for easy free movement of the saw when cutting on a flat surface.
8.
9.Decompression Valve – Push inward when starting engine.
10. Choke Lever – Used in the starting of a cold engine, or in cold weather conditions. The choke enriches the fuel mixture.
11. Rear Handle – When starting engine, place right foot onto rear handle base. For normal operation always place one hand on the rear handle and the other hand on the upper handle. Always use two hands when operating the saw.
12.Engine ON/OFF Switch – ON position permits engine starting, OFF position stops engine operation.
PAGE 14 — HS81A
