Manuals
/
Musical Fidelity
/
Home Audio
/
Stereo Amplifier
Musical Fidelity
Installation, Supercharger 750K, Page 6 of, Setting Up, Audio Connections
Models:
750K
1
6
11
11
Download
11 pages
31.2 Kb
3
4
5
6
7
8
9
10
Specification
Install
Fault Condition
Problem
Safety
General Advice
Page 6
Image 6
Page 5
Page 7
Page 6
Image 6
Page 5
Page 7
Contents
MONOBLOCK BRIDGED POWER AMPLIFIER
SUPERCHARGER 750K
INSTRUCTIONS FOR USE
CONTENTS
Supercharger 750K
Page 2 of
IMPORTANT! U.K. only
SAFETY INFORMATION
Supercharger 750K
Page 3 of
Supercharger 750K
GENERAL ADVICE
INSTALLATION PRECAUTIONS and USER INFORMATION
Page 4 of
ITEM DISPOSAL INFORMATION
Supercharger 750K
Page 5 of
MAINS POWER INPUT
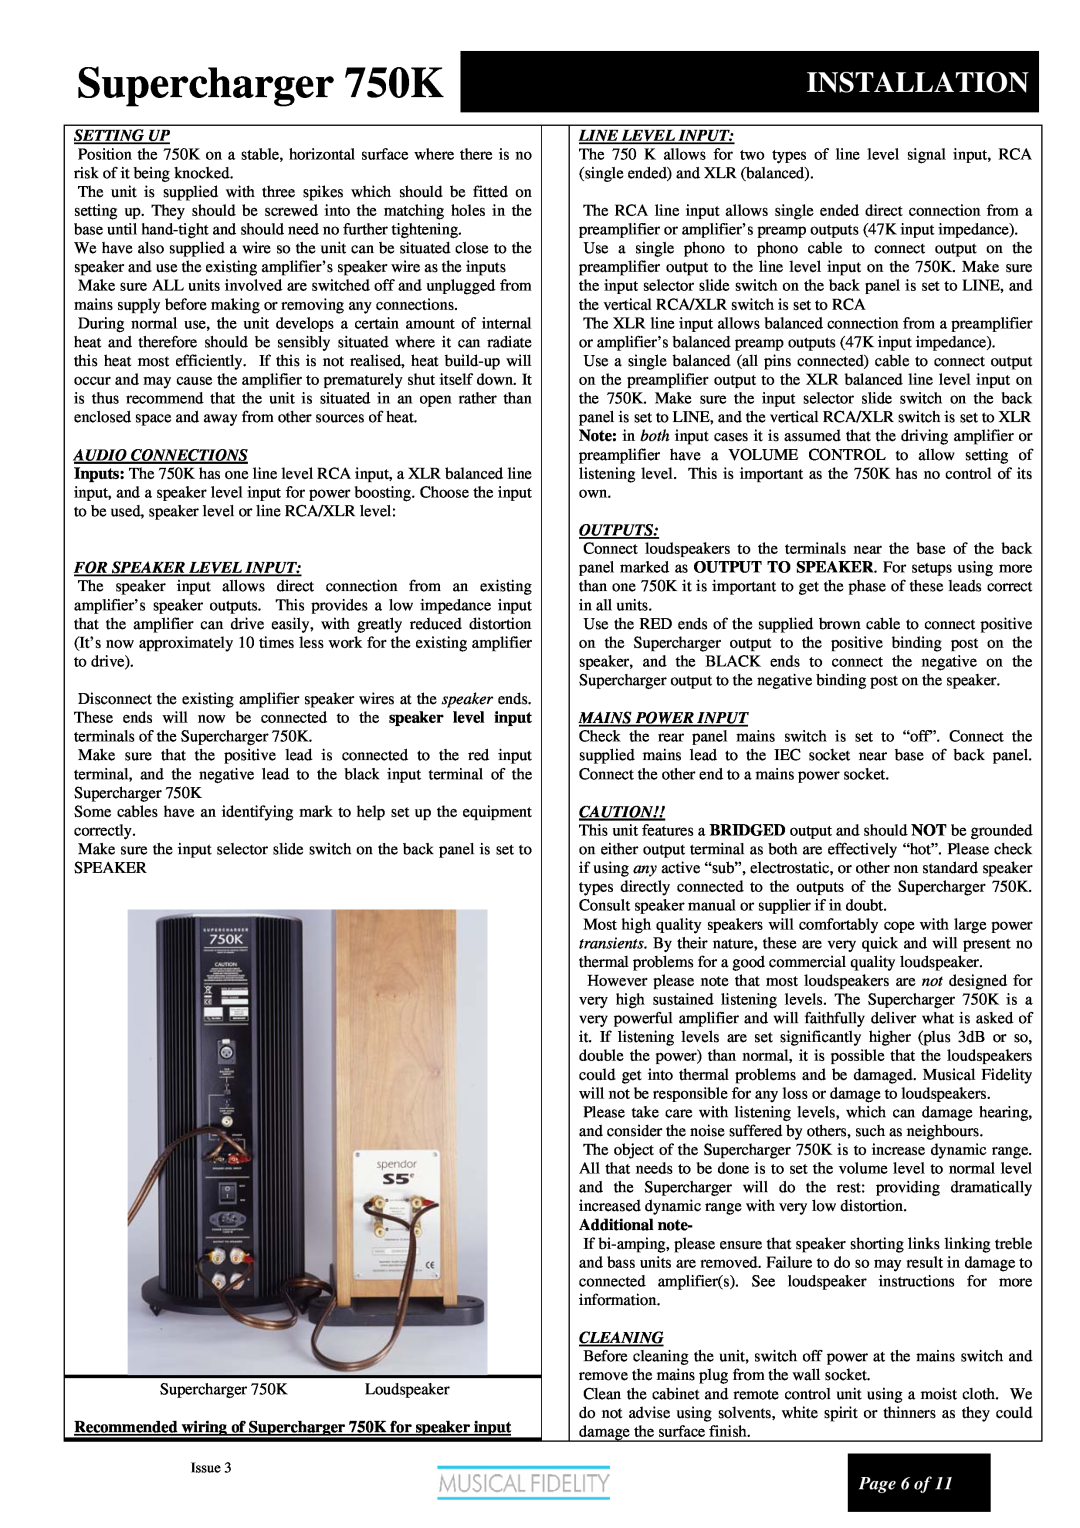
INSTALLATION
SETTING UP
CLEANING
AMPLIFIER CONNECTIONS
Supercharger 750K
Page 7 of
FAULT CONDITION
AMPLIFIER OPERATION
POWER ON
Supercharger 750K
Probable Cause
Supercharger 750K AMPLIFIER SPECIFICATIONS
Problem
Remedy
AMPLIFIER SPECIFICATIONS
Supercharger 750K
Page 10 of
RELEASE
MANUAL REVISION
Supercharger 750K
DATE
Top
Page
Image
Contents