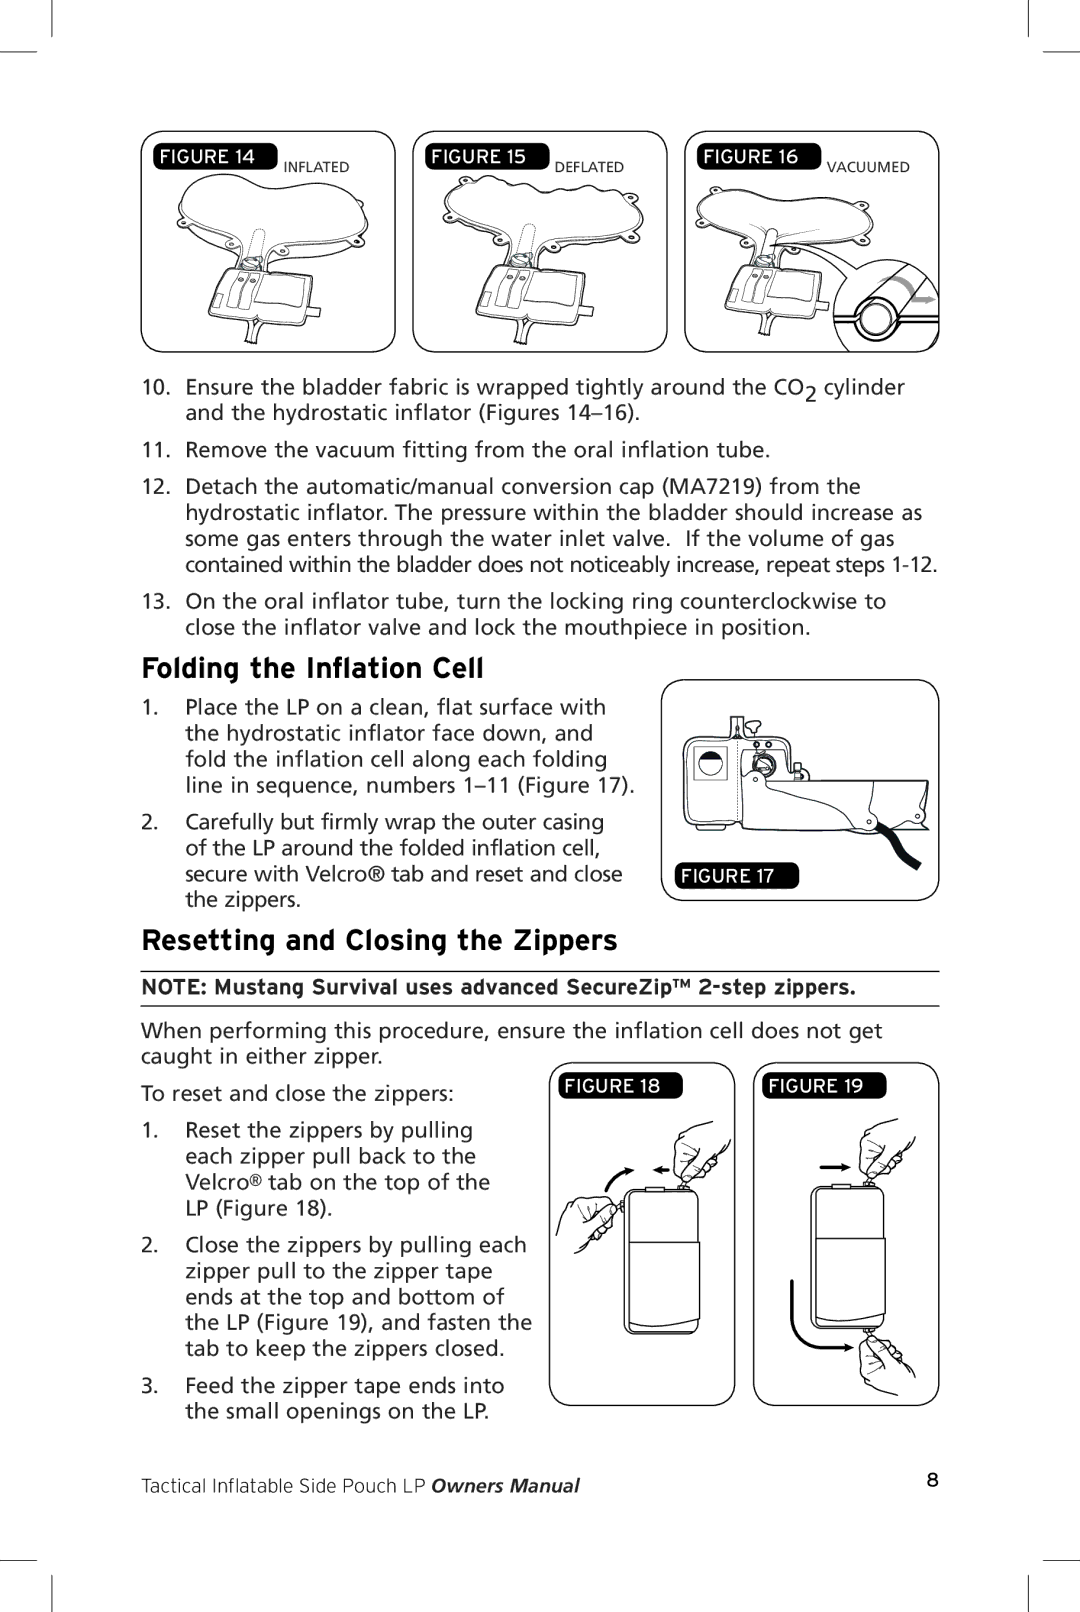
Figure 14 | inflated |
|
Figure 15 | deflated |
|
Figure 16 | vacuumed |
|
10.Ensure the bladder fabric is wrapped tightly around the CO2 cylinder and the hydrostatic inflator (Figures
11.Remove the vacuum fitting from the oral inflation tube.
12.Detach the automatic/manual conversion cap (MA7219) from the hydrostatic inflator. The pressure within the bladder should increase as some gas enters through the water inlet valve. If the volume of gas contained within the bladder does not noticeably increase, repeat steps
13.On the oral inflator tube, turn the locking ring counterclockwise to close the inflator valve and lock the mouthpiece in position.
Folding the Inflation Cell
1.Place the LP on a clean, flat surface with
the hydrostatic inflator face down, and fold the inflation cell along each folding line in sequence, numbers
2. Carefully but firmly wrap the outer casing |
|
of the LP around the folded inflation cell, |
|
secure with Velcro® tab and reset and close | Figure 17 |
the zippers. |
|
Resetting and Closing the Zippers
NOTE: Mustang Survival uses advanced SecureZip™
When performing this procedure, ensure the inflation cell does not get caught in either zipper.
To reset and close the zippers: | Figure 18 | Figure 19 |
1.Reset the zippers by pulling
each zipper pull back to the Velcro® tab on the top of the LP (Figure 18).
2. Close the zippers by pulling each zipper pull to the zipper tape ends at the top and bottom of the LP (Figure 19), and fasten the tab to keep the zippers closed.
3.Feed the zipper tape ends into the small openings on the LP.
Tactical Inflatable Side Pouch LP Owners Manual | 8 |